Objective
Main Objective of this blog post is how to give more detailing in Pixel Art Graphic.
It is said that god lies in details, and that’s exactly what we are going to do; putting more details to our character in order to make it come alive! Previously I wrote blog on How to Create Pixel Art Graphic in Photoshop. And now I inspire to share more about my experience in detailing in Pixel Art Graphic.
Step 1 Various Kinds of detailing
We can give following kinds of detailing in order to make our character look awesome.
- Shadows
- Lightnings
- Gadgets
- Designs
- Extra colors etc.
Providing these kinds of details would make your character looks live.It’s not necessary to provide these details in any particular sequence. You may add your details according to your wish.
Step 2 Start Detailing with shadows and lightings
I always start detailing with shadows and lightings, remember to create new layer per detail such that you can change it later.
Step 3 Catching Source of Light
Catching up a source of light is very important in order to provide shadow and lighting details. To give some more details: a. Source of light is the place from where the light comes. b. Imagine you have a dim, too dim, bright, too bright or a leveled light at any corner of your document. c. And believe that light is coming from that direction on your character. d. Add lighting as per your source of light.
Here let’s imagine we have a leveled light at front side of our character, and give it a light on front view. Don’t forget to add shadows according to your source of light.
Step 4 Start with shadow
Pick a little dark color of thing where you want to add shadow. Color darkness and brightness are totally dependent of lighting source, so choose detailing color carefully.
I generally pick the color first and then I reduce its brightness from color picker window.
For color picker window click on color box.

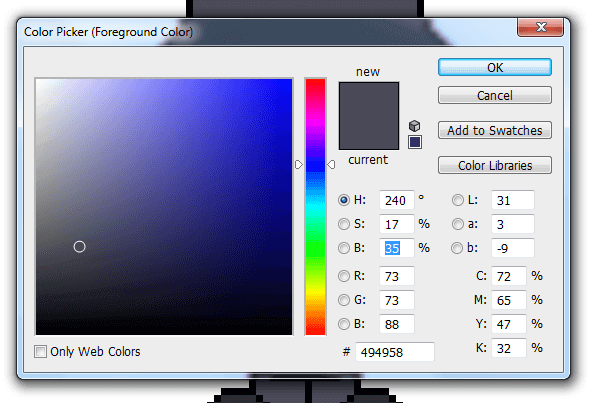
Reduce the brightness.
Start putting pixels of dark color on relative color depending on light source. Check your character in 100% zoom. (Keep checking at every step)
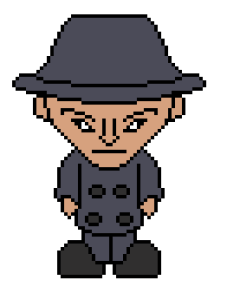
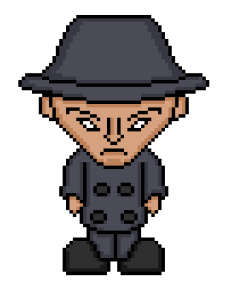
Check out bellow images.
I put my source of light at the front so I put a little shadow at both side. I also change character lips during shadowing, as I feel that changing lips shape will make it look like angry young man.
Step 5 Add New Layer and add some other details
Next step is to add one more layer of detail, Create next new layer. Repeat the detailing step with a little bright color of shadow, and add another shadow lines to the character. It’s not necessary to add detailing shadows in a single or double pixel lines, you may add shadow in any shape you want, but that shadow must be related to lighting source.
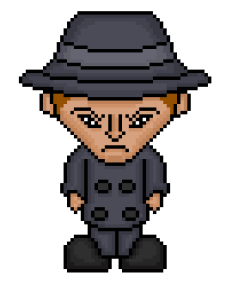
Check out above images, I add one more layer of details, and also add some other details like hair, hat changes, eye balls. Also check eyebrows shape, I change it to little angriness.
Keep repeating detailing steps, give as much details as u can. But be care full, don’t give that much shadows and lighting to your creation that original color goes disappear.
Let the original color have a more then 40% part.
Pick a little bright color of original color and give it a lightning same as your give shadow.
I add some more details in over coat as well.
Step 6 Giva a Final Touch
Give your character final touch with last layer detail. Observe bellow image.
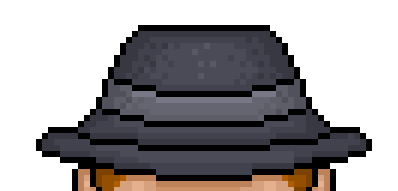
See the pixel dots, its last touch of detail. Give your character this detail.
Put a small pixel group of your shadow color parallel to your relative shadow. Use this shading only when necessary.
Check your character once again for a remaining detail, add more if you find so. Check it in 100% zoom if it’s not looks that much good, find the mistake and keep changing.
Step 7 Give border to a Character
Now, we are about to finish. Give it last final touch.
Having practice of using dark color for outer border is good, so we generally use black color for border.
But to make your character more realistic, it’s best to have dark color border of the inner color.
So, now we will change the border color with dark color of inner color.
I also found that having cigar is little more detailing. I suggest you create new layer and to redraw border with different color, creating different part border in different layer is recommended, so that you can change border color as necessary.
Step 8 Resize the Image
We have set 100px X 100px size of our photoshop document, now what if we want to have this image in large size ?
To resize image goto Image - > Image Size ( Alt + Ctrl + I ).
Set your Image options as shown in bellow image (let the), resize your image by adding extra pixels in width and height.
Be careful while resizing your pixel art, don’t add height and width pixels randomly, It will not give you proper result.
Step 9 Increase Your Image Size Accordingly
Add pixels in “table of your doc height/width”
a. i.e. if your table is of 100px X 100px.Then resize your doc as 100 X 1 = 100 , 100 X 2 = 200, 100 X 3 = 300, 100 X 4 =400 ...
![]()
Hope you learn something good about Detailing in Pixel Art Graphic from this blog, thank you for reading this. Let me know if you have any questions regarding Pixel Art Graphic comment here. I will reply you ASAP.
Got an Idea of Game Development ? What are you still waiting for? Contact us now and see the Idea live soon. Our company has been named as one of the best Pixel Game Development Company in India

I am 2D game graphics designer at TheAppGuruz, I designed graphics for many 2D games. Here I am writing blog about one of my favorite concept of 2D graphics; love to share this with you.
SVG Light Source Filter Tutorial
Game Assets (Graphics) Optimization
