To download the code, login with one of the following social providers.
Login
Be patient..... we are fetching your source code.
Objective
The main objective of this blog post is to show you some simple ways to create cool and simple animations using animation curve in the script easily.
Want to create some cool and smooth animations as shown in video?
Have you ever tried to create animation using Animation Curve in script?
Does it sounds difficult to you as I said using script?
Don’t worry it’s not as difficult as it sounds. Instead it is one of the easiest way to do so.
Want to learn this new way to animate objects using animation curve!!!
Then lets starts without any further delay.
What all we need?
All we need is the initial state, final state (where state can be position, scale, rotation or color), time duration and a function that performs the operation.
Step 1
- Let's create a script and attach it to the object that is to be animated.
- In that we will create an animation curve variable using its constructor as shown below
public AnimationCurve animationCurve;
Add a header attribute to make it more understandable.
Write this line above the declaration of animation curve to add a header attribute.
[HeaderAttribute ("Animation Curve")]
Here, you can use any name within the inverted commas and the same will be displayed in the inspector window.
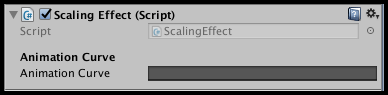
Now, save the script and switch back to Unity and you will see the following in the inspector window:
Click on that empty black box and you will see a empty curve editor on your screen as shown below:
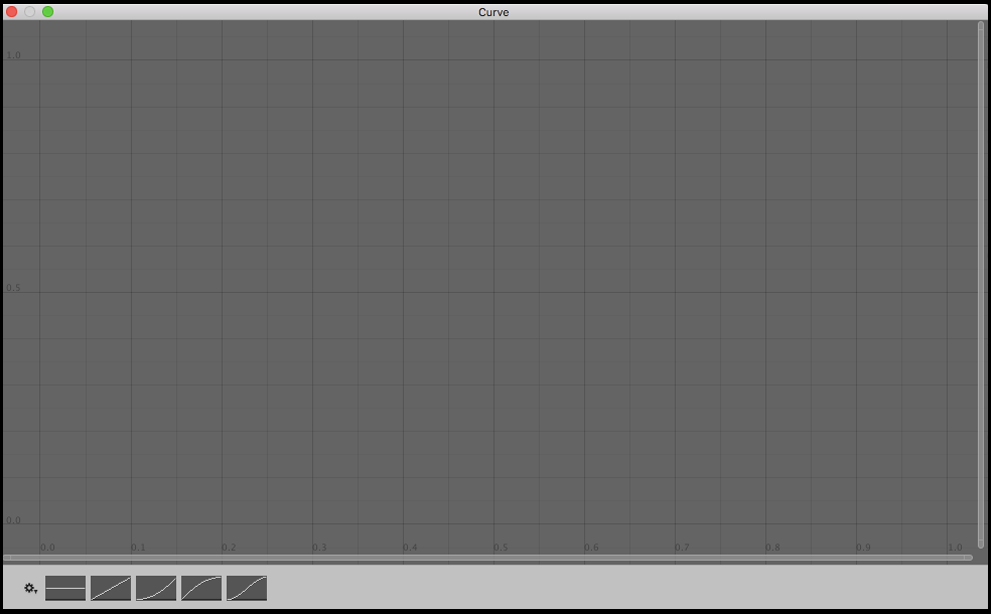
Select any one graph from the pre drawn graphs by clicking on it. You can also have graph of your own choice.
To make a graph of your own choice, you have to select any of the above pre drawn graph and then change it by adding or editing the keys in the graph.
If you don't know how to edit or add key to the graph you can refer it from here Editing keys, Adding keys.
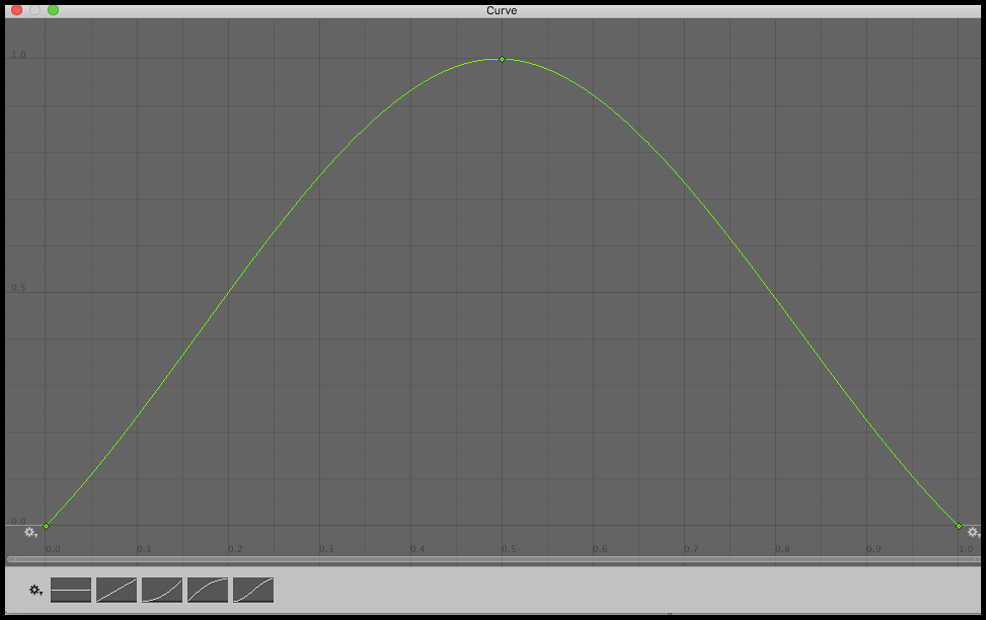
I made the graph look like first half of a sine wave for this demo as shown in image below:
Step 2:
Hope, you are on the same track. Once graph editing is done, move back to the script.
In script, declare two variables which can hold initial and final state of the object and assign its value in the awake method.
Let’s take an example to understand better:
private Vector3 initialScale;
private Vector3 finalScale;
private float graphValue;

private void Awake()
{
    initialScale = transform.localScale;
    finalScale = Vector3.one;
    animationCurve.postWrapMode = WrapMode.PingPong;
}
In this example I have created a scaling effect. Here, I have used Vector3 variable to store the initial scale and final scale.
We’ll also need a float variable to store the updating value of animation curve.
animationCurve.postWrapMode = WrapMode.PingPong;
The above statement ensures that animation is played continuously.
When the time is about to reach the end of the animation curve, time will ping pong back between beginning and end. Reverse will happen when time reaches the beginning.
Step 3
In final step, create a function that will perform the required changes on the object.
Depending on number of times the operation/ animation is to be displayed appropriate function should be selected.
If the animation/ operation is to displayed once then Coroutine should be used.
Wait..
If you don’t know how to use coroutine. Don't worry our coroutine unity blog post will help you.
Trust me you will be master in 10mins.
If you want continuous display of animation/ operation, go for the Update() function
private void Update()
{
  graphValue = animationCurve.Evaluate(Time.time);
  transform.localScale =finalScale*graphValue;
}
Here we’ll be using Update() function as we want continuous changes in scale of the object.
graphValue = animationCurve.Evaluate(Time.time);
Here, in this piece of code, Evaluate() function of Animation Curve class will be called.
It will return a float value of the curve, at the point in time specified.
This value from curve is to be multiplied with finalScale and assign it to the object’s scale.
And that’s it!
Save the script and head back to Unity. Play the scene and you’ll see the object contracting and expanding continuously. Like below video.
You can have this scaling effect in any particular axis. All you need to do is just change the corresponding axis in update function of script instead of multiplying it the whole vector.
Similarly, we can make some really good animation and screen transitions using this feature of Unity.
Let's, take another example where we will make some awesome screen transitions using animation curves.
We will also be using some other helping scripts to control animations as we move from one screen to another.
Now, here we will be make a sliding effect. In this we can make an object fall from the top, run from any of sides or can make it climb from bottom etc.
Again follow the same steps that we performed while learning the basics of animation curve or you can just copy the code from below.
[Header ("Animation-Curve")]
public AnimationCurve slideCurve;
public Vector3 finalPosition;

private Vector3 initialPosition;
private float time=0.5f;

private void Awake ()
{
      initialPosition = transform.localPosition;
}

private void Start ()
{
      StartCoroutine  ( MoveObject () );
}

private IEnumerator MoveObject ()
{
     float i = 0;
     float rate = 1 / time;
     while (i < 1) {
         i += rate * Time.deltaTime;
         transform.localPosition = Vector3.Lerp (initialPosition, finalPosition, slideCurve.Evaluate (i));
         yield return 0;
     }
}
Here, I have used two new functions Coroutine and Vector3.Lerp().
Any idea about this fuction..?
"Lerp() will interpolate between two vectors linearly and Coroutine in short is a function that provide ability to control a sequence of events over time."
This topic is endless, if you want to understand better so click on the topic Lerp.
In the Coroutine I have created a while() loop. This is the part from where the main action of the object begins.
In that function I have used two variables. The float variable named i is used to store the passing time.
Another float variable named rate is actually nothing but the speed with which the time passes.
You can increase or decrease the rate by changing the value of time variable.
Variable rate is inversely proportional to time, hence if we increase time, rate will decrease. Reverse will happen if we decrease time.
Also we multiplied the rate with Time.deltaTime before storing it.
The main reason to do that is to make the variable i frame rate independent.
In simple terms changes will be made per sec instead of per frame.
Once the time is calculated, position of the object at that instance of time is calculated using Lerp() function and then position of the object is changed accordingly.
This will continue until the object hasn't reached its final position.
And our job here is done, after saving the script head back to Unity and play the scene.
You will see the object moving from its initial position to final position smoothly.
Similarly you can make many more effects easily with few lines of code. Also you can download the demo project to access all the effects shown in the video.
Feel free to contact us if you really liked this blog. And don’t forget to share your comments below!
TheAppGuruz is a leading Mobile Game development company in India. We are proficient in Unity and we have design & developed 500+ Android and iOS mobile games for various client across the globe. If you have any game project that need professional help feel free to contact us.
We provide mobile game development services in countries like US, UK, Australia, UAE, Kuwait, Qatar, India, China, Indonesia, Singapore and European countries
Tune in to our social media for the latest on Facebook | Twitter | Linkedin | YouTube.

Im an Electrical Engineer working as a GameDeveloper, which is like a dream come true. I’m an enthusiastic developer, with eagerness to learn every new thing about game development. Working with TheAppGuruz team is like an honor for me.