Be patient..... we are fetching your source code.
Objective
Main objective of this post is to give an idea about how to allow two-way text chat over Bluetooth in android.
Step 1 Get Bluetooth Service
We need the Android Bluetooth service for this tutorial to work. In order to use Bluetooth service, declare BLUETOOTH permission in manifest file.
<uses-permission android:name="android.permission.BLUETOOTH" />
Now to initiate device discovery and to access Bluetooth setting declare BLUETOOTH_ADMIN permission.
<uses-permission android:name="android.permission.BLUETOOTH_ADMIN" />
(Note: If we require BLUETOOTH_ADMIN permission, then we have to declare BLUETOOTH permission also.)
Step 2 BluetoothAdapter class
Now to check whether Bluetooth is supported on device or not, we use object of BluetoothAdapter class.
BluetoothAdapter bluetoothAdapter = BluetoothAdapter.getDefaultAdapter();
If this method returns null, then it means that Bluetooth is not supported on the device and so we will close the application.
To know more about BluetoothAdapter class please refer following link:
Step 3 isEnable() Method
To check Bluetooth is enabled or not, we will use isEnabled() method on object of BluetoothAdapter class.
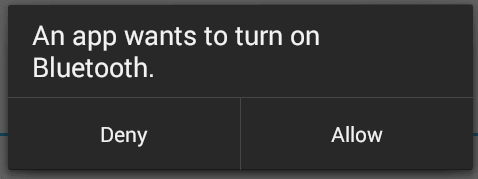
If Bluetooth is disabled then we request the user to enable it. And we perform this action by calling startActivityForResult() with REQUEST_ENABLE_BT action. This will open dialog to enable Bluetooth on the device.
Intent enableIntent = new Intent(
BluetoothAdapter.ACTION_REQUEST_ENABLE);
startActivityForResult(enableIntent, REQUEST_ENABLE_BT);

If the user clicks Allow then the onActivityResult() method receives RESULT_OK and if the user clicks Deny (or due to internal problem in device), RESULT_CANCELED is received. If returned value RESULT_OK is received then we will initiate the chat service.
Step 4 Discover Bluetooth
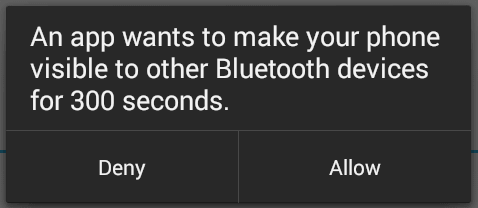
Now in android, device is not discoverable by default. To make device discoverable, call startActivityForResult() with BluetoothAdapter.ACTION_REQUEST_DISCOVERABLE action. By default device is discoverable for 120 seconds. To set discoverable duration, add EXTRA_DISCOVERABLE_DURATION in intent extra. The maximum value for duration is 360 seconds.
Intent discoverableIntent = new Intent(
BluetoothAdapter.ACTION_REQUEST_DISCOVERABLE);
discoverableIntent.putExtra(
BluetoothAdapter.EXTRA_DISCOVERABLE_DURATION, 300);
startActivity(discoverableIntent);
This will open dialog to enable discoverable mode.

Step 5 Bluetooth Connection
To start the chat, we first need to establish connection with the desired device. And before starting scanning for available devices, we usually get paired devices first in the list.
BluetoothAdapter bluetoothAdapter = BluetoothAdapter.getDefaultAdapter();
Set<BluetoothDevice> pairedDevices = bluetoothAdapter.getBondedDevices();
Above code will return a set of BluetoothDevice objects. The object of BluetoothDevice class gives required information about remote device which is used to establish connection (Explained later).
To start scanning, call the startDiscovery() method of BluetoothAdapter class. The activity which starts scanning must register receiver with BluetoothDevice.ACTION_FOUND action. After completing discovery, system will broadcast BluetoothDevice.ACTION_FOUND intent. This Intent contains extra fields EXTRA_DEVICE and EXTRA_CLASS, representing a BluetoothDevice and a BluetoothClass, respectively.
private final BroadcastReceiver discoveryFinishReceiver = new BroadcastReceiver() {
        @Override
        public void onReceive(Context context, Intent intent) {
            String action = intent.getAction();

            if (BluetoothDevice.ACTION_FOUND.equals(action)) {

                BluetoothDevice device = intent
                .getParcelableExtra(BluetoothDevice.EXTRA_DEVICE);

            if (device.getBondState() != BluetoothDevice.BOND_BONDED) {
newDevicesArrayAdapter.add(device.getName() + "\n"+ device.getAddress());
                }
            } else if (BluetoothAdapter.ACTION_DISCOVERY_FINISHED
                    .equals(action)) {
                setProgressBarIndeterminateVisibility(false);
                setTitle(R.string.select_device);
                if (newDevicesArrayAdapter.getCount() == 0) {
                    String noDevices = getResources().getText(
                            R.string.none_found).toString();
                    newDevicesArrayAdapter.add(noDevices);
                }
            }
        }
    };
To know more about BroadcastReceiver please refer following link:
To register receiver:
IntentFilter filter = new IntentFilter(BluetoothDevice.ACTION_FOUND);
        registerReceiver(discoveryFinishReceiver, filter);
Step 6 Pairing devices
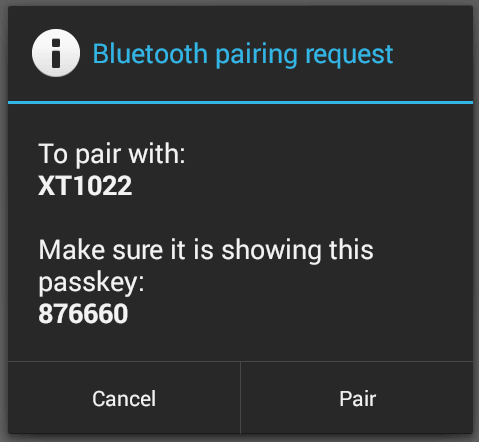
To connect two devices, we must implement server side and client side mechanism. One device shall open the server socket and another should initiate the connection. Both are connected when BluetoothSocket is connected on the same RFCOMM channel. During connection procedure android framework automatically shows pairing dialog.

Connection as Server:
- Make object of BluetoothServerSocket by calling the listenUsingRfcommWithServiceRecord().
- Listening for connection requests by calling accept().
- Release server socket by calling close().
private class AcceptThread extends Thread {
                private final BluetoothServerSocket serverSocket;
        private String socketType;

        public AcceptThread(boolean secure) {
            BluetoothServerSocket tmp = null;
            socketType = secure ? "Secure" : "Insecure";

                        try {
                if (secure) {
                    tmp = bluetoothAdapter.listenUsingRfcommWithServiceRecord(
                            NAME_SECURE, MY_UUID_SECURE);
                } else {
                    tmp = bluetoothAdapter
                            .listenUsingInsecureRfcommWithServiceRecord(
                                    NAME_INSECURE, MY_UUID_INSECURE);
                }
            } catch (IOException e) {
            }
            serverSocket = tmp;
        }

        public void run() {
            setName("AcceptThread" + socketType);

            BluetoothSocket socket = null;

                        while (state != STATE_CONNECTED) {
                try {

                    socket = serverSocket.accept();
                } catch (IOException e) {
                    break;
                }


                if (socket != null) {
                    synchronized (ChatService.this) {
                        switch (state) {
                        case STATE_LISTEN:
                        case STATE_CONNECTING:
                                                        connected(socket, socket.getRemoteDevice(),
                                    socketType);
                            break;
                        case STATE_NONE:
                        case STATE_CONNECTED:

                            try {
                                socket.close();
                            } catch (IOException e) {
                            }
                            break;
                        }
                    }
                }
            }
        }

        public void cancel() {
            try {
                serverSocket.close();
            } catch (IOException e) {
            }
        }
    }
To know more about BluetoothSocket please refer following link:
Connection as Client:
- Create object of BluetoothSocket by calling createRfcommSocketToServiceRecord(UUID) on BluetoothDevice object.
- Initiate connection by calling connect().
private class ConnectThread extends Thread {
        private final BluetoothSocket socket;
        private final BluetoothDevice device;
        private String socketType;

        public ConnectThread(BluetoothDevice device, boolean secure) {
            this.device = device;
            BluetoothSocket tmp = null;
            socketType = secure ? "Secure" : "Insecure";


            try {
                if (secure) {
                    tmp = device
                            .createRfcommSocketToServiceRecord(MY_UUID_SECURE);
                } else {
                    tmp = device
                            .createInsecureRfcommSocketToServiceRecord(MY_UUID_INSECURE);
                }
            } catch (IOException e) {
            }
            socket = tmp;
        }

        public void run() {
            setName("ConnectThread" + socketType);

                        bluetoothAdapter.cancelDiscovery();

                        try {

                socket.connect();
            } catch (IOException e) {

                try {
                    socket.close();
                } catch (IOException e2) {
                }
                connectionFailed();
                return;
            }


            synchronized (ChatService.this) {
                connectThread = null;
            }

                        connected(socket, device, socketType);
        }

        public void cancel() {
            try {
                socket.close();
            } catch (IOException e) {
            }
        }
    }
Step 7 Read and Write Data
- After establishing connection successfully, each device has connected BluetoothSocket.
- Now one can Read and write data to the streams using read(byte[]) and write(byte[]).
private class ConnectedThread extends Thread {
        private final BluetoothSocket bluetoothSocket;
        private final InputStream inputStream;
        private final OutputStream outputStream;

        public ConnectedThread(BluetoothSocket socket, String socketType) {
            this.bluetoothSocket = socket;
            InputStream tmpIn = null;
            OutputStream tmpOut = null;

                        try {
                tmpIn = socket.getInputStream();
                tmpOut = socket.getOutputStream();
            } catch (IOException e) {
            }

            inputStream = tmpIn;
            outputStream = tmpOut;
        }

        public void run() {
            byte[] buffer = new byte[1024];
            int bytes;

                        while (true) {
                try {

                    bytes = inputStream.read(buffer);

                                        handler.obtainMessage(MainActivity.MESSAGE_READ, bytes, -1,
                            buffer).sendToTarget();
                } catch (IOException e) {
                    connectionLost();
                                        ChatService.this.start();
                    break;
                }
            }
        }


        public void write(byte[] buffer) {
            try {
                outputStream.write(buffer);


                handler.obtainMessage(MainActivity.MESSAGE_WRITE, -1, -1,
                        buffer).sendToTarget();
            } catch (IOException e) {
            }
        }

        public void cancel() {
            try {
                bluetoothSocket.close();
            } catch (IOException e) {
            }
        }
    }
(Note: use android-support-v7-appcompat from your SDK)
I hope you find this blog post is very helpful while working with Two Way Text Chat Over Bluetooth in Android. Let me know in comment if you have any questions regarding Android. I will reply you ASAP.
Got an Idea of Android App Development? What are you still waiting for? Contact us now and see the Idea live soon. Our company has been named as one of the best Android App Development Company in India.

I am Android Developer, as a developer my basic goal is continue to learn and improve my development skills , to make application more user friendly.
Using CSS and jQuery Animation in Web
