To download the code, login with one of the following social providers.
Login
Be patient..... we are fetching your source code.
Objective:
In this blog post you will learn how to make Multi language supported app in android.
Android is one of the popular Mobile OS which is being used by millions of users over 190 countries and it is increasing day by day. So when you are targeting global audience, it will be beneficial if you make your app localized.
While localizing, you should think about text, audio, currency, numbers and graphics depending upon the region or country. But in this tutorial language is covered only.
We will make simple login application.
Before going into this you should care about this things.
- Whenever you are making any android application, Always declare text you want to use in your application in strings.xml only. For Example
While referring it in layout file<string name="welcome">Welcome!</string><TextView android:layout_width="wrap_content" android:layout_height="wrap_content" android:layout_marginBottom="40dp" android:text="@string/welcome" android:textColor="@color/white" android:textSize="45dp" android:textStyle="bold" /> - When defining the string through java code, use R.string
emailNote.setText(R.string.note_email);
It would be easy to edit and to translate your app into multiple language.
Now
How String Localization Works?
By default android considers English as primary language and loads the string resources from res >> values >> strings.xml. When you want to make Multilanguage supported app, you need to create a values folder by appending a Hyphen (-) and the ISO language code. For example for French, values-fr named folder should be created and keep a strings.xml file in it with all the strings translated into French language.
In brief it works as follows:
- When user changes the device language, android OS itself checks for proper language resources in the app.
- If the app supports selected language, android looks for it’s string resources in values-(ISO language Code) folder in the project.
- If the supported language strings.xml misses any string value, android always loads the missing strings from default strings.xml file i.e values >> strings.xml
To Create new Project:
open File >> New >> Android Application Project


Step 1 Colors.xml file
Add following colors into values >> colors.xml file
<?xml version="1.0" encoding="utf-8"?>
<resources>
<color name="white">#ffffff</color>
<color name="bg_gradient_start">#00BDB0</color>
<color name="bg_gradient_end">#820d2a</color>
<color name="bg_button_login">#336167</color>
</resources>
Step 2 Drawable Directory
Create Following drawable under drawable directory
bg_button_rounded.xml
<?xml version="1.0" encoding="utf-8"?>
<shape xmlns:android="http://schemas.android.com/apk/res/android"
android:shape="rectangle" >
<!-- view background color -->
<solid android:color="@color/bg_button_login" >
</solid>
<!-- If you want to add some padding -->
<padding
android:bottom="5dp"
android:left="5dp"
android:right="5dp"
android:top="5dp" >
</padding>
<!-- Here is the corner radius -->
<corners android:radius="6dp" >
</corners>
</shape>
bg_form_rounded.xml
<?xml version="1.0" encoding="utf-8"?>
<shape xmlns:android="http://schemas.android.com/apk/res/android"
android:shape="rectangle" >
<!-- view background color -->
<solid android:color="@color/white" >
</solid>
<!-- If you want to add some padding -->
<padding
android:bottom="5dp"
android:left="5dp"
android:right="5dp"
android:top="5dp" >
</padding>
<!-- Here is the corner radius -->
<corners android:radius="6dp" >
</corners>
</shape>
Bg_gradient.xml
<?xml version="1.0" encoding="utf-8"?>
<shape xmlns:android="http://schemas.android.com/apk/res/android"
android:shape="rectangle" >
<!-- view background color -->
<solid android:color="@color/white" >
</solid>
<!-- If you want to add some padding -->
<padding
android:bottom="5dp"
android:left="5dp"
android:right="5dp"
android:top="5dp" >
</padding>
<!-- Here is the corner radius -->
<corners android:radius="6dp" >
</corners>
</shape>
Step 3 string.xml
Open strings.xml from values directory.
Paste following strings into values >> strings.xml files. These are default English text.
<?xml version="1.0" encoding="utf-8"?>
<resources>
<string name="app_name">Multi Language App</string>
<string name="action_settings">Settings</string>
<string name="welcome">Welcome!</string>
<string name="email">Email Address</string>
<string name="password">Password</string>
<string name="login">Login</string>
<string name="signup">Don\'t have account? Sign Up</string>
</resources>
Step 4 Make More for each language
Now as we discussed earlier about localization mechanism, Create new folder under res folder named values-hi, values-fr, values-de.

Deutsch values-de >> strings.xml
<?xml version="1.0" encoding="utf-8"?>
<resources>
<string name="welcome">Willkommen!</string>
<string name="email">Email Addresse</string>
<string name="password">passowrd</string>
<string name="login">Login</string>
<string name="signup">müssen nicht angemeldet? Anmeldung</string>
</resources>
Hindi values-hi >> strings.xml
<?xml version="1.0" encoding="utf-8"?>
<resources>
<string name="welcome">???????</string>
<string name="email">???? ???</string>
<string name="password">???????</string>
<string name="login">?????</string>
<string name="signup">???? ???? ??? ???? ?? ????</string>
</resources>
French values-fr >> strings.xml
<?xml version="1.0" encoding="utf-8"?>
<resources>
<string name="welcome">accueil</string>
<string name="email">adresse e-mail</string>
<string name="password">mot de passe</string>
<string name="login">connexion</string>
<string name="signup">Ne pas avoir un compte? signer</string>
</resources>
Step 5 activity_main.xml file
Now paste below code into activity_main.xml file
<RelativeLayout xmlns:android="http://schemas.android.com/apk/res/android"
xmlns:tools="http://schemas.android.com/tools"
android:layout_width="match_parent"
android:layout_height="match_parent"
android:background="@drawable/bg_gradient"
tools:context=".MainActivity" >
<LinearLayout
android:layout_width="fill_parent"
android:layout_height="wrap_content"
android:layout_centerInParent="true"
android:layout_marginLeft="15dp"
android:layout_marginRight="15dp"
android:gravity="center"
android:orientation="vertical" >
<TextView
            android:layout_width="wrap_content"
            android:layout_height="wrap_content"
            android:layout_marginBottom="40dp"
            android:text="@string/welcome"
            android:textColor="@color/white"
            android:textSize="45dp"
            android:textStyle="bold" />
<LinearLayout
android:layout_width="fill_parent"
android:layout_height="wrap_content"
android:background="@drawable/bg_form_rounded"
android:orientation="vertical" >
<EditText
android:layout_width="fill_parent"
android:layout_height="wrap_content"
android:layout_marginBottom="10dp"
android:background="@null"
android:hint="@string/email"
android:padding="5dp"
android:singleLine="true" />
<EditText
android:layout_width="fill_parent"
android:layout_height="wrap_content"
android:background="@null"
android:hint="@string/password"
android:inputType="textPassword"
android:padding="5dp" />
</LinearLayout>
<Button
android:layout_width="fill_parent"
android:layout_height="wrap_content"
android:layout_marginTop="25dp"
android:background="@drawable/bg_button_rounded"
android:text="@string/login"
android:textColor="@color/white" />
</LinearLayout>
<TextView
android:layout_width="fill_parent"
android:layout_height="wrap_content"
android:layout_alignParentBottom="true"
android:layout_marginBottom="25dp"
android:gravity="center_horizontal"
android:text="@string/signup"
android:textColor="@color/white" />
</RelativeLayout>
Step 6 MainActivity.Java file
Now, Paste following code into MainActivity.java file
package com.example.androidwithmultiplelanguagesupport;

import java.util.Locale;

import android.app.Activity;
import android.content.res.Configuration;
import android.os.Bundle;
import android.view.Menu;
import android.view.MenuItem;

public class MainActivity extends Activity {

	@Override
	protected void onCreate(Bundle savedInstanceState) {
		super.onCreate(savedInstanceState);
		setContentView(R.layout.activity_main);
	}

	@Override
	public boolean onCreateOptionsMenu(Menu menu) {
		getMenuInflater().inflate(R.menu.lang_setting_menu, menu);
		return super.onCreateOptionsMenu(menu);
	}

	@Override
	public boolean onOptionsItemSelected(MenuItem item) {
		switch (item.getItemId()) {
		case R.id.eng:
			String languageToLoad = "en"; // your language
			Locale locale = new Locale(languageToLoad);
			Locale.setDefault(locale);
			Configuration config = new Configuration();
			config.locale = locale;
			getBaseContext().getResources().updateConfiguration(config,
					getBaseContext().getResources().getDisplayMetrics());
			this.setContentView(R.layout.activity_main);
			break;
		case R.id.hn:
			languageToLoad = "hi"; // your language
			locale = new Locale(languageToLoad);
			Locale.setDefault(locale);
			config = new Configuration();
			config.locale = locale;
			getBaseContext().getResources().updateConfiguration(config,
					getBaseContext().getResources().getDisplayMetrics());
			this.setContentView(R.layout.activity_main);
			break;
		case R.id.fr:
			languageToLoad = "fr"; // your language
			locale = new Locale(languageToLoad);
			Locale.setDefault(locale);
			config = new Configuration();
			config.locale = locale;
			getBaseContext().getResources().updateConfiguration(config,
					getBaseContext().getResources().getDisplayMetrics());
			this.setContentView(R.layout.activity_main);
			break;
		case R.id.de:
			languageToLoad = "de"; // your language
			locale = new Locale(languageToLoad);
			Locale.setDefault(locale);
			config = new Configuration();
			config.locale = locale;
			getBaseContext().getResources().updateConfiguration(config,
					getBaseContext().getResources().getDisplayMetrics());
			this.setContentView(R.layout.activity_main);
			break;
		default:
			break;
		}
		return super.onOptionsItemSelected(item);
	}
}
To know more about Locale class please refer:
To know more about Configuration class please refer:
Now, run the project. You will see app in English (Assuming your device language is English).

Now for testing with other languages
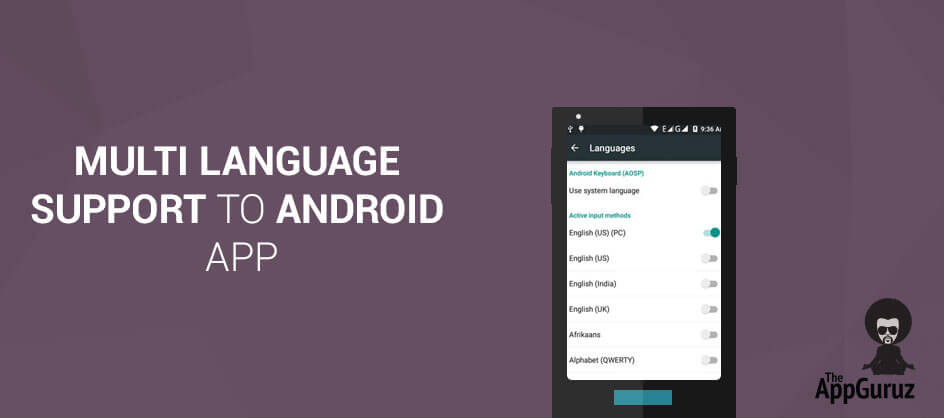
- Go to Settings >> Language & Input
- Select the Language and choose the language that you supported in the app
Hindi

French

Deutsch

I hope you find this blog post very helpful while working with Multi language support to Android App. Let me know in comment if you have any questions regarding Multi language supported Android app. I will reply you ASAP.
Got an Idea of Android App Development? What are you still waiting for? Contact us now and see the Idea live soon. Our company has been named as one of the best Android App Development Company in India.

I am dedicated and very enthusiastic Android developer. I love to develop unique and creative apps and also like to learn new programing languages and technology.
Face Skin Texture in 3D Max