Objective
Main objective of this post is to give you basic idea about how to use Render To Texture for Game Environment.

Step 1 Quick Review
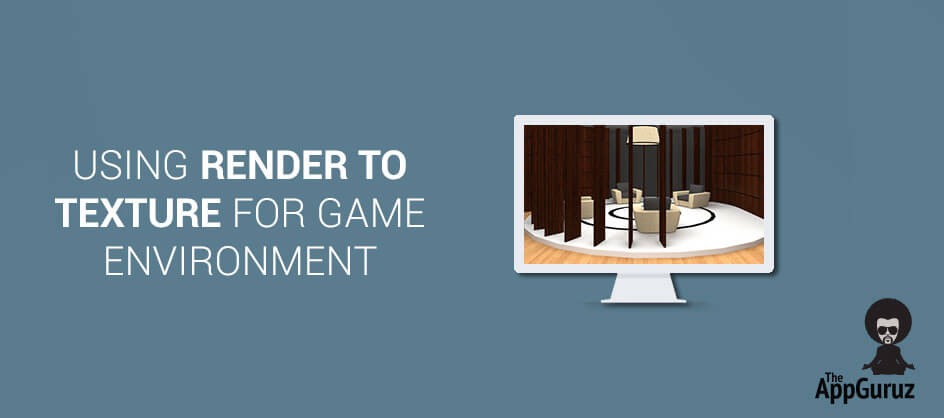
(Above screenshot is taken from a mobile game that we have created)
1.1 Pros and Cons
Pros: Using this technique you can create a way better lighting result than you can do in any game engine. No need to generate separate light map, as lighting effect is already baked into single diffuse map. This solution is also lightweight (in game) as it doesn’t need any special/heavy shaders to render properly.
Cons: You will have to bake the whole scene from start if changes are needed in the environment. You cannot duplicate similar geometries after baking. It is not a good solution for big environment like outdoor scenery (But this is an exceptional solution for indoor/small environment baking). As a bigger environment will require a very big texture which will be hard to handle for a game engine.
Render to texture also known as texture baking is a technique to bake details of high poly model on to a low poly one. Apart from that as its name suggests it can also be used to capture the light map and other image based data from a particular object.
1.1.1 Quick Review
In this tutorial we are going to learn about how to make a game environment with lighting effects outside the game engine without baking separate light map.
In this tutorial I’m going to use V-ray with 3ds max. You can use the same technique with your favourite software and renderer. However you may have to use a little different path.
Let’s start.
1.2 Environment Setup
First step is to setup your enviroment as per your Scene Require. Setup your enviroments with diffrent props. it would be model by low polygonal geometry. so that it will be easy to unwrap and texture for baking.
Once u did setup your props withing the particualr scene make sure you did set it up that way so that you dont hve to make changes for that.
Environment Setup would be perfect beacuse it will be gonna bake with realistic lights shadows and refelections too. once it will be done u can go for the next step.

1.2.1 Lighting setup
When your scene setup is done the next thing is to setup lights for your scene. You need to setup lights that way sooo that your scene and props are easily visible beacuse the lights, shadows and refelections are going to bake the same way it seems on your scene.

1.3 Readying model to setup
1.3.1 Merging all Objects and UV sets
Once you are done with lighting setup you need to merge all the props and scene into single mesh. Whenever you merdge your props with scene you need to match material ids to material ids and your UVs are also merged in to editable poly so you need to setup UVs too before merging your scene.


Step 2 Crucial part: The UVs
Before you start with the process, take a backup of the file. In case baking goes wrong.
2.1 Unwrap UVW modifier
Next step is to Unwrap the model through Unwrap UVW modifier in modifier drop down list.

2.1.1 Flatten mapping
Go to face selection, press Ctrl+A to select all the faces and then inside the UV Mapping window go to Mapping>Flatten Mapping. This will bring up a Flatten Mapping window. Click OK, 3ds Max will automatically flatten each faces and will organize them in way that no overlapping faces are there in uv.


2.1.2 Move UVW map channel
Next step after you flatten mapping, you need to move your UVW map channel from channel number 1 to 2. By default it will remain 1. You need to move your UVW map channel so that it doesn’t affect your default one.
(NOTE: Make sure whenever you export this scene in to any game engine you need to move your channel to channel number 1 once your scene is baked and you get your baked texture.)


Step 3 Render to Texture
To bring up the dialog box, go to Rendering on the top bar and select Render to Texture. Scroll down a bit and add VRay Complete Map. This will take all the re?ection, refraction and shadow and bakes it into one map. Set the resulting map size and save your file wherever your path is defined.


3.1 Bake Texture
Hit the Render button right at the bottom of the viewport. This will show you a ?at (2D) view of the texture that is being baked and you will notice that your shadows and reflection are gradually being baked. Once baking is complete, save the image wherever you want to. Bake texture is ready to be used in our scenes. You can automatically save the baked images using Render to Texture dialog box.

3.1.1 Reapply the Baked Texture
Go to material slot by pressing M and select Standard Material and apply Baked Image in Diffuse colour map. Apply it to model and you will get a realistic output without using a single light on a particular scene. (NOTE: Remember one thing once you get baked texture, you need to apply it on your scene. You need to move your UVW map channel from channel number 2 to 1.)

I hope this blog post will help you to how to use Render to Texture for Game Environment in 3DMax. Let me know if you have any questions regarding 3DMax. I will reply you ASAP.
Got an Idea of Game Development? What are you still waiting for? Contact us now and see the Idea live soon. Our company has been named as one of the best Game Development Company in India.
I am Game designer. I am working on 3D game design. I love to share designing tips & tricks with you.
Tips for 3D Character Modelers