Objective:
The main objective of this blog post is to give you an idea about how to use Event System in New UI Elements of Unity 4.6. So, let’s start by understanding the basics of the Event System.
Step 1 Basics of the Event System
1.1 Need of an Event System:
Often, while using UI elements in a scene, we want them to respond to the changes in the environment. In other words, we want our UI elements to be intractable.
For example, when the user hovers over a button, we want to respond by changing color. So, Let us see how we can respond to these changes in the environment.
1.1.1 Ways Of Sending Message to a Game Object:
Two major ways in which the program can respond to the changes are polling and events. With polling, an object checks the state of the world around it at some regular intervals and then responds to those changes.
On the other side, with events, an object sets up a listener with some kind of control object so that the object becomes a receiver of the events. Hence, when the state of the world changes, the control object then checks to see, what objects are affected and then it sends a message or an event to each affected object.
Thus, the difference between responding to changes via polling and responding to changes via events is that, an object actively checks for changes while using polling and an object passively waits for an event while using event listeners and event system.
Therefore, Unity has introduced Event System that sends message to the affected UI elements via events so that those UI elements can respond to the changes.
1.2 Work of an Event System:
In unity 4.6, Event System handles input, raycasting and sending events. It handles inputs from the user and sends events to the affected UI element/UI elements in the scene.
1.3 Advantage of using Event System:
In Unity 4.6, all the UI elements respond to changes via events and all those events are pushed to a single control object known as Event System. So, when the state of the world changes, Event System notifies to the affected UI element and reduces the overhead of continuous checking for changes by all the UI elements in the scene. This is the advantage of using Event System and events over polling.
Tip: Event System in Unity 4.6 or in later versions of unity is open source. So, you can extend it as per your requirement. For Example, getting inputs from your custom input module and sending events to registered and affected game object/game objects.
As said previously, the user interacts with UI elements via events. So, here I am going to generate and handle some of those events to demonstrate, how the event system works in Unity4.6.
Before proceeding towards creating a demo, Let us understand some of the basic components that Event System has and some of the basic properties of those components.
Step 2 Event System Game Object and its Components:
Whenever a canvas is created in a scene, an Event System game object is also created with the canvas automatically.
This game object has the following components:
- Transform
- Event System
- Standalone Input Module
- Touch Input Module
Transform: Transform is a default component that each and every game object has.
Event System:
Event System is the script attached to this game object that detects events on UI elements from the input modules. It is a component attached to the Event System game object that controls and manages the whole Event System. It updates at every frame and essentially does polling.
So, it’s a kind of control piece for us. When a scene starts, the event system looks for input modules on the game object and uses those modules to define how each UI element should react to the input.
Event System has one property named, First Selected. The UI element applied to this property will be selected by default when the scene starts. For example, we can apply a play button to this property so that, when we start the scene, play button will be selected by default and you can press that button by simply pressing the space bar, without needing to click on the button with the mouse.
Standalone Input Module:
It is a script attached to this game object for taking inputs in standalone builds that makes use of the standard inputs like keyboard, mouse, gamepads, etc. Standalone Input Module takes input from these standard inputs and sticks that input with Event Data object, which will be passed around to the affected game object by Event System when needed.
The standalone input module has a series of properties that refer to the different input axis of those standard inputs. These properties are used for navigating among different intractable UI elements.
This input axis includes Submit and Cancel buttons. This had been added by default to the input manager. The frequency of input being registered can be changed using the Input Actions per Second property. You can take standalone inputs from the mobile device also by enabling Allow Activation on Mobile Device property.
Touch Input Module:
It is a script attached to this game object for taking inputs in standalone builds that makes use of the touch input. Touch inputs work like mouse inputs so there is no navigation axis available in Touch Input Module.
Just like standalone input module, you can take touch inputs on a standalone place by enabling Allow Activation on Standalone property.
Step 3 Event System and Unity UI Events:
The Event System and Input modules determine when events are to be sent or fired to different game objects. One such event is the OnClick event of the button, which is called when the button is pressed. There are so many such input events that exist on different UI elements.
There are many ways to use these events. Some interact-able UI elements have function lists on their components which are called when a specific event to that element is fired.
To catch specific event that is not listed on a component by default, use the Event Trigger component or implement interface referenced under UnityEngine.EventSystems namespace, for that specific event in the script attached to that game object and write implementation for the method of the interface.
Unity provides so many interfaces for catching the specific event on any UI element referenced under UnityEngine.EventSystems namespace. List of Interfaces and events that are handled by those interfaces are listed below:
| Interface | Event |
| IBeginDragHandler | OnBeginDrag |
| ICancelHandler | OnCancel |
| IDeselectHandler | OnDeselect |
| IDragHandler | OnDrag |
| IDropHandler | OnDrop |
| IEndDragHandler | OnEndDrag |
| IInitializePotentialDragHandler | OnInitializePotentialDrag |
| IMoveHandler | OnMove |
| IPointerClickHandler | OnPointerClick |
| IPointerDownHandler | OnPointerDown |
| IPointerEnterHandler | OnPointerEnter |
| IPointerExitHandler | OnPointerExit |
| IPointerUpHandler | OnPointerUp |
| IScrollHandler | OnScroll |
| ISelectHandler | OnSelect |
| ISubmitHandler | OnSubmit |
| IUpdateSelectedHandler | OnUpdateSelected |
Now, as we have understood what Event System is and how it works, let us create a short demo to detect OnClick event of the play button and loading of the game scene after play button is clicked.
Step 4 Scene Setup:
We have a simple scene named as Main Scene which is as shown below:
Main Scene:
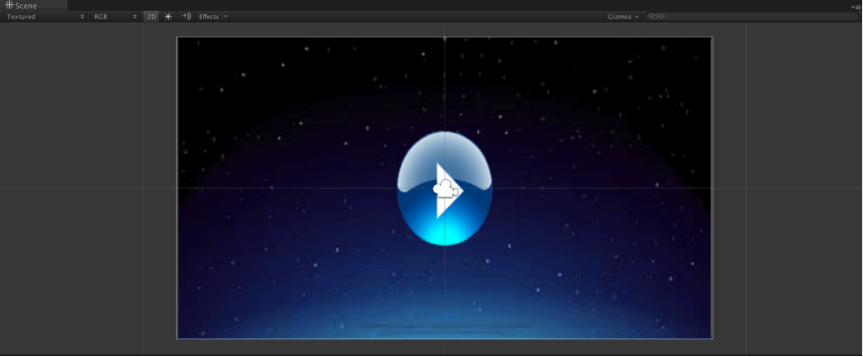
Main Scene is created with the help of Main Camera, Background Image, Canvas, Play Button and Event System.
We have another scene named as Game Scene as shown below:
Game Scene:
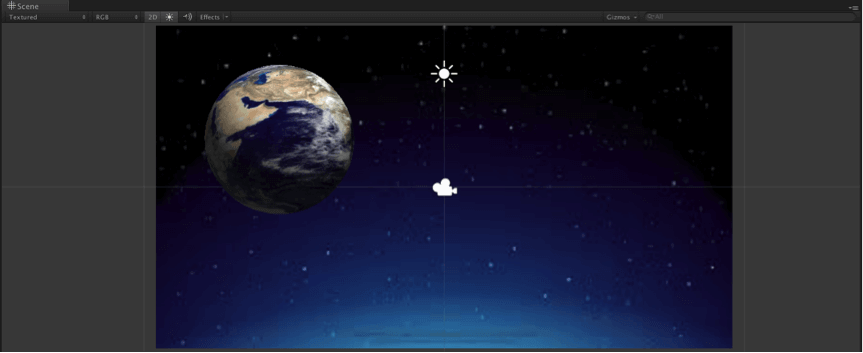
Game Scene is created with the help of Main Camera, Background Image and Earth Image.
Before start the scripting, let’s add these two scenes in the build. For adding scenes into build, refer the following steps:
- Open the scene you want to add into a build.
- Go to File >> Build Settings.
- Click on Add Current button in the Build Settings dialog box.
Repeat above steps for the Main Scene as well as for the Game Scene. First add Main Scene and after that add the game Scene.
In this case, we want to switch to Game Scene from the Main Scene when Play Button placed in the Main Scene is clicked. So, let us create a C# script named as Game Manager for loading the second scene i.e. Game Scene when Play Button is clicked. So create an empty game object in the Main Scene and name it as Game Manager and attach the following GameManager.cs script to that game object.
Step 5 Script for detecting OnClick Event:
GameManager.cs:
using UnityEngine;
using System.Collections;

public class GameManager : MonoBehaviour
{
        public void Play ()
        {
                Application.LoadLevel (Application.loadedLevel + 1);
        }
}
Now, we have to call this method on play button's OnClick event. Button component has the list of functions to be called on its OnClick event.
Initially, this list will be empty as shown below:
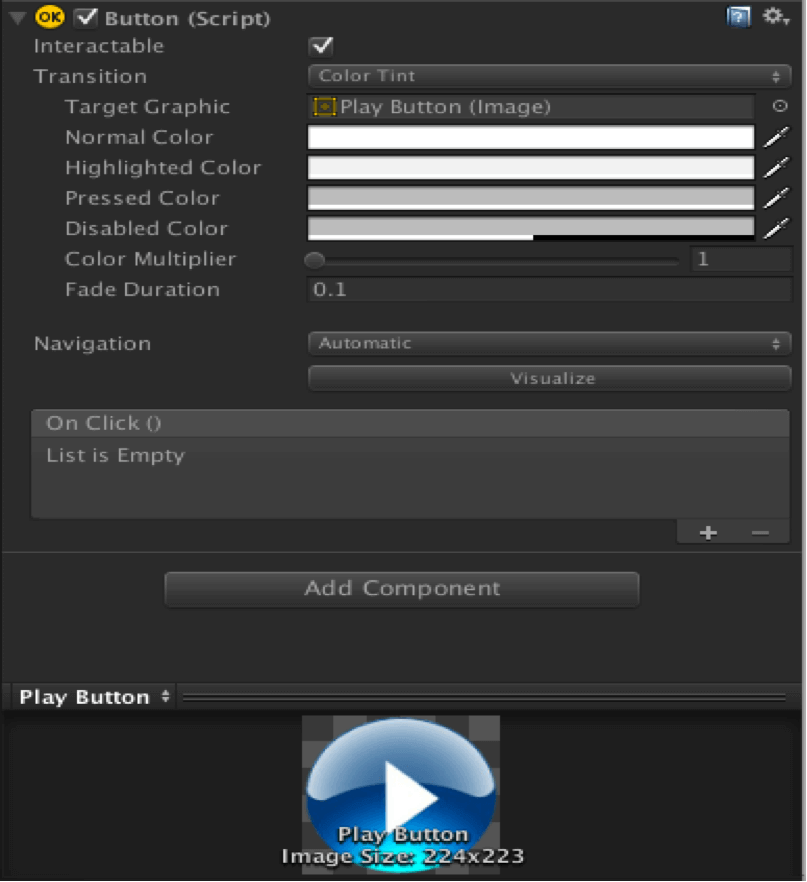
For adding a function in the list, click the + icon. This will create an empty entry in the list, for the function to be called, as shown below:

Now Drag Game Manager onto the object property in the list or select it by clicking on the drop down for the object property. Once the object has been applied the drop down will be populated with all of the available functions to be called by clicking on the drop down.
So call the Play () function from the script GameManager.cs as follows:
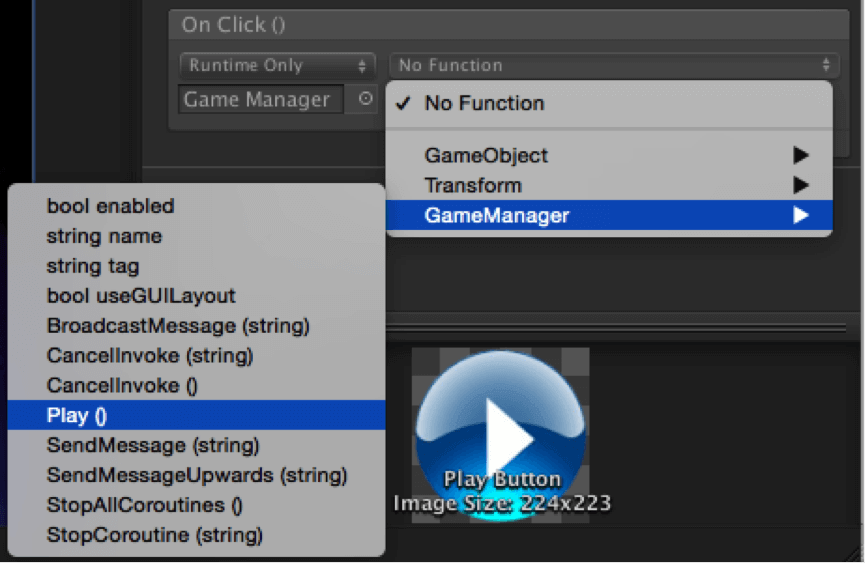
In order to call a function for an event, that function must be public, should have a void return type and should take one or no parameter. If the function has a parameter, it must be one of the following types:
- Float
- integer
- string
- object reference
So, here we have created Play () function as public which has a void return type. You can call any method that takes an argument of the above described types on the OnClick event. Now, if you start the gameplay, then you will be able to load your Game scene when the Play Button is clicked in the Main scene.
Step 6 Conclusion:
Event System works as a control object for listening UI events and sending those events to UI elements.
I hope you find this blog post very helpful while using Event System. Let me know in comment if you have any questions regarding Unity. I will reply you ASAP.
Got an Idea of Unity Game Development? What are you still waiting for? Contact us now and see the Idea live soon. Our company has been named as one of the best Unity3D Game Development Company in India.

I am an enthusiastic game developer who likes to explore different gaming concepts to enhance the knowledge and polish the development skills.
