Be patient..... we are fetching your source code.
Objective
This blog post gives you an idea about how to use UIPageViewController in iOS using Swift.
You will get Final Output:
Step 1 Introduction
A UIPageViewController lets user navigate between pages of content,
In which:
- Each page is managed by its own view controller object.
- The screen navigation is controlled by the user gestures.
- Once UIPageViewController interface is defined, you can add the ViewController for page content.
Click here for more information about UIPageViewController.
In this post I am going to create a simple example of UIPageViewController which uses the scroll transition style to navigate between three screens.
So, let's get started.
Step 2 Create new xCode project for UIPageViewController
2.1 Create new iOS project
Create new iOS Project named UIPageViewControllerDemo under single view application and select swift language.
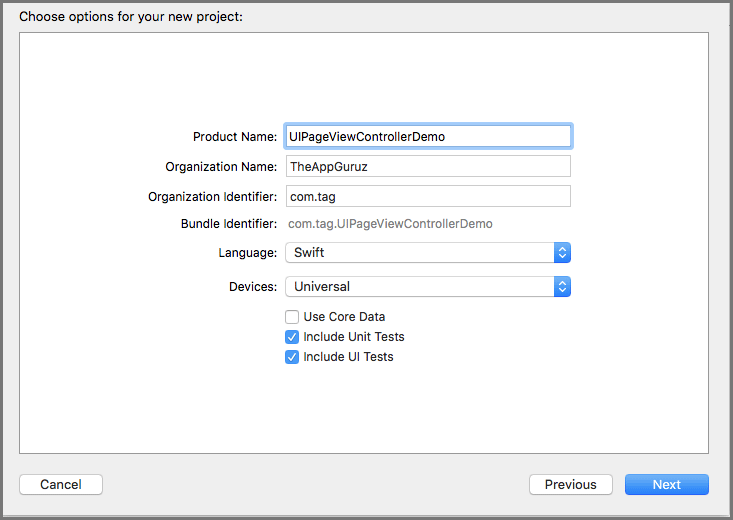
2.2 Setup PageViewController
Now select ViewController.swift file and inherit UIPageViewController instead of UIViewController.
class ViewController: UIPageViewController, UIPageViewControllerDataSource
{
2.3 Create Swift file
Create new swift file named PageContentViewController for PageViewController content by selecting file menu and inherit UIViewController class
Step 3 Designing User Interface
3.1 Assign class references
Open Main.storyboard and select UIViewController and assign PageContentViewController class reference to it.
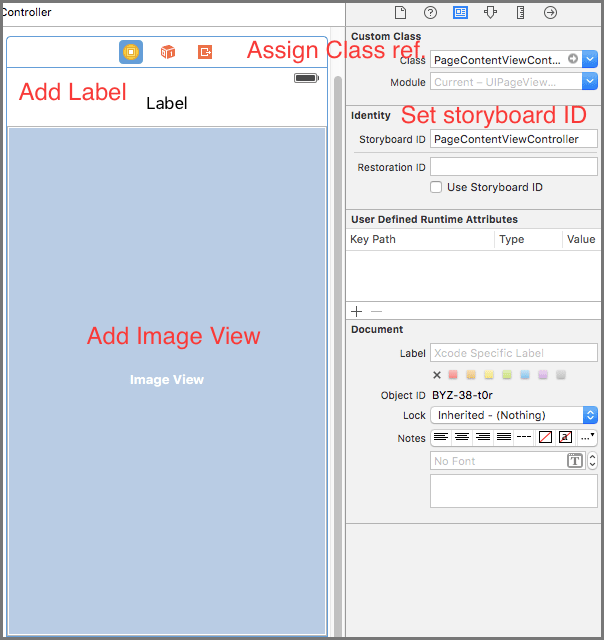
[This screen shows imageview, label, class ref. and storyboard ID]
3.2 Add ImageView to PageContentViewController
Drag Image view from object library to PageContentViewController and apply constraints to image view.
3.3 Add label to PageContentViewController
Drag label from object library to PageContentViewController and apply constraints to label.
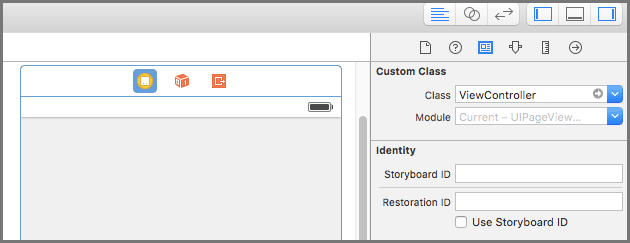
3.4 Add PageViewController
Drag new PageViewController from object library which is subclass of UIPageViewController and assign ViewController class reference to it.
Step 4 Setup StoryBoard
4.1 PageViewController setting
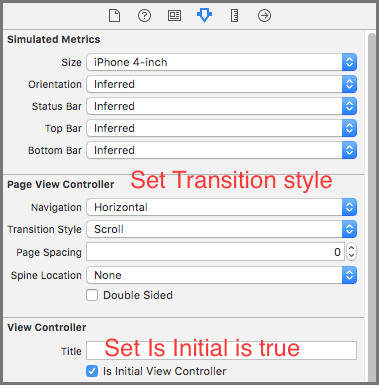
By default, the transition style of the page view controller is set as Page Curl.
The Page Curl style is perfect for book kind of apps.
For navigating between screens,I would be using scrolling style.
So change the transition style to Scroll under Attribute Inspector.
4.2 PageContentViewController setting
Now I would assign Storyboard ID for PageContentViewController which we will use later in our code.
- Select the PageContentViewController
- Go to identity inspector.
- Enter the text PageContentViewController.
Step 5 SetUp PageContentViewController
5.1 Create IBOutlet
Now create an Outlet from the ImageView and Label in the PageContentViewController.
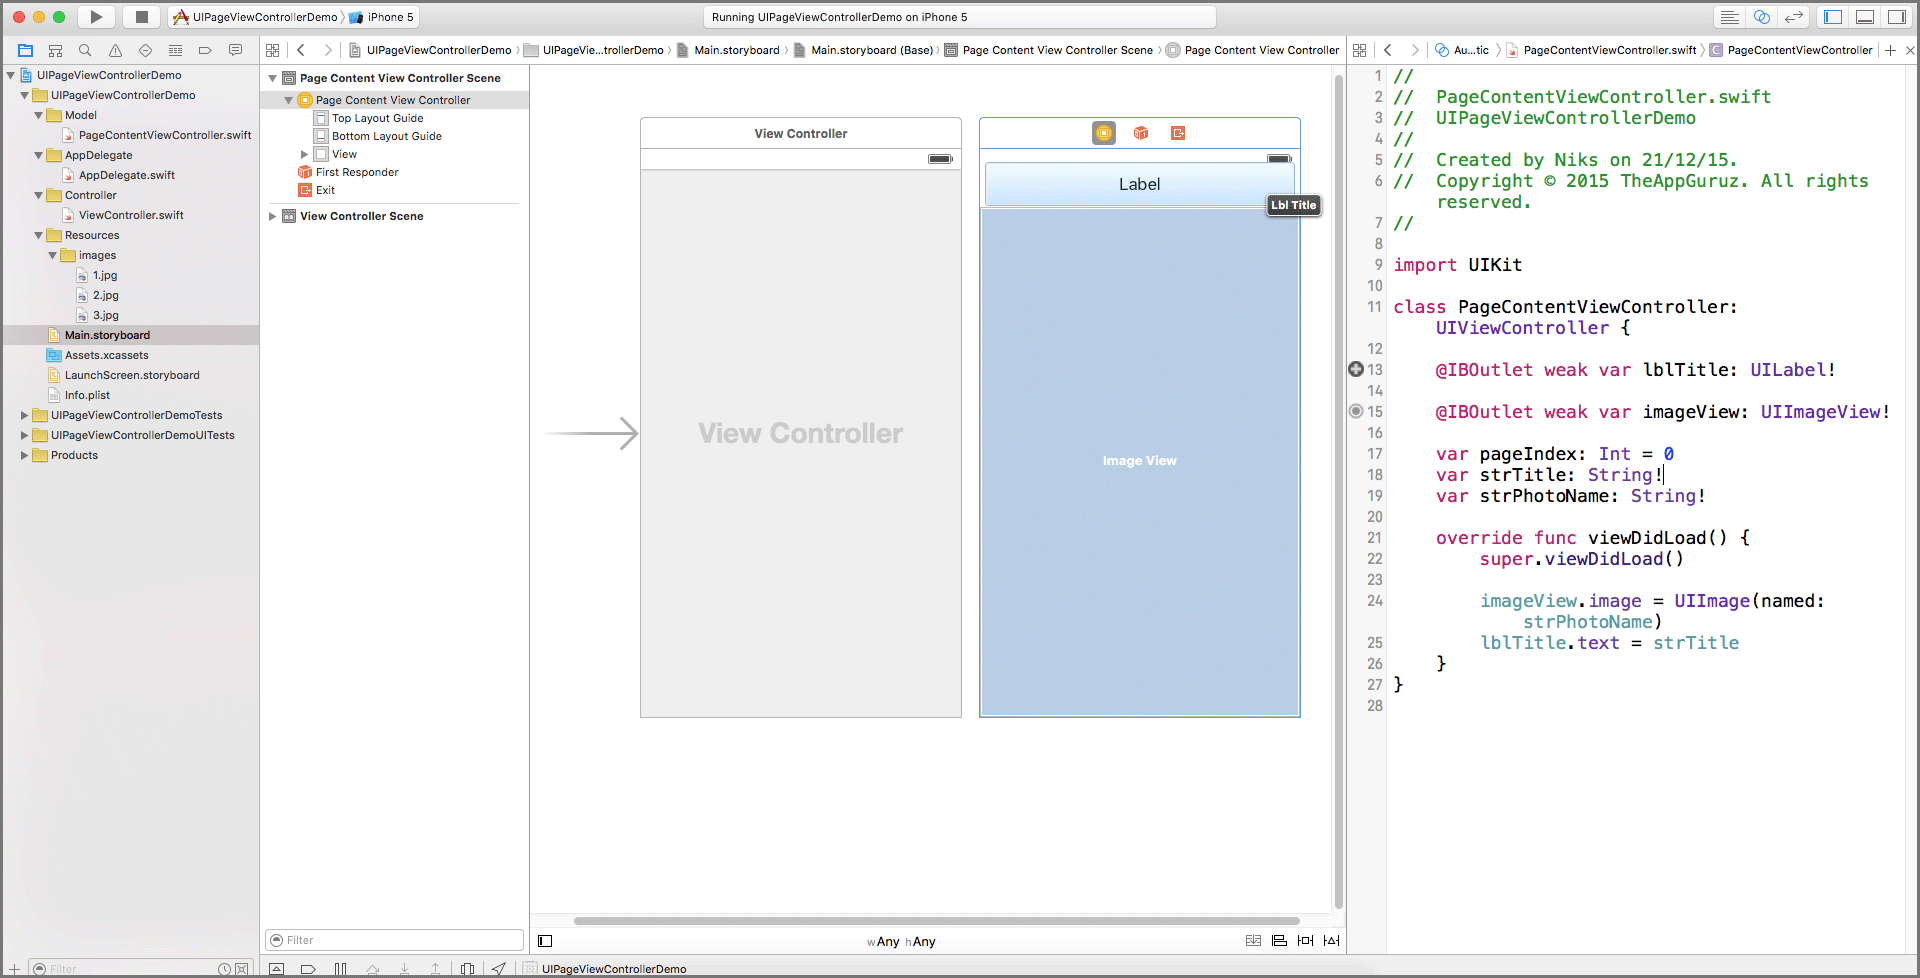
5.2 Create variable for content
var pageIndex: Int = 0
var strTitle: String!
var strPhotoName: String!
5.3 Set Content of object
Set data to object in viewDidLoad() method.
override func viewDidLoad()
	{
       	super.viewDidLoad()

        imageView.image = UIImage(named: strPhotoName)
        lblTitle.text = strTitle
    }
Step 6 Implement UIPageViewController
6.1 Create two NSArray to store Image title and Image name
var arrPageTitle: NSArray = NSArray()
    	var arrPagePhoto: NSArray = NSArray()
6.2 Variable Initialisation
Initialise Array.
Set datasource for PageViewController.
Set first page of PageViewController from viewDidLoad() method.
override func viewDidLoad() {
        super.viewDidLoad()

        arrPageTitle = ["This is The App Guruz", "This is Table Tennis 3D", "This is Hide Secrets"];
        arrPagePhoto = ["1.jpg", "2.jpg", "3.jpg"];
        self.dataSource = self
        self.setViewControllers([getViewControllerAtIndex(0)] as [UIViewController], direction: UIPageViewControllerNavigationDirection.Forward, animated: false, completion: nil)
    }
6.3 Implement Datasource Methods
6.3.1 viewControllerBeforeViewController()
Use this method to return to previous view. In this I have put a condition such that if it is first view then return nil otherwise return ViewController.
func pageViewController(pageViewController: UIPageViewController, viewControllerBeforeViewController viewController: UIViewController) -> UIViewController?
    {
        let pageContent: PageContentViewController = viewController as! PageContentViewController
        var index = pageContent.pageIndex
        if ((index == 0) || (index == NSNotFound))
        {
            return nil
        }
        index--;
        return getViewControllerAtIndex(index)
    }
6.3.2 viewControllerAfterViewController
Use this method to return next view. In this I have put a condition such that if it is last view then return nil otherwise return ViewController.
  func pageViewController(pageViewController: UIPageViewController, viewControllerAfterViewController viewController: UIViewController) -> UIViewController?
    {
        let pageContent: PageContentViewController = viewController as! PageContentViewController
        var index = pageContent.pageIndex
        if (index == NSNotFound)
        {
            return nil;
        }
        index++;
        if (index == arrPageTitle.count)
        {
            return nil;
        }
        return getViewControllerAtIndex(index)
    }
6.4 Create method for get new PageContentViewController
6.4.1 getViewControllerAtIndex
When user swipe using gesture then we have to instantiate ViewController from storyboard and assign all content data of ViewController and return it.
func getViewControllerAtIndex(index: NSInteger) -> PageContentViewController
    {
        // Create a new view controller and pass suitable data.
        let pageContentViewController = self.storyboard?.instantiateViewControllerWithIdentifier("PageContentViewController") as! PageContentViewController
        pageContentViewController.strTitle = "\(arrPageTitle[index])"
        pageContentViewController.strPhotoName = "\(arrPagePhoto[index])"
        pageContentViewController.pageIndex = index
        return pageContentViewController
    }
I hope you will find this blog post helpful while working with UIPageViewController in iOS Swift. Let me know in comment if you have any questions regarding UIPageViewController in iOS Swift. Please put a comment here and we will get back to you ASAP.
Got an Idea of iPhone App Development? What are you still waiting for? Contact us now and see the Idea live soon. Our company has been named as one of the best iPhone App Development Company in India.

I'm a Professional Game Developer, truly passionate about creating different types of games and learning different gaming concepts that can enhance my knowledge. Games are my passion and I aim to create addictive, unique, creative and high quality games.
Learn RecyclerView With an Example in Android
Google Maps Mobile SDK Using Swift
