To download the code, login with one of the following social providers.
Login
Be patient..... we are fetching your source code.
- Introduction
- Create Demo Project
- Pushwoosh Account Creation
- Pushwoosh Application Creation
- Configure iOS Application
- Integrate Pushwoosh.framework
- Add other framework
- Info.plist file Setting
- AppDelegate.m file
- Pushwoosh Delegate Methods
- Final Build & Run
- Send Push from Pushwoosh
- Pushwoosh notification output
Objective
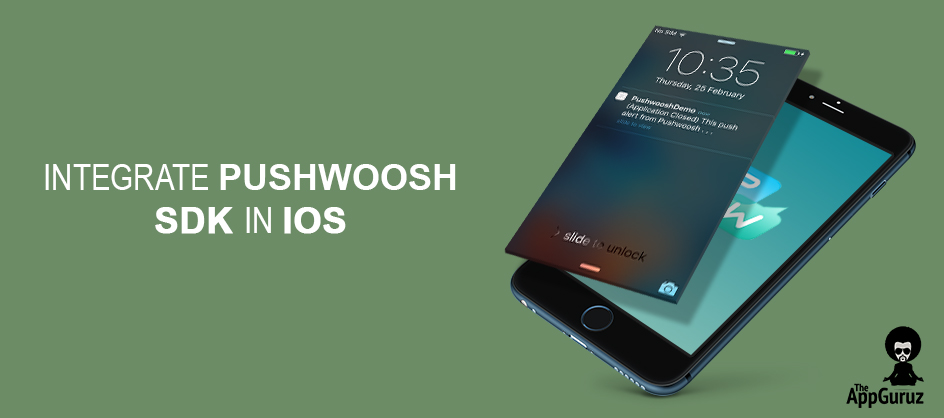
The main objective of this tutorial is to learn how to Integrate Pushwoosh SDK in iOS Application.
Step 1 Introduction
What is Push Notifications?
- Push notification is a message alert delivered by a centralized server to an endpoint device.
- Push Notifications allows your application to notify users about some things. i.e message, score, results, events etc.
What is Pushwoosh?
- Pushwoosh is third party service for push notifications to registered devices with applications.
- It offers a variety of accounts and plans as per the requirement of the user.
- PushWoosh API is used to access and integrate the functionality of PushWoosh with other applications.
This blog post will help you integrate Push Notification Service in your iOS Applications & show how to send notifications using Pushwoosh Third party service as well.
Step 2 Create Demo Project
First of all, Create one sample Xcode project. If you don't know how to create Xcode project, I recommend you to visit:
Here are some interesting iOS Blog Posts, that can help you learn iOS application development.
Step 3 Pushwoosh Account Creation
Create a Pushwoosh account to access their services.

Now, click on Start Now button and fill all the necessary information to Sign Up. If you already have a Pushwoosh account, login to your account.
Once you logged in, you will get the following screen:

Step 4 Pushwoosh Application Creation
Now, click on Add New button, it will open the following screen.

Now, give appropriate Application Title and click on Save Application button. Upload Icon if you wish. it’s optional. Choose iOS SDK in SDK Settings, I've selected Pushwoosh.
Once you save your application, you will get the following screen:

Application code highlighted in above screen will be used in our application for Pushwoosh integration later. Click Configure button as displayed in above picture.
Step 5 Configure iOS Application
You must have got the following screen now.

Select Manual tab and browse your certificate file (.cer) and Push certificate (.p12). Enter your private key password for .p12 file which you already set while creating .p12 file.
If you have no any idea about how to create this .cer and .p12 file then please refer to:
Now, click on Save button.
If you configured properly then next window will replace Configure button with Edit button as shown below:

Step 6 Integrate Pushwoosh.framework
Now, Download Pushwoosh.framework & follow the steps given below:
- Unzip downloaded Pushwoosh.framework
- Go to Framework folder
- Copy Pushwoosh.framework to your directory folder as following:

- Now, add this Pushwoosh.framework in your project by following the steps given below:
- Open your Xcode project
- Right-click on project folder, Select Add file to PushwooshDemo
- Choose your framework location & click Add and project navigation will be something like this:

Step 7 Add Other Framework
Now, go to Build Phases and Link Binary with Libraries.
Add following frameworks:
- libstdc++
- libz
Your screen will look like:

Step 8 Info.plist File Setting
Now, add one key-value pair for Pushwoosh Application configuration in your Info.plist file as following.

Here, the key is Pushwoosh_APPID with type String and Its value is 634AF-C9A48 which is generated in Step 3 (Application Code).
- (BOOL)application:(UIApplication *)application didFinishLaunchingWithOptions:(NSDictionary *)launchOptions
{
    // Override point for customization after application launch.

    //-----------PUSHWOOSH PART-----------
    // set custom delegate for push handling, in our case - view controller
    PushNotificationManager * pushManager = [PushNotificationManager pushManager];
    pushManager.delegate = self;

    // handling push on app start
    [[PushNotificationManager pushManager] handlePushReceived:launchOptions];

    // make sure we count app open in Pushwoosh stats
    [[PushNotificationManager pushManager] sendAppOpen];

    // register for push notifications!
    [[PushNotificationManager pushManager] registerForPushNotifications];

    return YES;
}
Step 9 AppDelegate.m File
Now, configure Pushwoosh service in your iOS project through AppDelegate.m such as following.
#import "AppDelegate.h"
#import <Pushwoosh/PushNotificationManager.h>

@import CoreLocation;
@import SystemConfiguration;
@import AVFoundation;
@import ImageIO;

@interface AppDelegate () <PushNotificationDelegate>

@end

@implementation AppDelegate
Now, go to didFinishLaunchingWithOptions() method of AppDelegate.m file & replace this method with the code given below:
- (BOOL)application:(UIApplication *)application didFinishLaunchingWithOptions:(NSDictionary *)launchOptions
{
    // Override point for customization after application launch.

    //-----------PUSHWOOSH PART-----------
    // set custom delegate for push handling, in our case - view controller
    PushNotificationManager * pushManager = [PushNotificationManager pushManager];
    pushManager.delegate = self;

    // handling push on app start
    [[PushNotificationManager pushManager] handlePushReceived:launchOptions];

    // make sure we count app open in Pushwoosh stats
    [[PushNotificationManager pushManager] sendAppOpen];

    // register for push notifications!
    [[PushNotificationManager pushManager] registerForPushNotifications];

    return YES;
}
Step 10 Pushwoosh Delegate Methods
There are few methods provided by Pushwoosh in Pushwoosh.framework which helps you perform actions or to handle push notification which is sent by Pushwoosh Service.
Here, we implement PushNotificationDelegate methods in AppDelegate.m file such as follows.
AppDelegate.m
// system push notification registration success callback, delegate to pushManager
- (void)application:(UIApplication *)application didRegisterForRemoteNotificationsWithDeviceToken:(NSData *)deviceToken
{
    [[PushNotificationManager pushManager] handlePushRegistration:deviceToken];

    dispatch_async(dispatch_get_main_queue(), ^{

        UIAlertController *alertController = [UIAlertController alertControllerWithTitle:@"Device Token" message:[NSString stringWithFormat:@"didRegisterForRemoteNotificationsWithDeviceToken : %@", deviceToken] preferredStyle:UIAlertControllerStyleAlert];

        UIAlertAction *alertAction = [UIAlertAction actionWithTitle:@"Cancel" style:UIAlertActionStyleCancel handler:nil];
        [alertController addAction:alertAction];

        [self.window.rootViewController presentViewController:alertController animated:YES completion:nil];
    });
}

// system push notification registration error callback, delegate to pushManager
- (void)application:(UIApplication *)application didFailToRegisterForRemoteNotificationsWithError:(NSError *)error
{
    [[PushNotificationManager pushManager] handlePushRegistrationFailure:error];

    dispatch_async(dispatch_get_main_queue(), ^{

        UIAlertController *alertController = [UIAlertController alertControllerWithTitle:@"Fail Register" message:[NSString stringWithFormat:@"didFailToRegisterForRemoteNotificationsWithError : %@", error.localizedDescription] preferredStyle:UIAlertControllerStyleAlert];

        UIAlertAction *alertAction = [UIAlertAction actionWithTitle:@"Cancel" style:UIAlertActionStyleCancel handler:nil];
        [alertController addAction:alertAction];

        [self.window.rootViewController presentViewController:alertController animated:YES completion:nil];
    });
}

// system push notifications callback, delegate to pushManager
- (void)application:(UIApplication *)application didReceiveRemoteNotification:(NSDictionary *)userInfo
{
    [[PushNotificationManager pushManager] handlePushReceived:userInfo];

    dispatch_async(dispatch_get_main_queue(), ^{

        UIAlertController *alertController = [UIAlertController alertControllerWithTitle:@"Receive Notification" message:[NSString stringWithFormat:@"didReceiveRemoteNotification : %@", userInfo] preferredStyle:UIAlertControllerStyleAlert];

        UIAlertAction *alertAction = [UIAlertAction actionWithTitle:@"Cancel" style:UIAlertActionStyleCancel handler:nil];
        [alertController addAction:alertAction];

        [self.window.rootViewController presentViewController:alertController animated:YES completion:nil];
    });
}

- (void) onPushAccepted:(PushNotificationManager *)pushManager withNotification:(NSDictionary *)pushNotification
{
    dispatch_async(dispatch_get_main_queue(), ^{

        UIAlertController *alertController = [UIAlertController alertControllerWithTitle:@"Push Notification" message:[NSString stringWithFormat:@"onPushAccepted : %@", pushNotification] preferredStyle:UIAlertControllerStyleAlert];

        UIAlertAction *alertAction = [UIAlertAction actionWithTitle:@"Cancel" style:UIAlertActionStyleCancel handler:nil];
        [alertController addAction:alertAction];

        [self.window.rootViewController presentViewController:alertController animated:YES completion:nil];
    });
}
Note
- Push Notifications does not work in Simulator. So, You must test this code/demo in iOS Device only. You can test Push Notifications in any of the iOS Devices(iPhone/iPad).
Step 11 Final Build & Run
Generate proper development/distribution certificate for your app. If you have no idea about it then refer to:
Now, Select your device, build (cmd + b) and run (cmd + r). When application is run for the first time, it will ask for the permission for receiving push notification and you must Allow it:

Once you agree, As soon as you run an application, every time Push service will get your Device Token which is not visible to users.

Step 12 Send Push from Pushwoosh
Now, go to Pushwoosh Dashboard, open your application. Follow the steps shown below to push notifications:
- Go to your PooshWhoosh application.

Enter your push message and select all other option as per your requirements.
- Make your Platforms settings as per your requirements.

It will display output as above.
- Click on Woosh! button to send the Push.

Step 13 Pushwoosh Notification Output
Now, you will get notification in the following manner:
- When Application is running, you will get a notification such as follows. (We handled it in our AppDelegate.m )

- You will get notification such as following if Application is not currently running

- When you tap the notification, it will directly open the application and show alert such as following.(Handled in AppDelegate.m file)

Each Output Screen will display UIAlertController message and its alert message starts with methods of PushNotificationDelegate delegate which is used to handle push notification sent by Pushwoosh.
I hope you will find this blog post helpful while working with Push Notification in iOS. Let me know in a comment if you have any questions regarding Push Notification in iOS Application. Please put a comment here and we will get back to you ASAP.
Got an Idea of iPhone App Development? What are you still waiting for? Contact us now and see the Idea live soon. Our company has been named as one of the best iPhone App Development Company in India.

I am iOS Application Developer & I personally believed that When a programming language is created that allows programmers to program in simple English, it will be discovered that programmers cannot speak English.
Integrate LinkedIn SDK In iOS
The Programming Nomenclature