- What is Isometric view?
- Issues while Developing Isometric Games in Unity
- Then How to Develop Isometric Games in Unity?
- Overview of Ultimate Isometric Toolkit
- Isometric View Example
- Create a simple Isometric Level
- Understanding LevelGenerator
- Moving an object in the current map
- Sprite management
- Translation in Isometric Map
- Other Advantages of Ultimate Isometric Toolkit
Objective
With the advancement of technology in computer games, 3D games are becoming very common. But years back when there was no support for 3D elements, it was quite hard to develop 3D games but solution found at that time was an Isometric view, of 2D elements.
Top 10 Most Popular Isometric Games:
- Clash Of Clans
- Plants vs Zombies
- Hay Day
- Boom Beach
- Kingdom Rush
- Monument Valley
- RollerCoaster Tycoon
- Castle Defense
- Crossy Road
- Village City
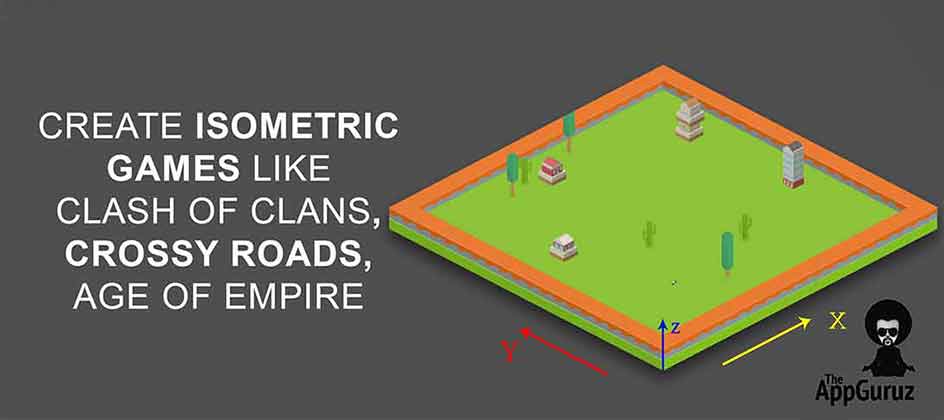
Let's see what we are going to make:
Step 1 What is Isometric view?

- Isometric view in simple words is nothing but creating an illusion of 3D game for a game created in 2D.
- Isometric view can be created by one of the most common and efficient approach called tile – based approach.
- As isometric view creates an illusion of 3D, sometimes it also referred as pseudo 3D or 2.5D.
- Earlier games like Q*bert from 1982 was one of the first games to use an isometric view.
- Today big games like Clash of Clans, Age of Empires use this kind of projection.
Step 2 Issues while Developing Isometric Games in Unity
You might face some of the following issues while Developing Isometric Games in Unity:
- Calculation for positioning tiles in a way such that it creates a 3D view of gameplay is complex.
- Mapping actual location of the object in a world space / Game space to the location in isometric view is complex and time-consuming.
- Unity does not have any direct tool or support for Isometric projections.
- Most of the 3rd party Tools available until now, were not strong enough or optimized enough for developing smooth and proper Isometric games.
- Calculations for map generation are heavy, for now, no tool was right enough, to load Isometric maps at an optimized rate.
Step 3 Then How to Develop Isometric Games in Unity?
While researching for this, I checked a lot of tools from Unity Asset Store. But the one, which I really found impressive was the asset called Ultimate Isometric Toolkit
Step 4 Overview of Ultimate Isometric Toolkit
Here is an overview of Ultimate Isometric Toolkit:
- Unity as a 3D engine is quite good for developing 3D games
- Of course, it comes with the overhead of creating and rendering 3D objects.
- But when it comes to the Isometric games you need a lot of additional code to solve common problems like sorting orders, intersecting sprites and continuous movements.
- The advantages of Isometric style 3D games are obvious. We can save a lot of time since we do not have to model/texture/rig/... 3D Objects
- We completely eliminate the overhead of rendering 3D scenes, and hence saving a lot of money by taking one of the hundreds of sprite sheets out there.
- Calculation of positioning tiles to create a 3D illusion and Mapping of an actual location of an object to a location in isometric view is handled by the toolkit.
- The problems of sorting orders and such other hard algorithms used for creating isometric views are all taken care of by this toolkit with very low overhead.
Let us understand this Toolkit with a very simple example
Step 5 Isometric View Example
We will try to understand following things from this example:
- Creating simple base in an isometric view.
- Placing some objects on that base.
- Translating object in Isometric Space
- Collision detection in Isometric space
- Sprite Management
- Functionalities of Ultimate Isometric toolkit
Let's get started.
Step 6 Create a simple Isometric Level
This is how you can create Isometric Level:
- Create a project in Unity with 2D settings
- Import Ultimate Isometric Toolkit package in your project (you can get the tool from here)
- Now, let's first create a base of the tile map.
- Create a prefab for the tile, which will be used to create your base. (For that you can use any sprite of block available with toolkit.)
- Add IsoObject and IsoCollider script into the prefab.
- Now, Take an empty gameobject in the scene called LevelGenerator.
- Now add LevelGenerator.cs Script to the gameobject. LevelGenerator script will be stored in Ultimate Isometric Toolkit > Code > IsometricTools > Other.
Step 7 Understanding LevelGenerator
Let us now understand LevelGenerator:
- Size represents the size of the tile map shown in the following image.
- In LevelGenerator, how the tiles will be placed in the scene is represented by the following image. Base in this image is created with size (x, y, z):(20, 20, 1).

- Tile Size represents a size of each tile to be placed on the map. It scales the isometric position of an IsoObject relative to its position in the tile map.
- Seed will be used for creating random maps
- Roughness represents how roughly the tiles will be placed. With more roughness, the tiles will be more scattered around to show its roughness
- Amplitude represents number of layers of tiles to be used in the map
- Prefab reference to the IsoObject script on the tile prefab you have created.
Set these properties as shown in the Following image:

Note
- Here, you have to set a reference to your prefab in Prefab property.
This will create a plane like in the following picture:

Now If you check, each tile (gameobject) created, will have two scripts attached to it
- IsoObject:
- Base class that makes a Game Object an Isometric Object. And it represents position and size of that tile
- Everything in the scene has a transform component attached and is part of your isometric game. Even empty gameObjects should have this component attached.
- IsoCollider:
- This enables collision detection in isometric gameobjects by adding mesh collider automatically
TIP: Do not forget to add IsoCollider and IsoObject while creating prefab for the map
- Now, let us create a border around the map, by selecting a different prefab.
- Here, I have made different prefab for creating boundary just like the prefab for the base.
We have created something like this for the demo:

Tip: You can also manually create the boundary but it will be time-consuming. So, here I have made some modifications in the GenericGridMap script of Ultimate Isometric Toolkit for creating Boundary as per my need.
- Now manually add objects as per your need. Just drag & drop the prefabs available with a toolkit on to your base as shown in the following image.
- Here, I have taken prefabs of some of the atlas, some of the cactus, some of the trees and a car for creating the scene as shown in the following image:

This shows how easy it is to create an isometric map, using this tool. We do not have to worry about all the sorting algorithms at all. This tool takes care of all and allows us to concentrate on the core functionality of the game.
Step 8 Moving an object in the current map
Let us create a script for translation/movement of an object on the isometric map. Attach this
CarController script on the prefab of the car.
CarController Script:
public class CarController : MonoBehaviour
{
    public float speed = 10;
    public SpriteRenderer spriteRenderer;
    public Sprite carSpriteNorth;
    public Sprite carSpriteSouth;
    public Sprite carSpriteWest;
    public Sprite carSpriteEast;
    public GameObject explisionPrefeb;
    private IsoDirection currentDirection;
    private Vector3 targetPosition;

    void Start()
    {
        currentDirection = IsoDirection.North;
        spriteRenderer.sprite = carSpriteNorth;
    }

    void Update()
    {
        if (!GameManager.Instance.isGameRunning)
            return;

        //North
        if (Input.GetKeyDown(KeyCode.UpArrow))
        {
            currentDirection = IsoDirection.North;
            spriteRenderer.sprite = carSpriteNorth;
        }
        //South
        else if (Input.GetKeyDown(KeyCode.DownArrow))
        {
            currentDirection = IsoDirection.South;
            spriteRenderer.sprite = carSpriteSouth;
        }
        //West
        else if (Input.GetKeyDown(KeyCode.LeftArrow))
        {
            currentDirection = IsoDirection.West;
            spriteRenderer.sprite = carSpriteWest;
        }
        //East
        else if (Input.GetKeyDown(KeyCode.RightArrow))
        {
            currentDirection = IsoDirection.East;
            spriteRenderer.sprite = carSpriteEast;
        }

        targetPosition = Isometric.vectorToIsoDirection (currentDirection);
       transform.Translate (targetPosition * Time.deltaTime * speed);
    }


    void OnCollisionEnter(Collision other)
    {
        if (other.gameObject.CompareTag("Finish") && GameManager.Instance.isGameRunning)
        {
            spriteRenderer.sprite = null;
            Instantiate(explisionPrefeb, transform.position, transform.rotation);
            GameManager.Instance.OnGameOver();
        }
    }
}
Step 9 Sprite management
As shown in the script, we will have four different sprites for each direction. So, the car will have a separate sprite for each of the four directions.
Step 10 Translation in Isometric MAP
The translation process of an isometric object is quite different than what we do while we are doing the normal transform.
For isometric translation, we will have to calculate the direction with respect to the isometric map.
For that, we will use Isometric class function
Isometric. vectorToIsoDirection (IsoDirection)
Here, we are using this function for moving a car in one of the IsoDirection i.e. North, South, East or West.
This function returns the projection vector of IsoDirection in Isometric map. Projected vector will represent the actual location/position of the car in a game space of Unity.
So, after getting the target position to move the car, we can pass that target position to Translate method of Transform class in Unity.
This is how we can create a simple Isometric game using this powerful tool.
This demo took me around an hour to complete, which is not bad considering I had to do some research in the tool itself. If I had known this tool already, it wouldn’t have taken more than 10 minutes to create the demo.
Step 11 Other Advantages of Ultimate Isometric Toolkit
Here are some of the other advantages of Ultimate Isometric Toolkit:
- Can Handle Thousands of sprites at a time, with very less overhead
- Editor tools to simplify the workflow in Unity
- Support for all the platforms provided by Unity
- Runtime Level generation
- Controller scripts for various use cases
- Proper documentation
- Offering both a lite and pro version
- User-friendly support via email, videos, unity forum, etc.
- Everything sorted and prefabbed
- Mouse and Touch input support
Conclusion:
Creating isometric view games become very easy and very less time taking by using the Ultimate isometric toolkit. Toolkit’s structure is very powerful. which is very easily understandable. Which makes it class apart from other isometric toolkits.
Got an Idea of Game Development? What are you still waiting for? Contact us now and see the Idea live soon. Our company has been named as one of the best Unity 3D Game Development Company in India.

I am Professional Game Developer, I love to develop a Game and also i love play a game, And i am always ready to helping you in Game Development.
Stripe Integration - iOS (Payments through Card)
Facebook Integration using Swift