Be patient..... we are fetching your source code.
Objective
The main objective of this post is to explain Stripe Integration - iOS (Payments through Card) in Objective-C.
I would implement following features in this blog post:
- Setup API Keys for Stripe
- Get Card information for Stripe
- Make Stripe payments
What is Stripe?
Stripe is a company, which accepts two types of payments over the Internet.
- Private Individuals
- Business
Stripe provides payment gateway like Paypal, iPay88 etc.
If you would like to learn more about Stripe, please follow this link:
What is Payment gateway ?
A payment gateway is an e-commerce application service provider service, which authorizes credit card payments for
- E-businesses
- Online retailers
- Bricks and clicks
- Traditional brick
- Mortar etc.
If you would like to learn more about Payment Gateway, please follow this link:
Introduction:
For this blog post, I would be creating a simple iOS app using Objective-C to integrate Stripe.
Stripe SDK is very powerful, and gives lot of functionalities like
- Provides an interface and programmatic access to Stripe.
- Identifies stripe applications and its users using Stripe apiKeys.
- Allows users to enter their card information.
- Checks card validation
- Makes payments etc.
Now, as we have got the basics in place - lets get started with our coding.
Step 1 Download Framework
In this demo, I have used Stripe.framework, which is provided by Stripe.
You can download Stripe Framework from the following link:
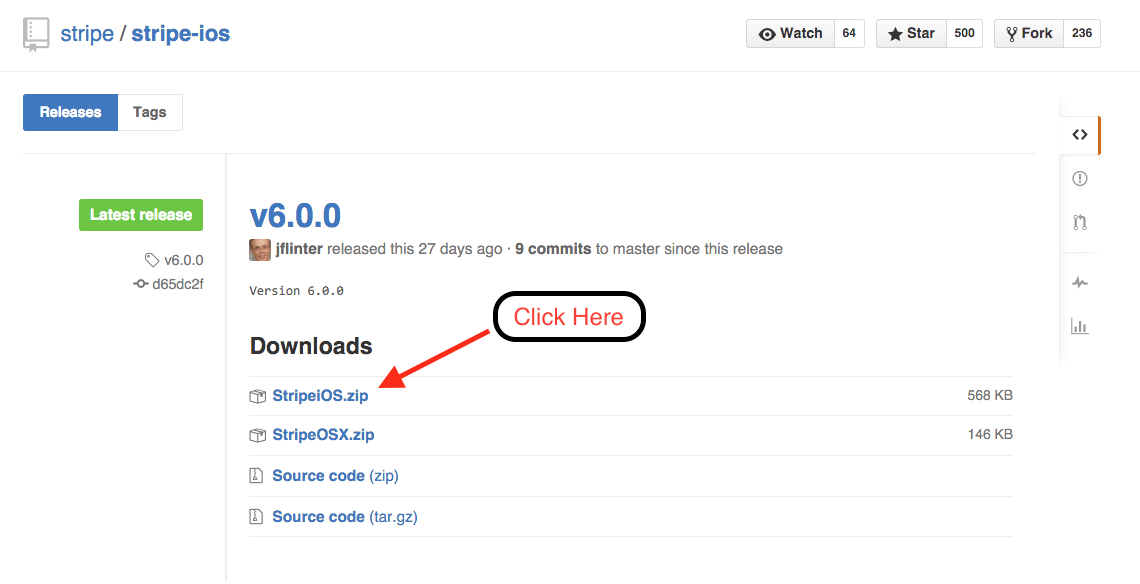
Here, I want to integrate Stripe for iOS Application, so I would be downloading StripeiOS.zip file.
Step 2 get Stripe API keys
For testing purpose, I have generated apiKeys from Stripe Account. If you don’t have Stripe Account then register here
If you already have an account, login into Stripe. Go to following link for Stripe apiKeys
It should look like:
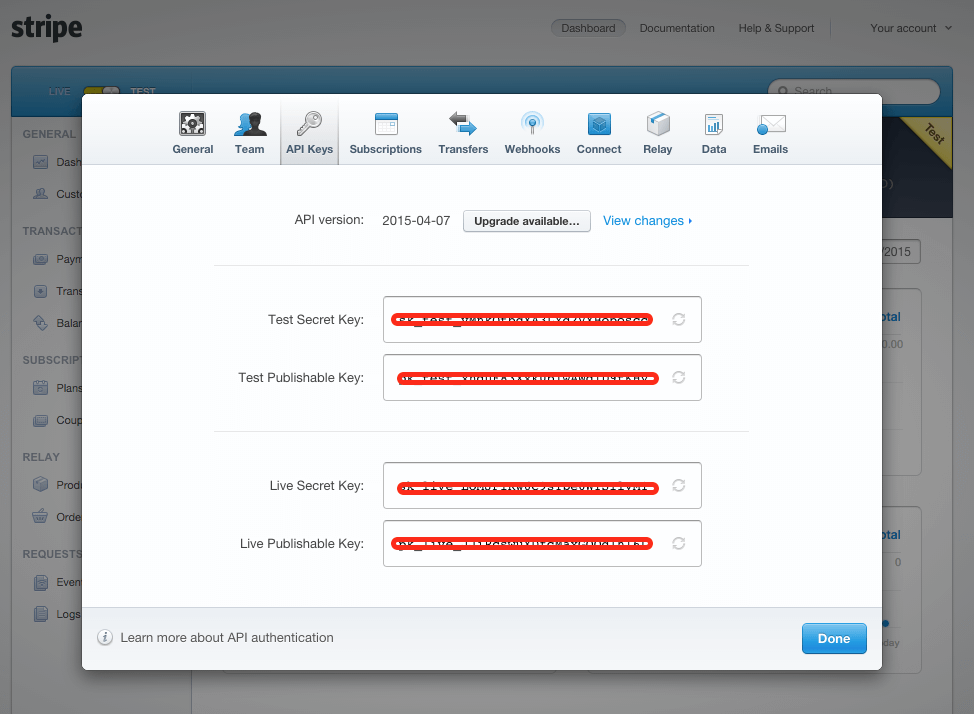
Here, I am using Test Publishable Key (2nd key) to integrate Stripe in my iOS app.
Step 3 Create Xcode Project
Now, lets create Xcode project for this demo. If you are beginner and have no idea about how to create Xcode project then refer our previous blog or Create Xcode Project.
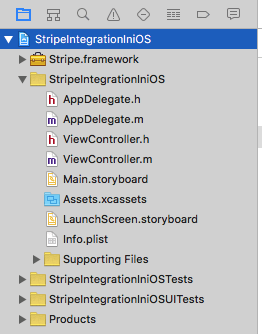
Your project navigator should look like:
Step 4 Add Stripe Framework to Project
Now, Unzip the StripeiOS.zip file (Link - Downloaded in step 1) and follow the steps given below:
- In Xcode, open your project, click on File >> Add files >> Project
- Select Stripe.framework
- Make sure "Copy items if needed is checked".
- Click Add.
- In your project settings, go to the "Build Settings" tab, and make sure -ObjC is present under "Other Linker Flags".
Step 5 Design UI
Open Main.storyboard from project navigation bar and create layout.
It should look like:

Step 6 Create Constant.h file
Now let’s create Constant.h header file, which is used to store constant values.
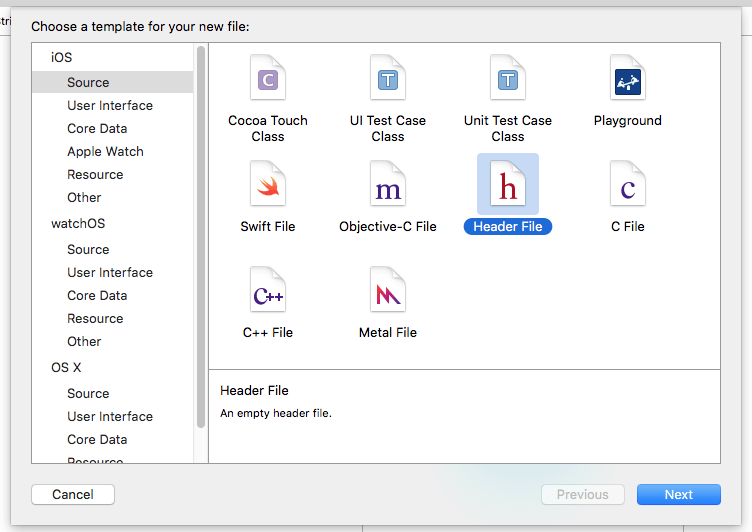
Constant.h:
#ifndef Constant_h
#define Constant_h

// This can be found at https://dashboard.stripe.com/account/apikeys (Step 2 link)

NSString *const kstrStripePublishableKey = nil; // TODO: replace nil with your own value

#endif /* Constant_h */
Step 7 Add PaymentViewController
Now, copy these two files to your project (you will find these files from the StripeiOS.zip file which we downloaded in Step 1.
- PaymentViewController.h
- PaymentViewController.m
Step 8 Initial setup for Stripe payment
To configure the payment, first - import PaymentViewController.h
#import "ViewController.h"
#import "PaymentViewController.h"
Set delegate of PaymentViewController view.
@interface ViewController () <PaymentViewControllerDelegate>
Now, we will open payment screen when user taps on Stripe Button.
- (IBAction)btnStripeTapped:(id)sender
{
    PaymentViewController *paymentViewController = [[PaymentViewController alloc] initWithNibName:nil bundle:nil];
    paymentViewController.amount = [NSDecimalNumber decimalNumberWithString:@"1.50"];
    paymentViewController.delegate = self;

    UINavigationController *navController = [[UINavigationController alloc] initWithRootViewController:paymentViewController];
    [self presentViewController:navController animated:YES completion:nil];
}
Step 9 Configure PaymentViewControllerDelegate Methods
Now, as I am done with the initial setup, I will move towards setting delegate methods, which would be used to handle callbacks from Stripe.
9.1 didFinish:
didFinish used to handle operations and give status of Success or Failure during payments.
- (void)paymentViewController:(PaymentViewController *)controller didFinish:(NSError *)error
{
    [self dismissViewControllerAnimated:YES completion:^{
        if (error) {
            [self showDialougeWithTitle:@"Error" andMessage:[error localizedDescription]];
        } else {
            [self showDialougeWithTitle:@"Success" andMessage:@"Payment Successfully Created."];
        }
    }];
}
9.2 showDialougeWIthTitle:
showDialougeWIthTitle used to display alertController for App user.
- (void)showDialougeWithTitle:(NSString *)strTitle andMessage:(NSString *)strMessage
{
    UIAlertController *controller = [UIAlertController alertControllerWithTitle:strTitle message:strMessage preferredStyle:UIAlertControllerStyleAlert];

    UIAlertAction *action = [UIAlertAction actionWithTitle:@"OK" style:UIAlertActionStyleDefault handler:nil];
    [controller addAction:action];

    [self presentViewController:controller animated:YES completion:nil];
}
Step 10 Set Product Details
If you want to customize your product details, check out the steps given below:
- Open PaymentViewController.m file.
- Go to viewDidLoad method.
- Change product name with below line:
self.title = @”Buy a Demo”; - Change product price with below line:
paymentViewController.amount = [NSDecimalNumber decimalNumberWithString:@"1.50"];
Step 11 Use Credential for Demo
Please use below credential given by Stripe when you run the demo:
- Credit Card Number: 4242 4242 4242 4242
- Expiration Date: any future month & year
- CVC Number: any 3 or 4 digit number
All these details will work only for development and debugging and they work with only development API keys.
Step 12 Build & Run the Demo
Click on Stripe button.
Output should look like following:
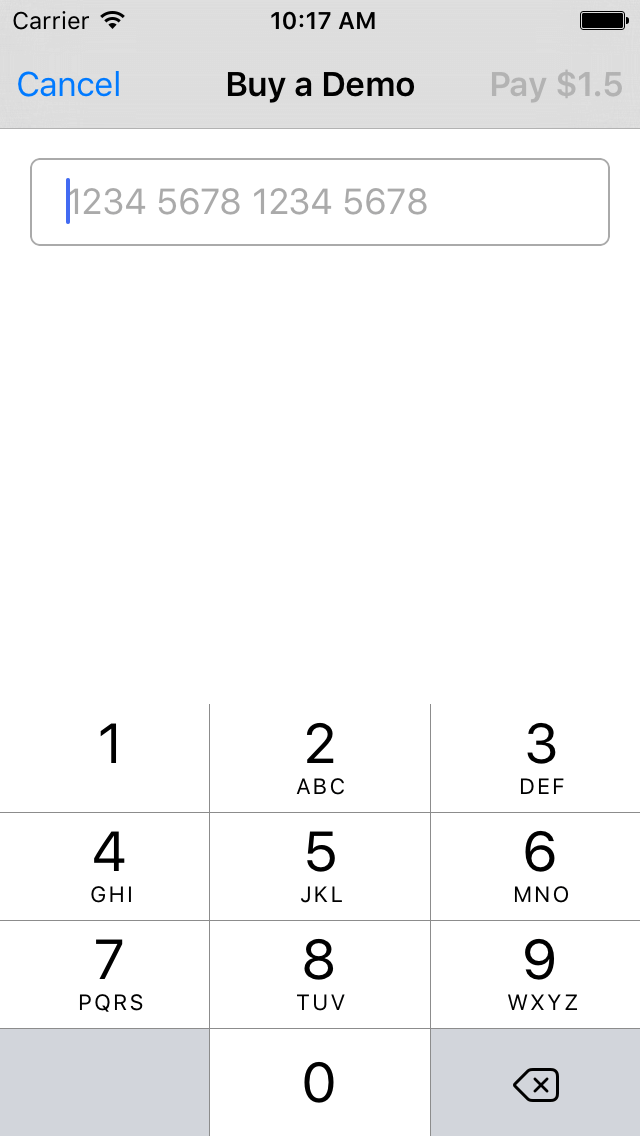
Now enter your card number here and it should automatically swipe and should ask for Expiry Date & CVC number.
It should look like following:
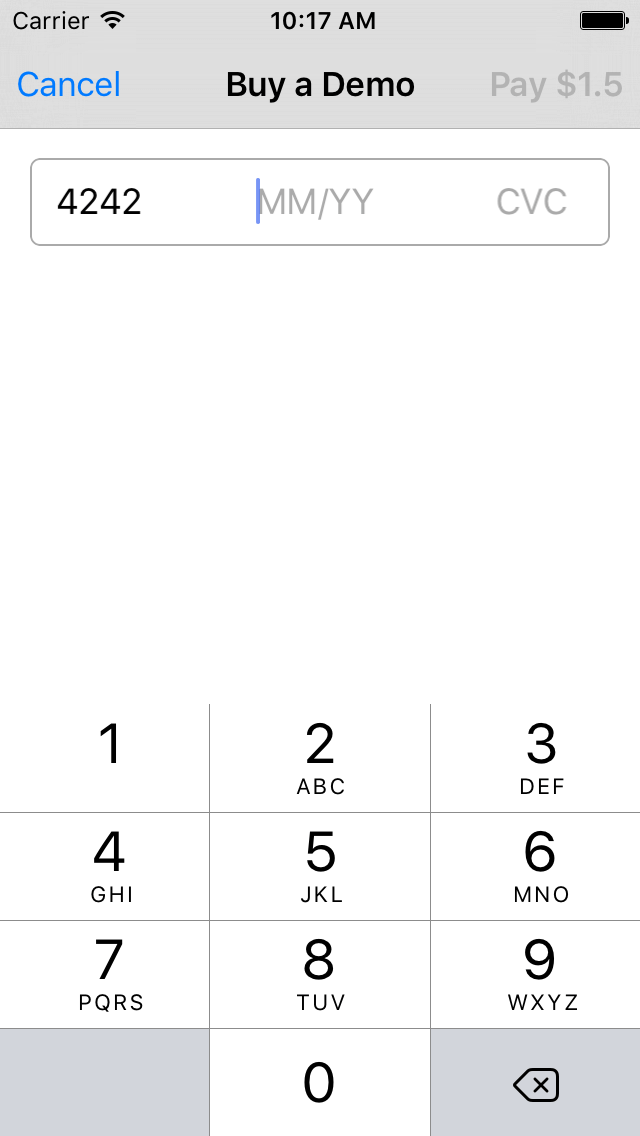
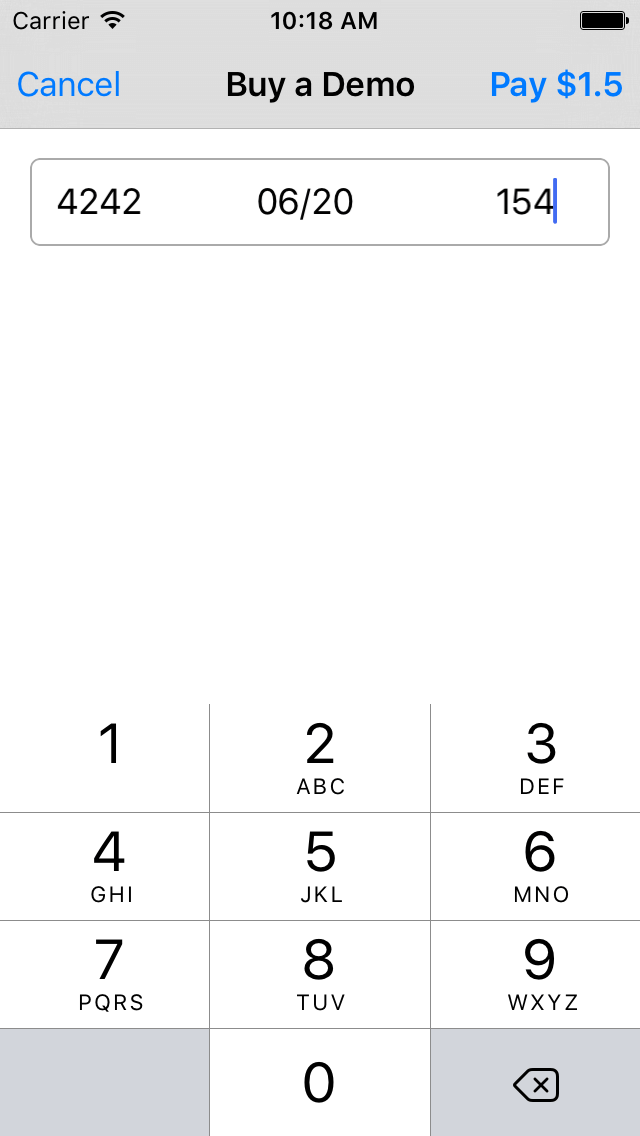
After you are done entering all these details correctly, "Pay $1.5" which is on top right bar should be enabled and would look like following:
I hope you will find this post very useful while working with Stripe integration in iOS. Let me know in comment if you have any questions regarding in Swift. I will reply you ASAP.
Got an Idea of iPhone App Development? What are you still waiting for? Contact us now and see the Idea live soon. Our company has been named as one of the best iPhone Application Development Company in India.

I am iOS Application Developer & I personally believed that When a programming language is created that allows programmers to program in simple English, it will be discovered that programmers cannot speak English.
