Be patient..... we are fetching your source code.
- Install and Setting Up Your Development Environment
- List of main files of your project
- Add MapKit Framework
- Import MapKit in file
- Make Design for MapKit View
- Ask User permission for Access Current Location of Device
- Make variables and connect controls to ViewController file
- Call delegate method and make CLLocation object
- Change map type on button click
- Build & Run Project
Objective
This post explains, in detail, how to use MapKit for User Location in iOS.
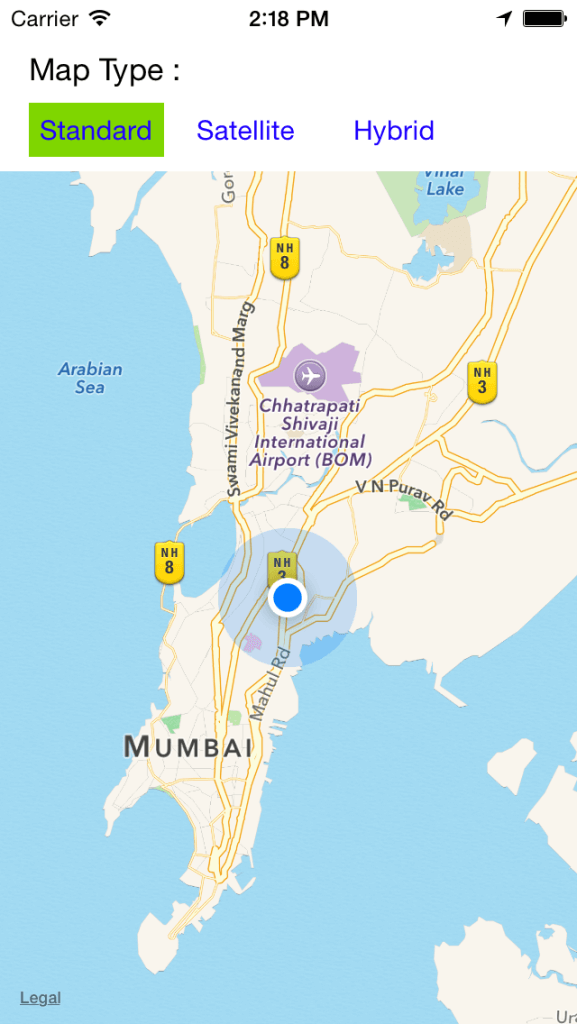
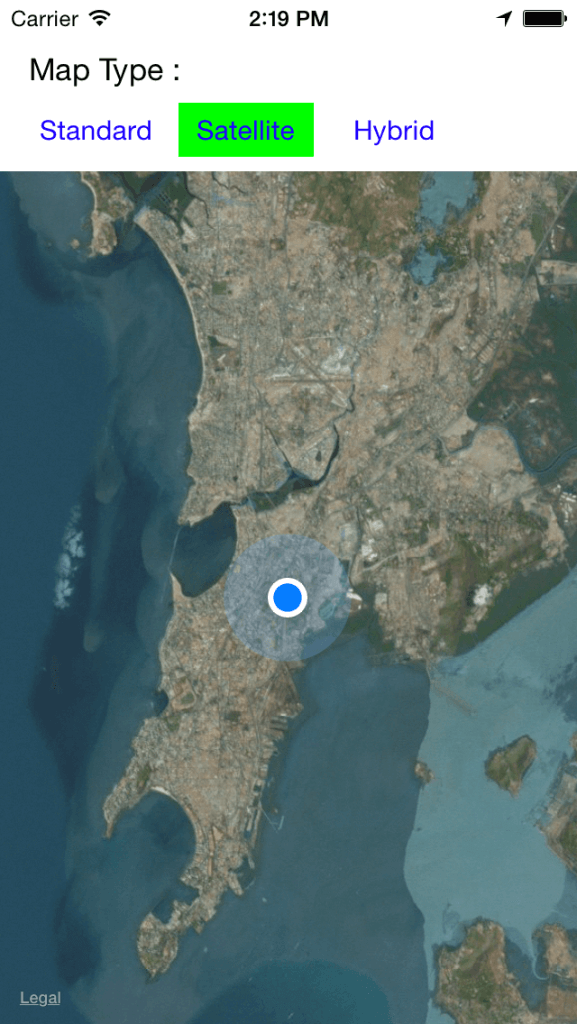
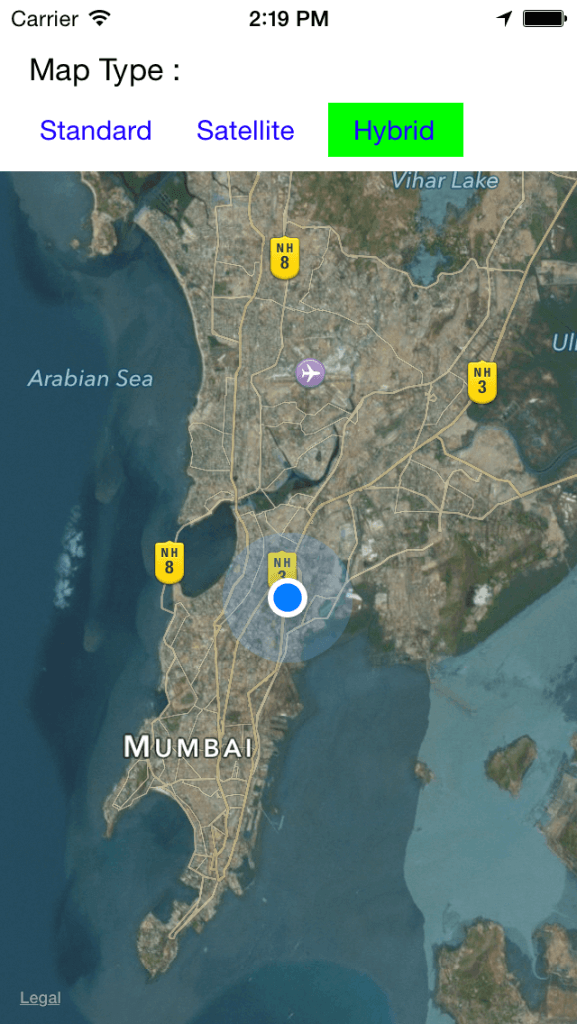
You will get Final Output:
You can show user location by it’s Latitude & Longitude number. The following steps may be easier to display locaiton on MapView. Follow the Step below to get started and go through for displaying user location on it.
Step 1 Install and Setting Up Your Development Environment
Download and install Xcode : Xcode is an Integrated Development Environment (IDE) to create all iPhone apps with Objective-C Programming. It contains a suite for software development tools for iOS application. After Installation Xcode; Open the Xcode and below screen will be appear:
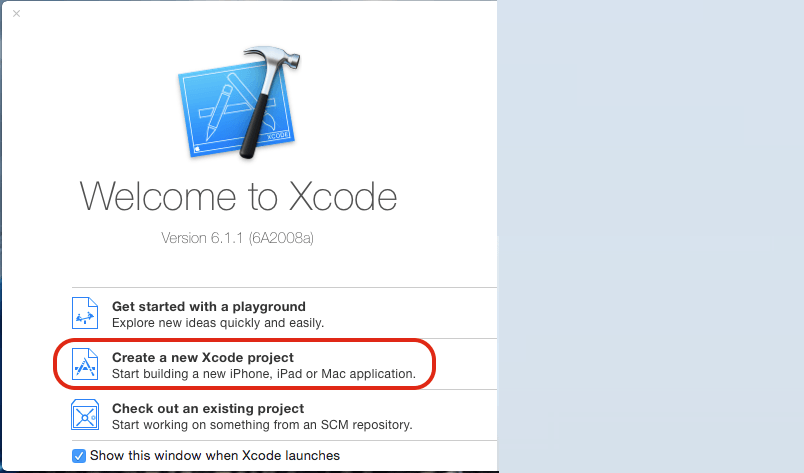
Now create a new application for this demo by clicking on “Create a new Xcode project” and it’s open below screen :
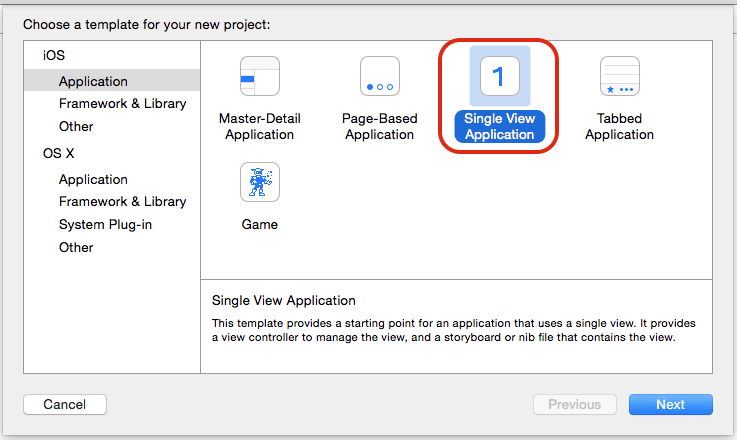
Now, choose Single View Application and click next which shows below screen :
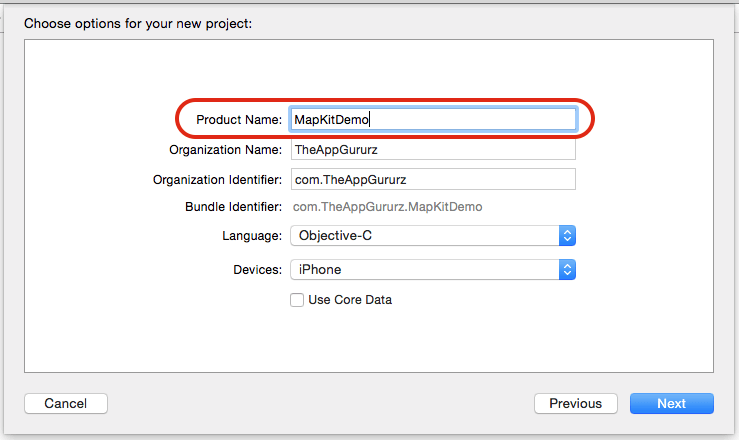
In above screen there are some field which must be fill carefully. Here, we can give project name MapKitDemo and Language is Objective-C. You can give any name for the appliation.
Now, click next and choose your project location and Click Create. It’s open your project.
Step 2 List of main files of your project
Your Project navigation file shows all your file which is used in your project data. Which is shown in below screen :
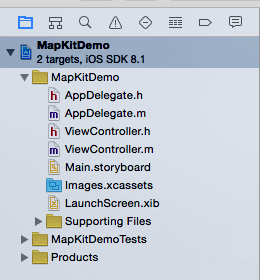
Here, We can use MapKit. So, first of all add MapKit Framework to your project.
Step 3 Add MapKit Framwork
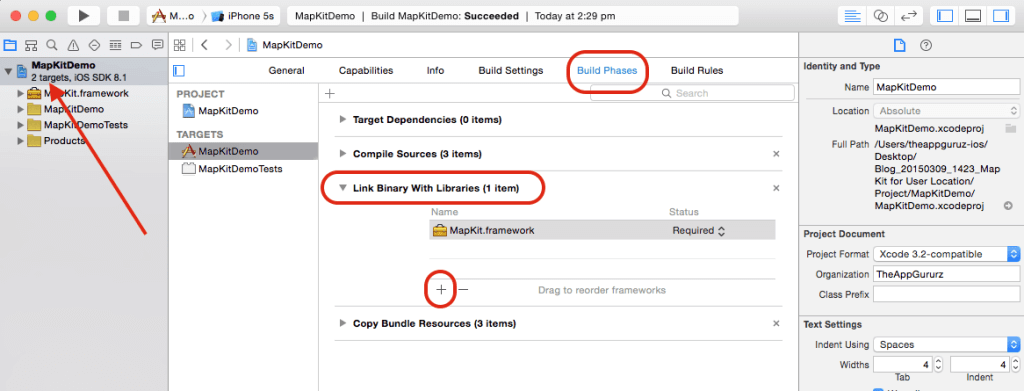
Now, click on Your Project target whose name is MapKitDemo from the left side section.
Click on Build Phases and Open Link Binary With Libraries and click on ‘+’ symbol type MapKit.framwork and Add. Your screen looks like
Now, you can easily used MapKit Framwork and it’s object by importing them.
Step 4 Import MapKit in file
Now, in ViewController.h file import MapKit and CoreLocation file for user current location and code for this are :
#import <MapKit/MapKit.h>
#import <CoreLocation/CoreLocation.h>
Step 5 Make Design for MapKit View
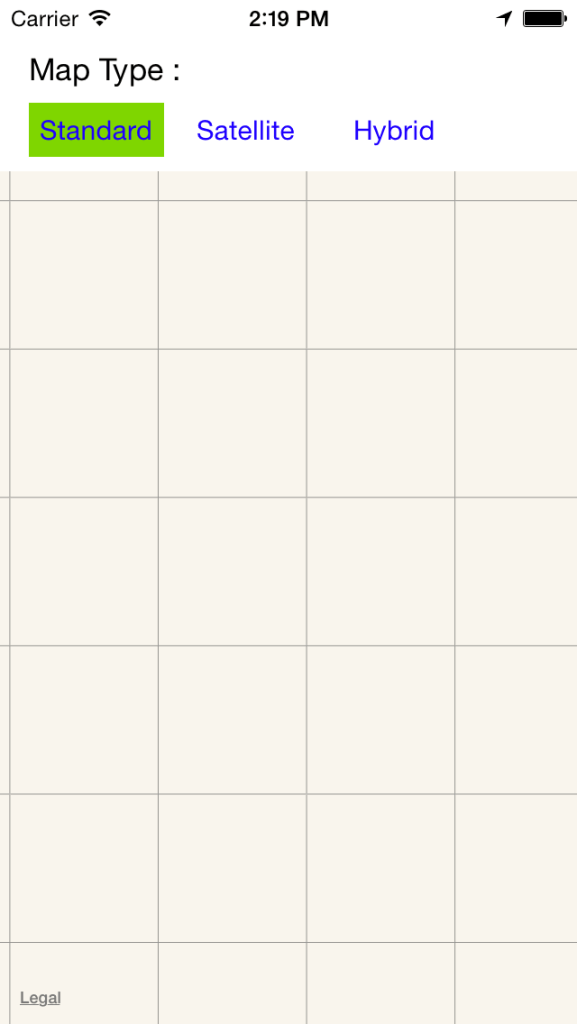
Now, we make a design for it. So, open Main.storyboard file. And put One label named “Mape Type” and put 3 button under that label with name “Standard”, “Satellite” & “Hybrid” and last put MapKit View form the controls. Your screen looks like :
Step 6 Ask User permission for Access Current Location of Device
Here, this step is most important step for display user location. In project
-> Supporting Files
-> Info.plist file you must put below key-value pair.
Key : NSLocationWhenInUseUsageDescription
Type : String
Value : We use your location to find places near you.
Finally, your Info.plist looks like :

Step 7 Make variables and connect controls to ViewController file
Now, we made some variables in ViewController.h file. Which looks like
@interface ViewController : UIViewController <CLLocationManagerDelegate>
{
CLLocationManager *objLocationManager;
double latitude_UserLocation, longitude_UserLocation;
}
Here, we can implement CLLocaitonManagerDelegate methodfor user current latitude & logitude and made some property for controls access in ViewController.m file So, in ViewController.h file put code like
1@property (weak, nonatomic) IBOutlet MKMapView *objMapView;
@property (weak, nonatomic) IBOutlet UIButton *btnStandard;
@property (weak, nonatomic) IBOutlet UIButton *btnSatellite;
@property (weak, nonatomic) IBOutlet UIButton *btnHybrid;
Step 8 Call delegate method and make CLLocation object
Now, make one method with name loadUserLocation and call write CLLocationManagerDelegate delegate method which is used for user’s location latitude and longitude. So, finally our method is looks like:
- (void) loadUserLocation
{
objLocationManager = [[CLLocationManager alloc] init];
objLocationManager.delegate = self;
objLocationManager.distanceFilter = kCLDistanceFilterNone;
objLocationManager.desiredAccuracy = kCLLocationAccuracyHundredMeters;
if ([objLocationManager respondsToSelector:@selector(requestWhenInUseAuthorization)]) {
[objLocationManager requestWhenInUseAuthorization];
}
[objLocationManager startUpdatingLocation];
}
and it’s delegate method is :
- (void)locationManager:(CLLocationManager *)manager
didUpdateLocations:(NSArray *)locations __OSX_AVAILABLE_STARTING(__MAC_NA,__IPHONE_6_0)
{
CLLocation *newLocation = [locations objectAtIndex:0];
latitude_UserLocation = newLocation.coordinate.latitude;
longitude_UserLocation = newLocation.coordinate.longitude;
[objLocationManager stopUpdatingLocation];
[self loadMapView];
}

- (void)locationManager:(CLLocationManager *)manager
didFailWithError:(NSError *)error
{
[objLocationManager stopUpdatingLocation];
}
Below method is used for load the MapView on the screen by changing user location. Which is called from delegate method.
- (void) loadMapView
{
CLLocationCoordinate2D objCoor2D = {.latitude = latitude_UserLocation, .longitude = longitude_UserLocation};
MKCoordinateSpan objCoorSpan = {.latitudeDelta = 0.2, .longitudeDelta = 0.2};
MKCoordinateRegion objMapRegion = {objCoor2D, objCoorSpan};
[objMapView setRegion:objMapRegion];
}
Step 9 Change map type on button click
Now, for change map type there are 3 buttons, make IBAction method in ViewController.m file and put below code for change type:
[objMapView setMapType:MKMapTypeStandard]; // for Standard
[objMapView setMapType:MKMapTypeSatellite]; // for Satellite
[objMapView setMapType:MKMapTypeHybrid]; // for Hybrid
and your final click event looks like:
- (IBAction)btnStandardTapped:(id)sender
{
[btnStandard setBackgroundColor:[UIColor greenColor]];
[btnSatellite setBackgroundColor:[UIColor clearColor]];
[btnHybrid setBackgroundColor:[UIColor clearColor]];
[objMapView setMapType:MKMapTypeStandard];
[self loadUserLocation];
}
- (IBAction)btnSatelliteTapped:(id)sender
{
[btnStandard setBackgroundColor:[UIColor clearColor]];
[btnSatellite setBackgroundColor:[UIColor greenColor]];
[btnHybrid setBackgroundColor:[UIColor clearColor]];
[objMapView setMapType:MKMapTypeSatellite];
[self loadUserLocation];
}
- (IBAction)btnHybridTapped:(id)sender
{
[btnStandard setBackgroundColor:[UIColor clearColor]];
[btnSatellite setBackgroundColor:[UIColor clearColor]];
[btnHybrid setBackgroundColor:[UIColor greenColor]];
[objMapView setMapType:MKMapTypeHybrid];
[self loadUserLocation];
}
Step 10 Build & Run Project
Now, build & run the project with cmd+b for build & cmd+r for run.

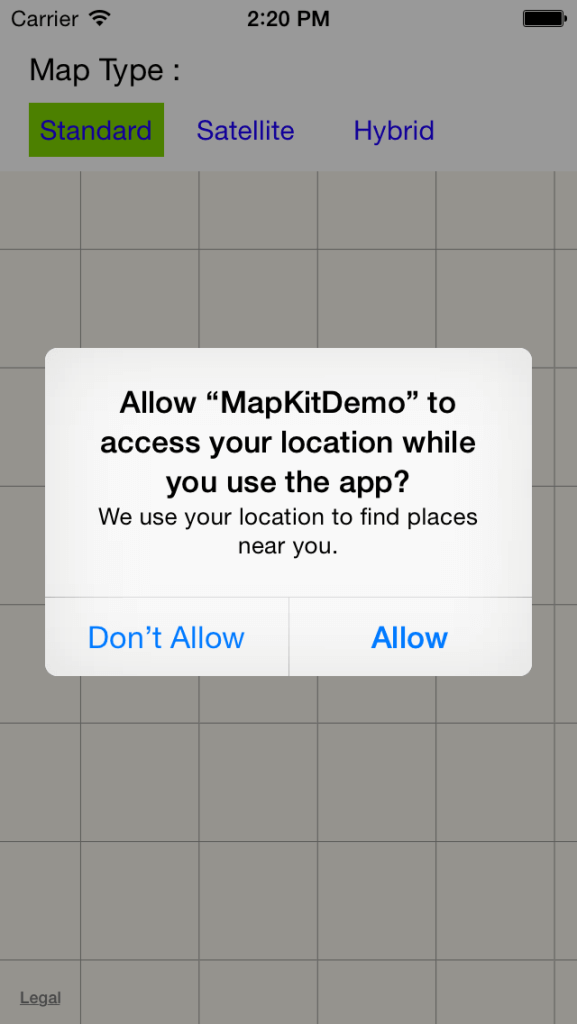
Wow, its build Successfully. And first time application asked for user location access permission. By displaying below dialogue.
I hope you will find this blog post very useful. While working with MapKit for User Location in iOS. Let me know in comment if you have any questions regarding in IOS. I will reply you ASAP
Got an Idea of iPhone App Development? What are you still waiting for? Contact us now and see the Idea live soon. Our company has been named as one of the best iPhone App Development Company in India.

I am iOS Application Developer & I personally believed that When a programming language is created that allows programmers to program in simple English, it will be discovered that programmers cannot speak English.
Login with Facebook in Laravel Application
Audio Player in iOS
