To download the code, login with one of the following social providers.
Login
Be patient..... we are fetching your source code.
Objective
In this blog post, I'll introduce you to the UIAlertController class and its styles that will help you present an alert message and an action sheet. I'll also show you how to handle the actions for that, using Swift closures.
Introduction:
With all new features laid by iOS 8 it has altered two commonly used APIs in UIKit framework. The UIActionSheet and UIAlertView classes used previously have been replaced by the UIAlertController class. So instead of using these deprecated classes you may now move towards using the UIAlertController.
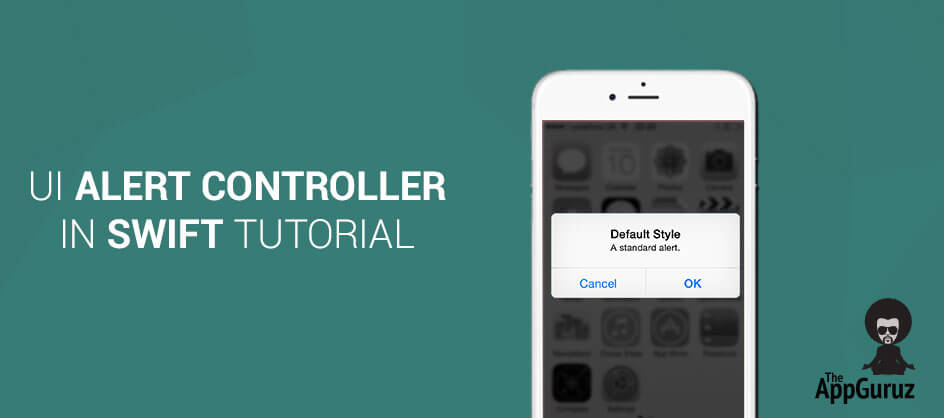
The enhancement with UIAlertController class is that you will not need any delegates to handle user response, amazing it is!!! Action sheet and Alert view are now two styles of UIAlertController. While using UIAlertController we associate actions with the controller and the action is expressed as closures in Swift. The User Interface we will build is as shown :-

Step 1 Open XCode Editor
Open Xcode and select "Create a new Xcode project".

Step 2 Choose Template
Select "Single View Application" from given list of templates

Step 3 Fill Your Product Data
Name the product as AlertControllerDemo and provide rest of the information and do notice it’s in “Swift” language. Once done press next.

The main files of generated application are shown in which we will write code to work with UIAlertController class.

Step 4 Design UI
Now open the storyboard and create the user interface as shown. We have two buttons and a label. Name the buttons “Show Alert Style” and “Show Action Sheet Style”. We will use the first button to show the alert style of UIAlertController and the second one to show ActionSheet style of UIAlertController. The label is used to display message which would be result of the actions handled by us when user interacts with buttons on AlertView and ActionSheet.

Step 5 IBAction for display .Alert
Once done with step 4 create actions for both buttons in “ViewController.swift” file and outlet for our label. Name the action method for “Show Alert Style” button as “btnShowAlertStyleTapped” and write the code as shown:
@IBAction func btnShowAlertStyleTapped(sender: AnyObject) {

            let objAlertController = UIAlertController(title: "Hey Pals !!", message: "We are     learning to use UIAlertController in Swift.Its Alert Style.", preferredStyle: UIAlertControllerStyle.Alert)

        let objAction = UIAlertAction(title: "OK", style: UIAlertActionStyle.Default, handler:
            {Void in self.lblMessage.text = "HEY!! You handled an Action for Alert."})
        objAlertController.addAction(objAction)

        presentViewController(objAlertController, animated: true, completion: nil)
    }
In the code above we have created an object of UIAlertController . We have used the below two methods
1
UIAlertController(title: “Write Your Title ”, message”Write Your Message”, preferredStyle: “Choose .Alert or .ActionSheet as per requirement ” )
2
addAction( “Pass a refrence of UIAction class ” )
The first method is used to create the reference of UIAlertController with various parameters. Do note the parameter” preferredStyle”, it determines wether to show an Alert view or an ActionSheet . The next method is used to add action to our UIAlertController object.
To add action to our UIAlertController object we need to create objects of UIAlertAction class.For this we have used the method:
UIAlertAction(title: "Write Name of Button you want on Alert view", style: ” Define style of button”, handler: ”Write your swift closure or code block”)
Add the UIAlertAction object to our UIAlertController object using the “addAction” method as discussed above.
Step 6 IBAction for display .ActionSheet
Repeat the above step to create actions for "Show Action Sheet Style" name it as "btnShowActionSheetStyleTapped" and edit the method as follows:
@IBAction func btnShowActionSheetStyleTapped(sender: AnyObject) {

        let objAlertController = UIAlertController(title: "Hey Pals !! ", message: "We are learning to use UIAlertController in Swift. Its ActionSheet style. ", preferredStyle: UIAlertControllerStyle.ActionSheet)

        let objAction = UIAlertAction(title: "OK", style: UIAlertActionStyle.Default, handler:
            {Void in self.lblMessage.text = "HEY!! You handled an Action for ActionSheet."})
        objAlertController.addAction(objAction)

        presentViewController(objAlertController, animated: true, completion: nil)
    }
The only change is we have changed the “prefferedStyle” parameter to be “.ActionSheet”. That’s it. No delegates and nothing more our app is ready.
The Views of app are shown below:
• Main screen

• Result of tapping “Show Alert Style” button and “Ok” button on AlertView being handled.


• Result of tapping “Show Action Sheet Style” button and “Ok” button on ActionSheet being handled.


I hope you find this blog very helpful. While working on UIAlertController in Swift. Let me know in comment if you have any question regarding Swift. I will reply you ASAP
Got an Idea of iPhone App Development? What are you still waiting for? Contact us now and see the Idea live soon. Our company has been named as one of the best iPhone App Development Company in India.

I am an iOS Developer and I Personally believe that Mobile applications are the best ways to convert your innovative ideas in to reality in quickest way and help people make their life a joy with technology.
Ads Implementation in Unity Using AdColony