Objective
Main objective of this blog post is to give you an idea about UV Mapping.
UV Mapping is a technique to apply 2D texture on 3D Object. "U" and "V" are the axes names of 2D Texture while "X", "Y" and "Z" are used for 3D Model Objects. It will wrap 2D image around 3D Object. UV Mapping spread polygons of 3D model on to a 2d plane in order to Map texture on it.
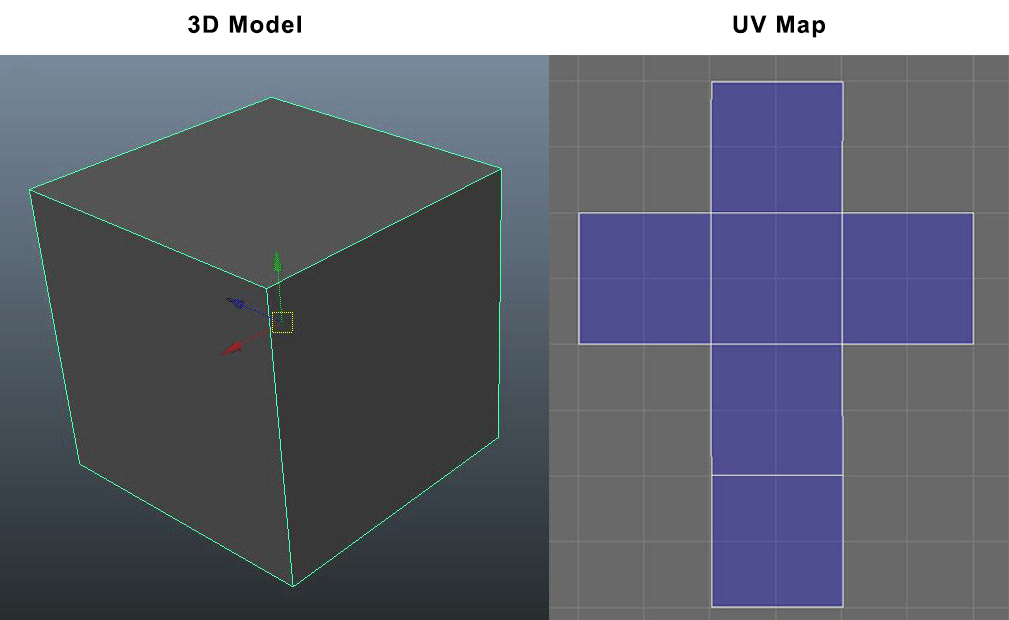
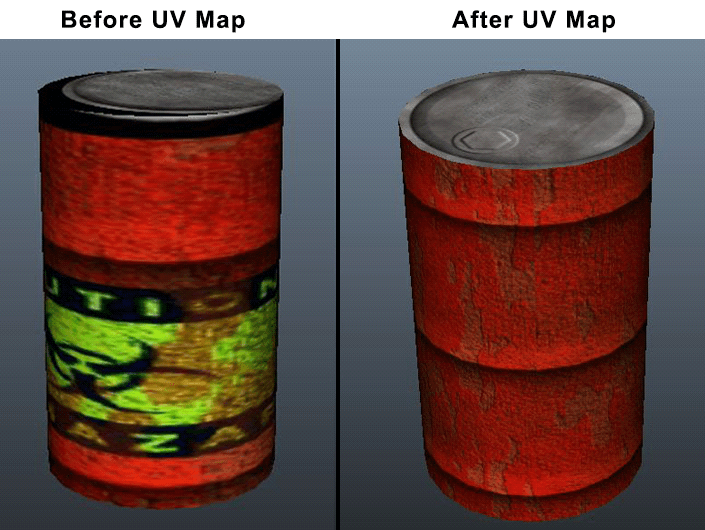
Step 1 UV Mapping in Maya
Maya includes a lot of useful features for UV mapping projections such as planar, box, cylindrical, spherical, automatic as well as advanced UVs based on camera. You can use any of the above as per your requirement.
1.1 Suggestions for UV Mapping
1.1.1 Map each Object
Map every object into UV space. It will allow you to apply texture to each object area.
1.1.2 Stretching
Stretching is always a common issue while UV mapping. It happen when polygon/s are laid in different from their actual shape. To avoid stretches always check you model with checkers map applied on your model and make sure that the checkers look square and evenly distributed. The quality of product depends on how well the UVs are placed.
1.1.3 Overlapping
Overlapping means one UV goes over another UV. Mostly, you need zero overlaps by the end of the process so that you can paint your texture over the entire surface of the model separately.
1.1.4 Reduce UV Space and Seams
Reduce UV Space
Arrange UVs in the layout and optimize as much as possible. Don't put large spaces between objects. The resolution of the feel map remains high and clean on reducing UV space.
Seams
Seams are where you choose to cut your 3d model so that it can be unwrapped into 2D. Few seams are attainable in outcome as a result of which it becomes easy to texture your model.
Step 2 Tests by Checkers Map
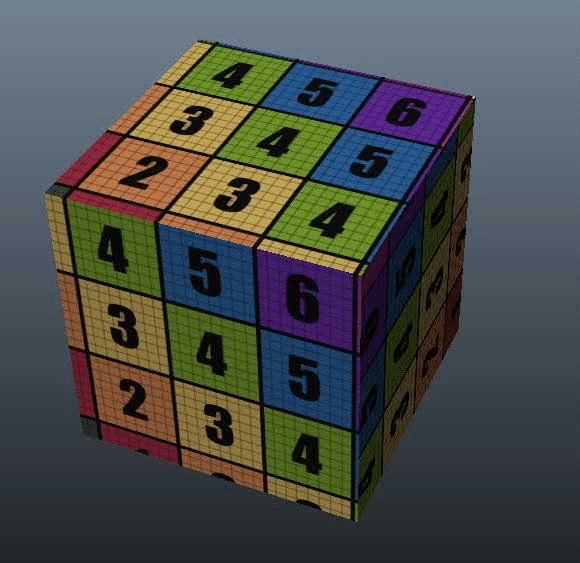
When you create UVs, check whether it is working well or not. To Test UV mapping apply Tillable Checker map on 3D object. Test on a Checker map is very useful as it shows the stretch area where correction is needed. Here in example, is the result of applying the texture on a cube. It looks pretty good and the tiles are of the same size over the 3D Model.
Let’s get started.
Let’s look at what we’re working with. Here is a face model in Maya.
Step 3 UV Mapping for Face Modeling
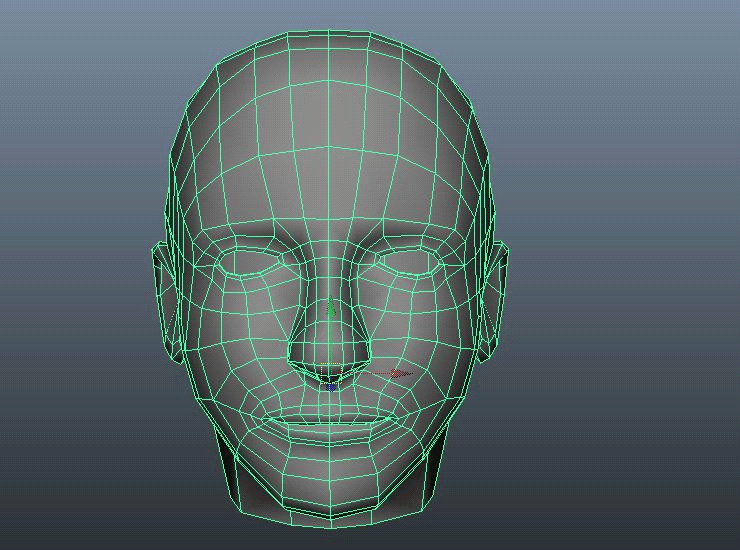
3.1 Projection
Select the face model and go to Create UVs > Planar Projection. Make projection on Z axis.
Apply the checker map texture to the face so that you can see the current UV layout.
This will give you your projection, and it looks good from front. The problem is when you move around the face you will see that the checker map is stretched on the side of the face, and reversed on the back.
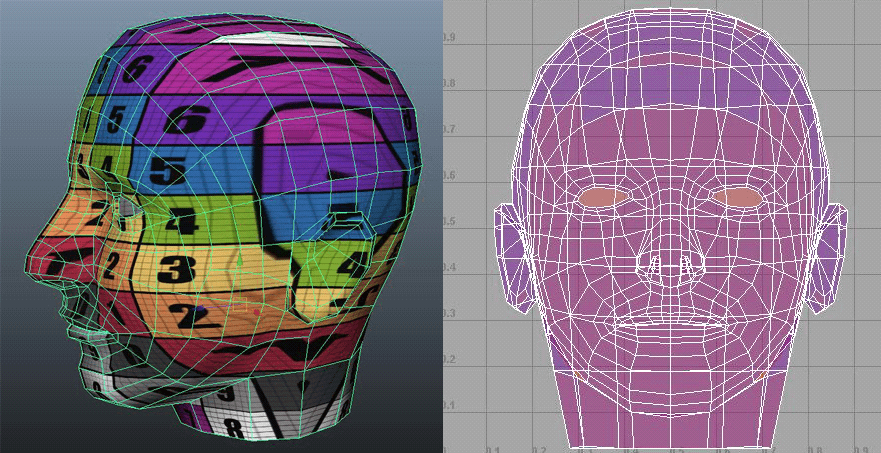
Select the edges from the face.
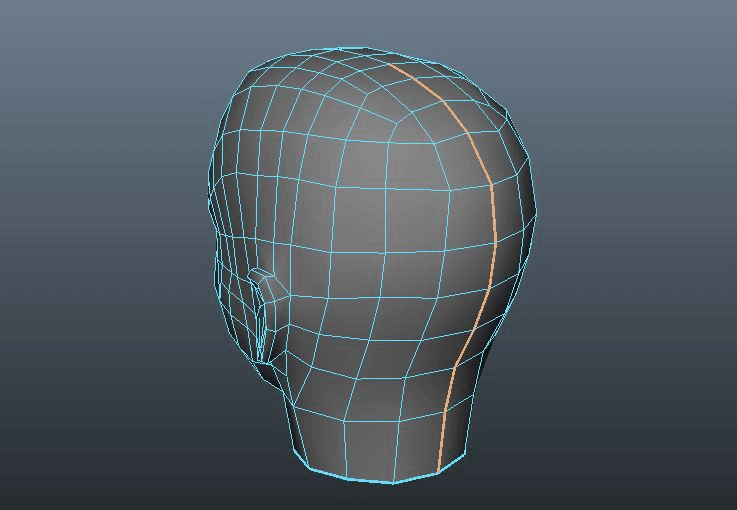
3.2 Cut UV's
In UV’s Texture Editor, Go to Edit > Cut UVs.
Set unfold horizontally and then click on Apply.
Next set unfold vertically and then click on Apply.
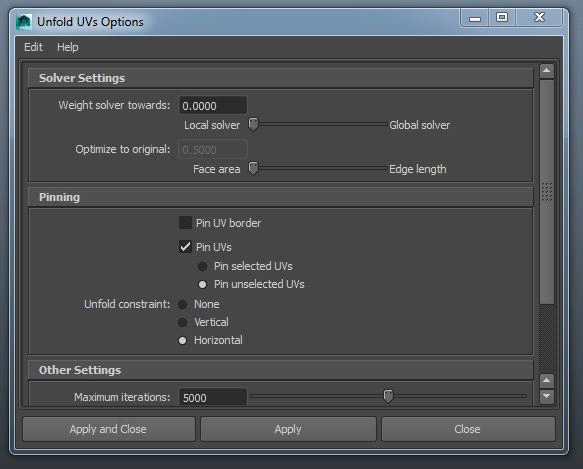
3.3 Unfold UV Options
This Process will give the result as shown below:
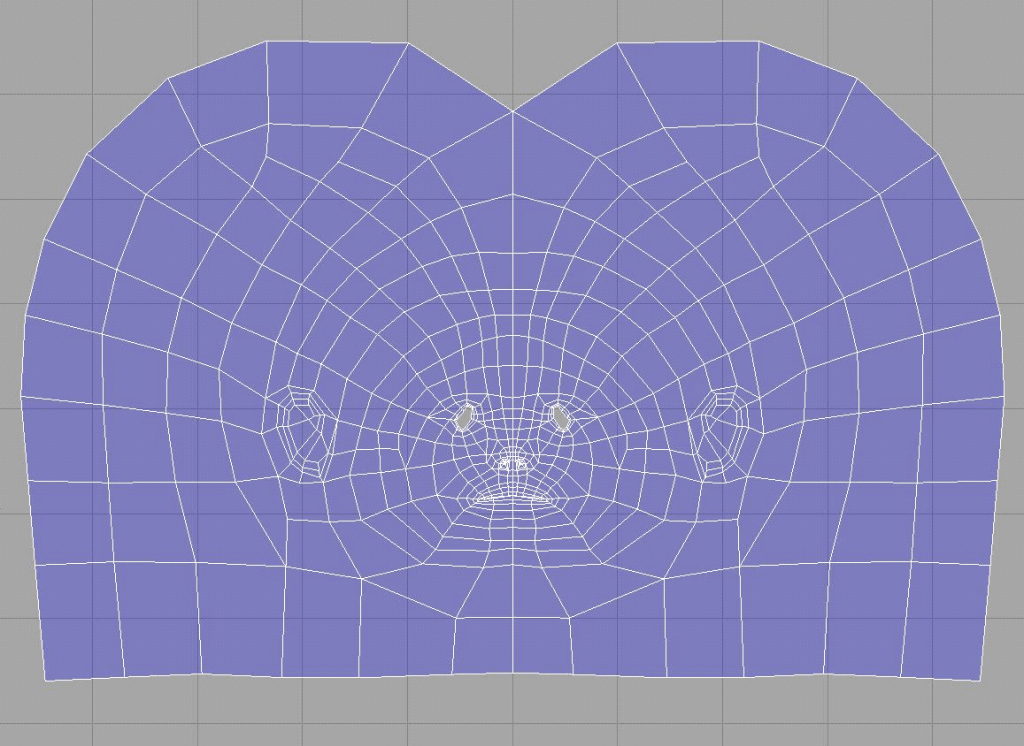
This is the process of UV Mapping in Maya.
I hope you find this blog very helpful. while working with UV Mapping. Let me know in comment if you have any questions regarding UV Mapping. I will reply you ASAP.
Got an Idea of Game Development? What are you still waiting for? Contact us now and see the Idea live soon. Our company has been named as one of the best Game Development Company in India.

I am 3D game graphics designer at TheAppGuruz. I like to work in 3D and learn new things.
Different Types of Topology
