Objective
Main objective of this blog post is to give you a basic idea of Pen tool.
Step 1 Getting Started Wtih Pen Tool
Working with paths
Create a new document. Select pen tool from toolbox located at the left side of screen.
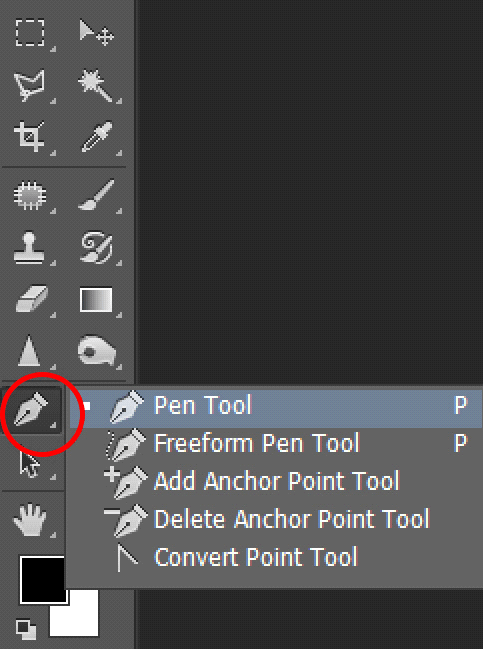
Here, you can see various options available at the top of the screen. Select Path from the drop down.

Next to that, draw a line by simply putting the points sequentially as shown in the image below.
1.1 Using Anchor Points in Path

Next, select Add Anchor Point Tool and add point at the middle of the line and drag it down as shown in the image below. This will create a curve from the straight line.
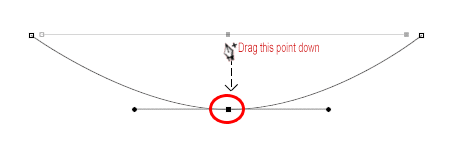
To delete the anchor point, select Delete Anchor Point Tool and click on the left anchor point as shown in the image below.
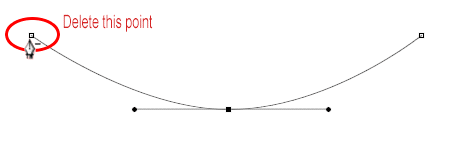
After deleting the point you'll have the path as shown in the image.

Now, hover on the midpoint and you will be able to see a small circle besides the pen tool that indicates the close path mode. Just click on the midpoint and drag it down as shown in below image.
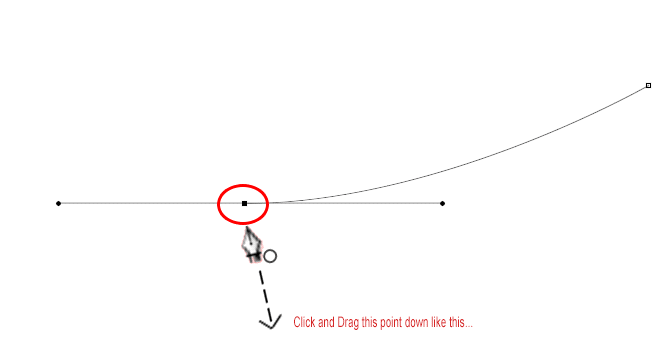
After this, you will have the path as shown below.
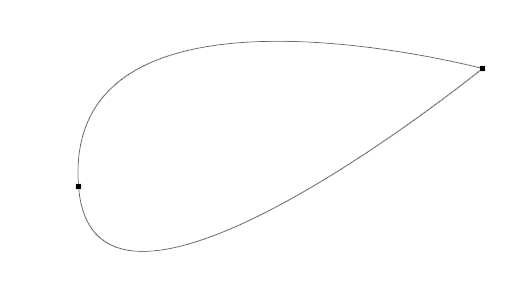
Now you can make a selection from this work path. To select this area, simply press Ctrl + Enter. Take a new layer and fill this selection as you want.

Using this, you can make different patterns or shape. Here I have made a flower as shown below.

Step 2 Convert Point Tool
Convert point tool edits the existing paths and shapes. It converts smooth points to corner points and corner points to smooth points.
Let's take an example. First, draw a circle and then select Convert Point Tool from the toolbox. Now, simply click on the anchor points one by one.
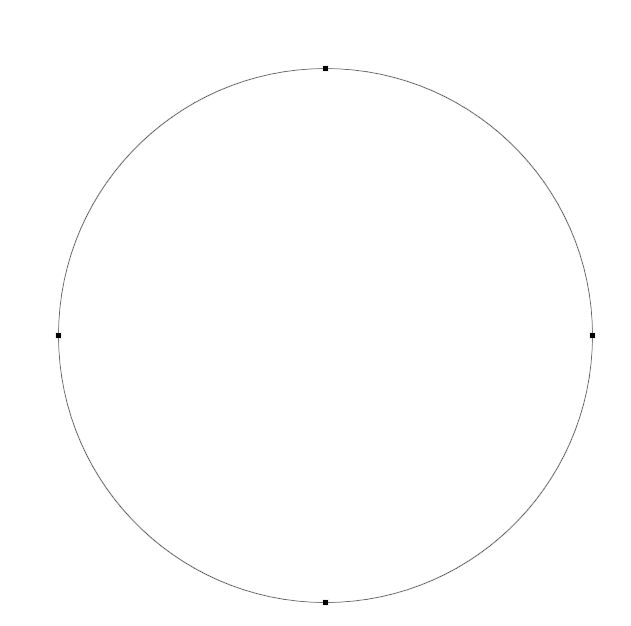
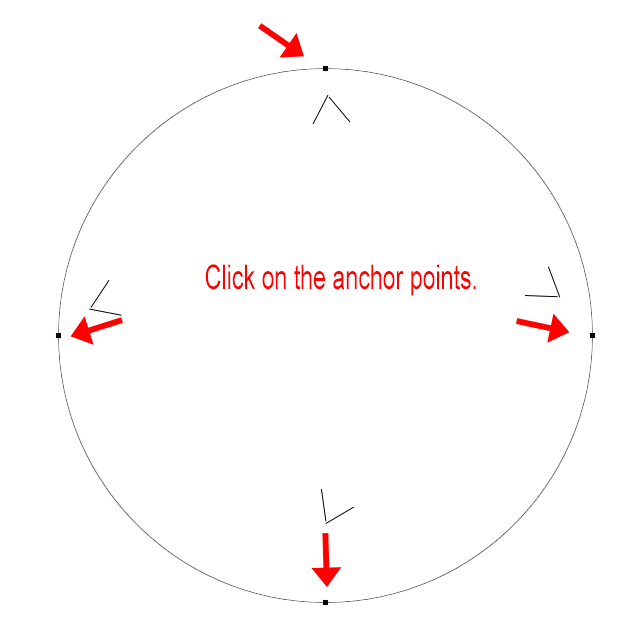
Now you will have the shape as shown below.
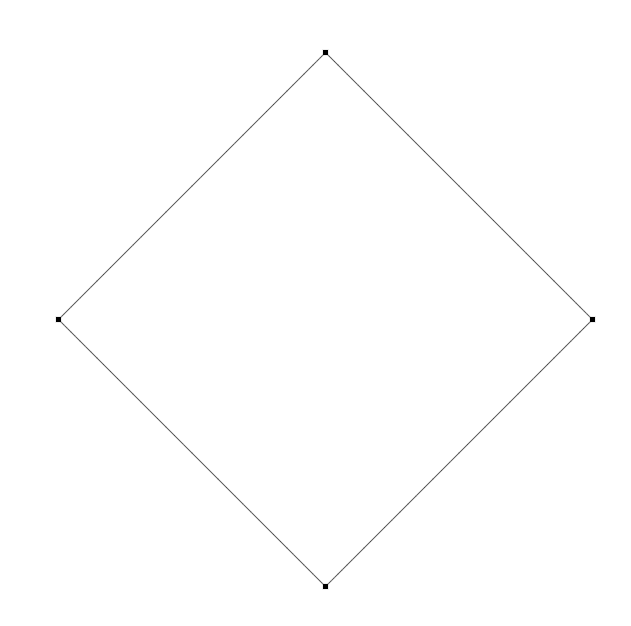
Step 3 Freeform Pen Tool
Freeform pen tool is just like a pencil on paper. Meaning, you can easily draw vector shape and paths. It will automatically add the anchor points.
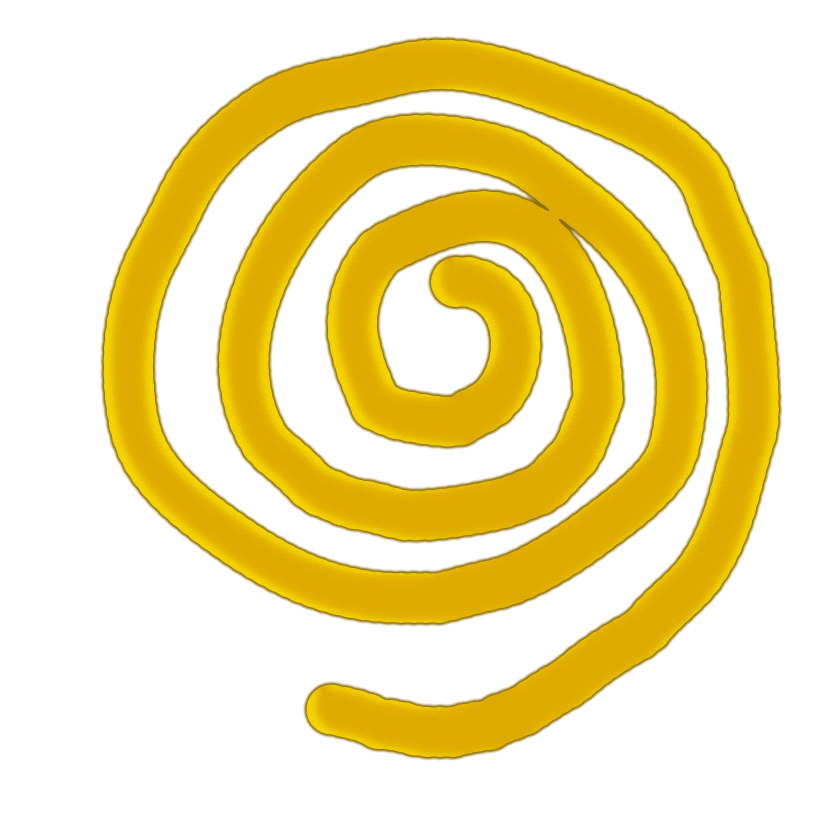
First select the Freeform Pen Tool from toolbox and draw a path as shown in below image.
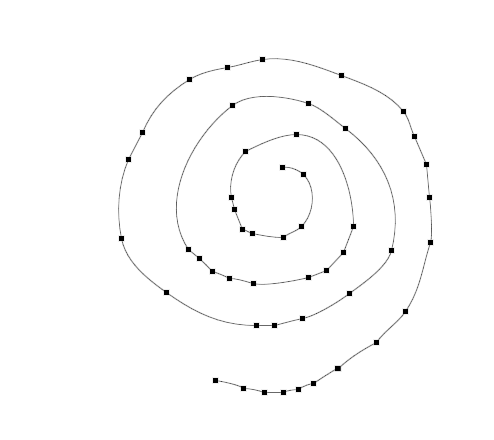
You can give stroke to this path by selecting the round brush with hard edges and set its size to 50.

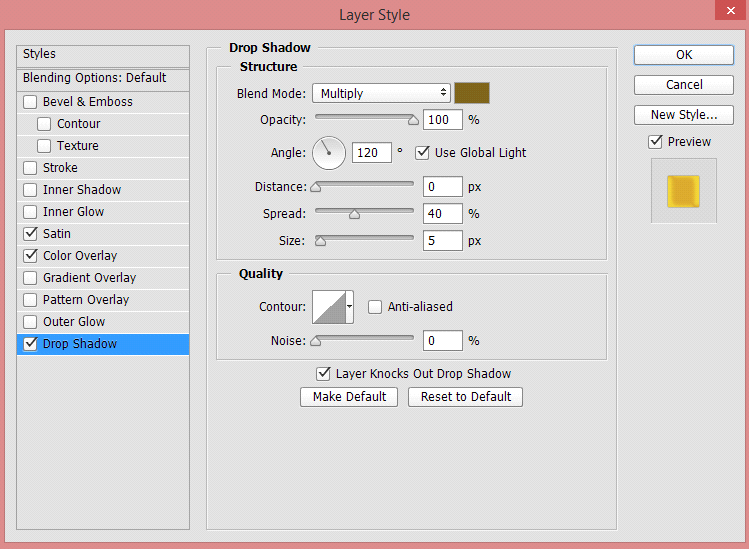
Now you can give various styles to it. Here I've used Satin, Color Overlay and Drop Shadow.
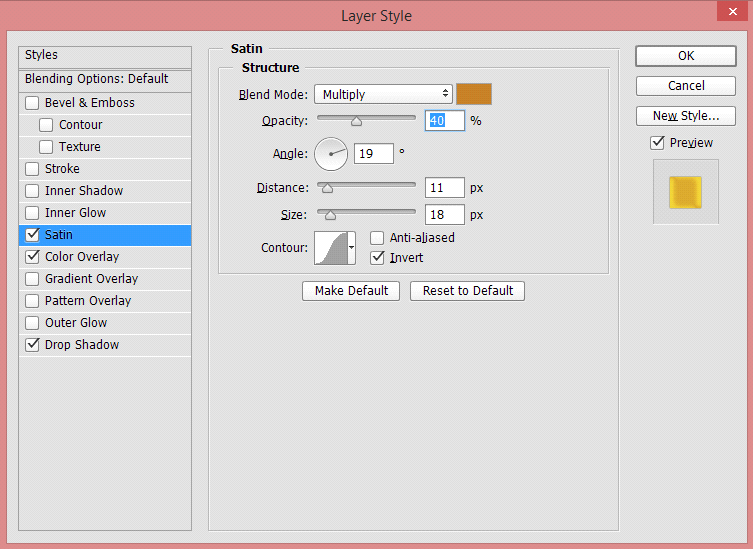
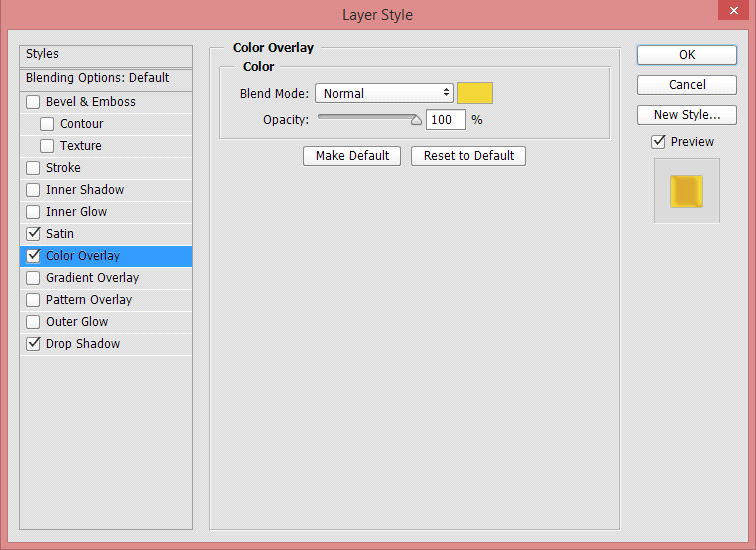
Finally, you'll have an image which looks like this.
Step 4 Making Custom Vector Shapes
For making custom shapes, select pen tool from the toolbox. Now, select a shape from the options available at the top of the screen.

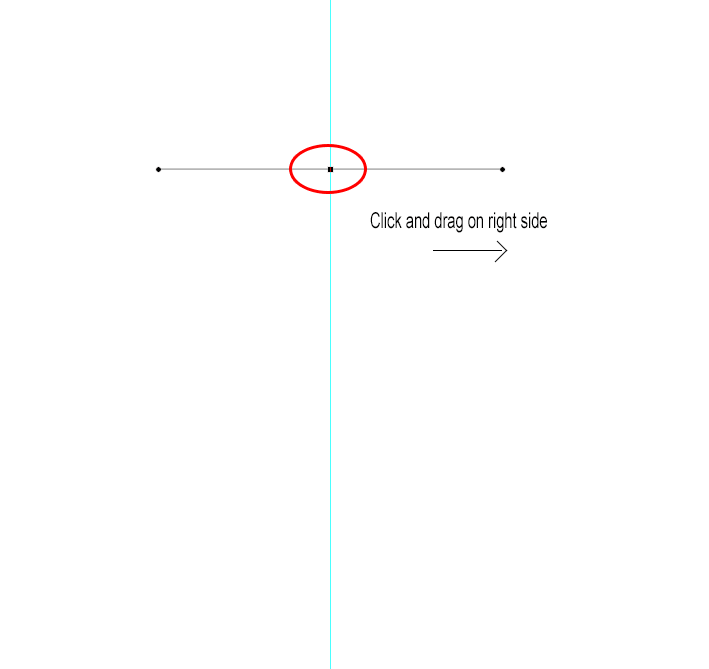
Now, whatever you'll make, it will be a vector i.e. you can scale as much as you want and it will not be pixilated. Here I’ve made a circle using a pen tool.To make a circle, take a guide vertically and place it in the center of the canvas. Put one point wherever you want on the guide. Hold Shift key and drag on left side as shown below.
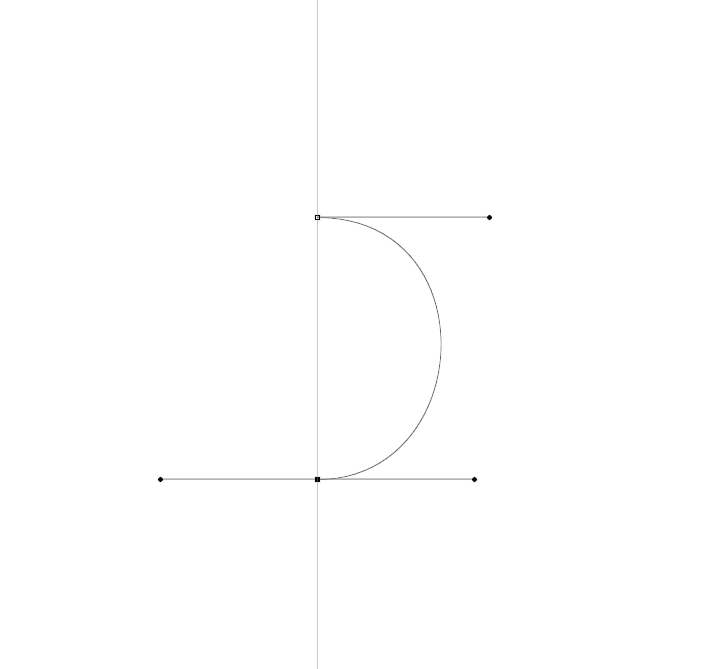
Now, put second point on the same line but at some distance. Press Shift key and drag it to the left side as shown below.
Now, simply click on the anchor point at the top and your circle is done.
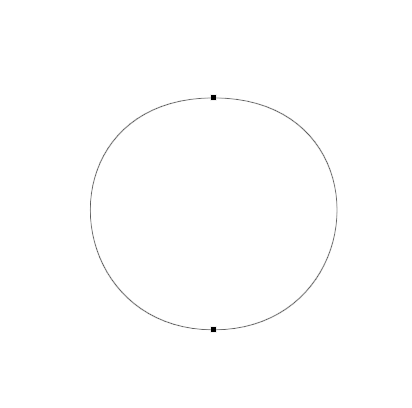
This will be the shape and you can scale it as you want without it getting pixilated.
I hope you find this blog very helpful while working with Pen tool in Photoshop. Let me know in comment if you have any questions regarding Photoshop. I will reply you ASAP.
Got an Idea of Game Development? What are you still waiting for? Contact us now and see the Idea live soon. Our company has been named as one of the best Game Development Company in India.

I am game graphics designer at TheAppGuruz. I am designing graphics for 2d Games. Here I am sharing information about 2d graphics designing tips and tricks.
Smooth Rotation of Object in UNITY
Share Extension in iOS 8
