Be patient..... we are fetching your source code.
- Create xCode Project for Swift UIImagePickerController
- Design User Interface
- Set the Delegate and Define Properties
- Button Choose Image Clicked
- Check sourceType is available or not
- Providing sourceType
- Present UIImagePickerController
- How to present according to device
- UIImagePickerController delegate methods
Objective
Main objective of this UIImagePickerController example is to give you an idea about User Interaction with Camera using UIImagePickerController in Swift.
Previously, we covered how to use UIImagePickerController in iOS. In this tutorial, we are going to learn How to pick an images from camera or photo library and saved into photo album?
The iOS library provides the class UIImagePickerController which provides easy user interface and allows you to choose pictures, movies from camera, saved photo album and photo library for use in your application. It handles user’s interaction and gives result to its delegate object. It is based on source type provided to it before it presents.
To understand the usage of UIImagePickerController, we build a simple demo app. The given example is very simple and easy to understand.
Step 1 Create xCode Project for Swift UIImagePickerController
First of all create new xCode Project name as UIImagePickerDemo which contain one UIViewController in Main.storyboard.
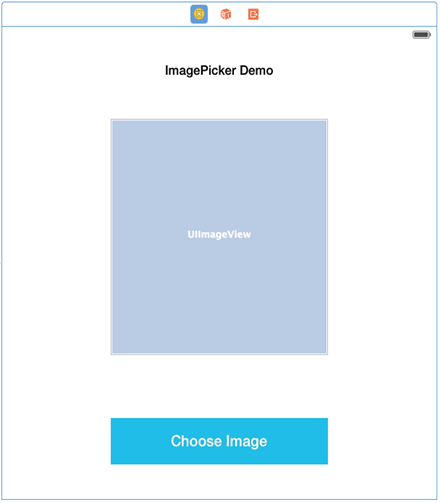
Step 2 Design User Interface
Design user interface of ViewController as per following figure. In iOS 8 now single storyboard is available for both iPhone and iPad, so after designing select view controller.
Now from Resolve Auto layout Issues button (third button from bottom right corner) select option named Reset to Suggested Constraints so constraints are automatically set as per suggestion by xCode for both iPhone and iPad.
Step 3 Set the Delegate and Define Properties
Define UIImagePickerControllerDelegate and UINavigationController in ViewController.swift file, also Declare UIImagePickerController object. Declare UIPopoverController object to open photo gallery in iPad in popover.
Declare choose image button and UIImageView property in ViewController.swift file.
import UIKit

class ViewController: UIViewController,UIAlertViewDelegate,UIImagePickerControllerDelegate,UINavigationControllerDelegate,UIPopoverControllerDelegate
{
    @IBOutlet weak var btnClickMe: UIButton!
    @IBOutlet weak var imageView: UIImageView!
    var picker:UIImagePickerController?=UIImagePickerController()
    var popover:UIPopoverController?=nil
     …………..
}
Step 4 Button Choose Image Clicked
In our Swift Image Picker tutorial, define following line of code of code in button choose Image’s action method which provide two option via Action sheet , that weather user want to capture image from camera or from saved photo album.
@IBAction func btnImagePickerClicked(sender: AnyObject)
    {
        let alert:UIAlertController=UIAlertController(title: "Choose Image", message: nil, preferredStyle: UIAlertControllerStyle.ActionSheet)

        let cameraAction = UIAlertAction(title: "Camera", style: UIAlertActionStyle.Default)
        {
            UIAlertAction in
            self.openCamera()

        }
        let gallaryAction = UIAlertAction(title: "Gallary", style: UIAlertActionStyle.Default)
        {
            UIAlertAction in
            self.openGallary()
        }
        let cancelAction = UIAlertAction(title: "Cancel", style: UIAlertActionStyle.Cancel)
        {
            UIAlertAction in

        }

        // Add the actions
        picker?.delegate = self
        alert.addAction(cameraAction)
        alert.addAction(gallaryAction)
        alert.addAction(cancelAction)
        // Present the controller
        if UIDevice.currentDevice().userInterfaceIdiom == .Phone
        {
            self.presentViewController(alert, animated: true, completion: nil)
        }
        else
        {
            popover=UIPopoverController(contentViewController: alert)
            popover!.presentPopoverFromRect(btnClickMe.frame, inView: self.view, permittedArrowDirections: UIPopoverArrowDirection.Any, animated: true)
        }
    }
Step 5 Check sourceType is available or not
First of all before use of UIImagePickerConroller you have to check weather device is capable of picking images or media from desired source. For that one class method is available named isSourceTypeAvailable
func openCamera()
    {
        if(UIImagePickerController .isSourceTypeAvailable(UIImagePickerControllerSourceType.Camera))
        {
            picker!.sourceType = UIImagePickerControllerSourceType.Camera
            self .presentViewController(picker, animated: true, completion: nil)
        }
}
Step 6 Providing sourceType
By providing source Type which you want to use to use for picking images or media. Basically three types of enumeration available for providing source type for UIImagePickerController.
UIImagePickerControllerSourceType.PhotoLibrary
UIImagePickerControllerSourceType.Camera
UIImagePickerControllerSourceType.SavedPhotosAlbum
Step 7 Present UIImagePickerController
Now present the user interface on iPhone or iPad.This task can be achieved by following method of currently activated view controller.
self .presentViewController(picker, animated: true, completion: nil)
Step 8 How to present according to device
When you specify sourceType as UIImagePickerControllerSourceType.PhotoLibrary or UIImagePickerControllerSourceType.SavedPhotosAlbum for iPad then you must have to present image picker using popover controller. Now if sourceType is UIImagePickerControllerSourceType.Camera then you have to present camera interface using full screen.
func openCamera()
    {
        if(UIImagePickerController .isSourceTypeAvailable(UIImagePickerControllerSourceType.Camera))
        {
            picker!.sourceType = UIImagePickerControllerSourceType.Camera
            self .presentViewController(picker, animated: true, completion: nil)
        }
        else
        {
            openGallary()
        }
    }
    func openGallary()
    {
        picker!.sourceType = UIImagePickerControllerSourceType.PhotoLibrary
        if UIDevice.currentDevice().userInterfaceIdiom == .Phone
        {
            self.presentViewController(picker, animated: true, completion: nil)
        }
        else
        {
            popover=UIPopoverController(contentViewController: picker)
            popover!.presentPopoverFromRect(btnClickMe.frame, inView: self.view, permittedArrowDirections: UIPopoverArrowDirection.Any, animated: true)
        }
    }
Step 9 UIImagePickerController delegate methods
After picking up newly captured, saved image cancels task or dismiss image picker following delegate methods are useful to perform various kind of operation according to requirement.
First set the delegate as per following:
class ViewController: UIViewController, UIImagePickerControllerDelegate,UINavigationControllerDelegate
Following are the delegate methods:
func imagePickerController(picker: UIImagePickerController, didFinishPickingMediaWithInfo info: [String : AnyObject])
    {
        picker .dismissViewControllerAnimated(true, completion: nil)
        imageView.image=info[UIImagePickerControllerOriginalImage] as? UIImage
    }


    func imagePickerControllerDidCancel(picker: UIImagePickerController)
    {
        print("picker cancel.")
    }
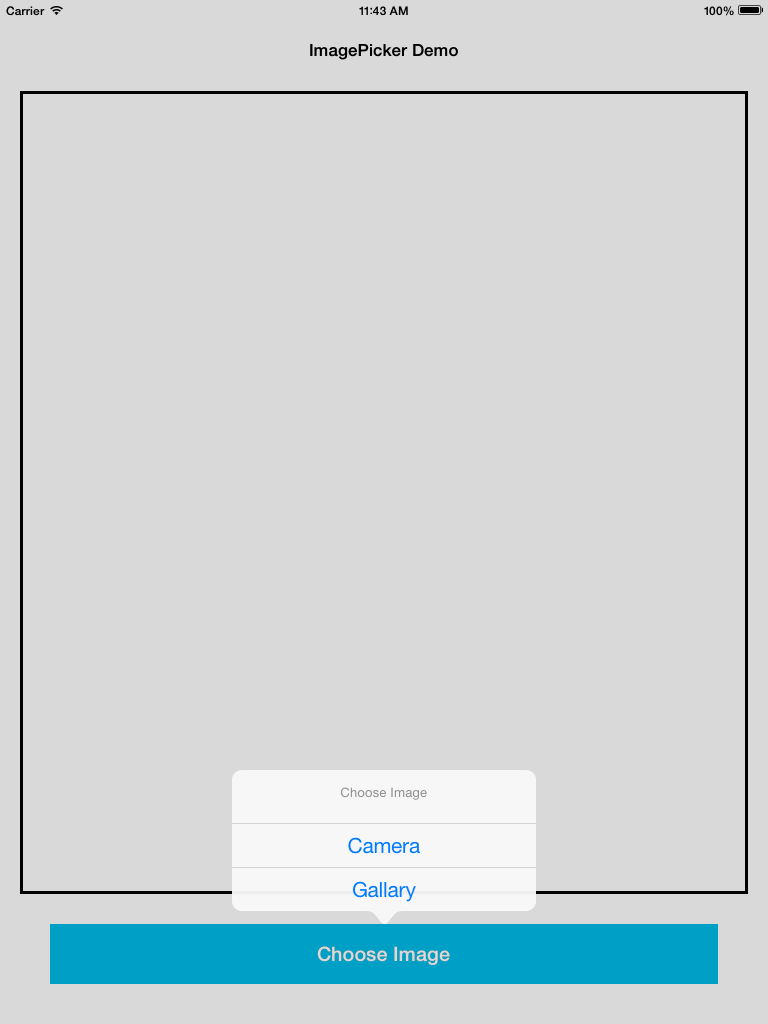
Screenshots for iPad:
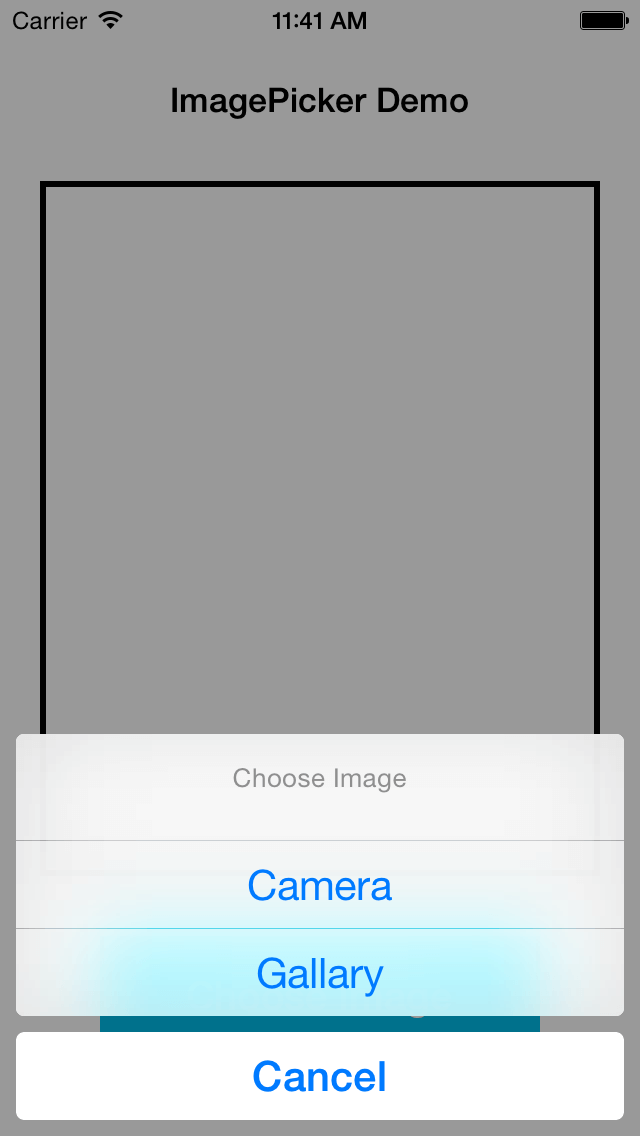
Screenshots for iPhone:
I hope you found this blog helpful while Interaction with Camera using UIImagePickerController. Let me know if you have any questions or concerns regarding Swift, please put a comment here and we will get back to you ASAP.
Got an Idea of iPhone App Development? What are you still waiting for? Contact us now and see the Idea live soon. Our company has been named as one of the best iPhone App Development Company in India.

I am iOS developer, as a developer my basic goal is continue to learn and improve my development skills , to make application more user friendly.
