Objective
The main objective of this post is to give you an idea about Clone Stamp Tool in Photoshop with a simple example.
Step 1 Getting Start With Clone Stamp Tool
In Photoshop CC Clone Stamp tool (S) uses pixels from one area of an image to replace the pixels in another area of an image. Using this tool, we cannot only remove unwanted objects from our images, but can also fill in missing areas of an image. Here, in this simple example we are going to work with this tool.
Step 2 Add Image For Cloning
Add an Image to Photoshop.

Now we are going to replace the unwanted cloud from sky.
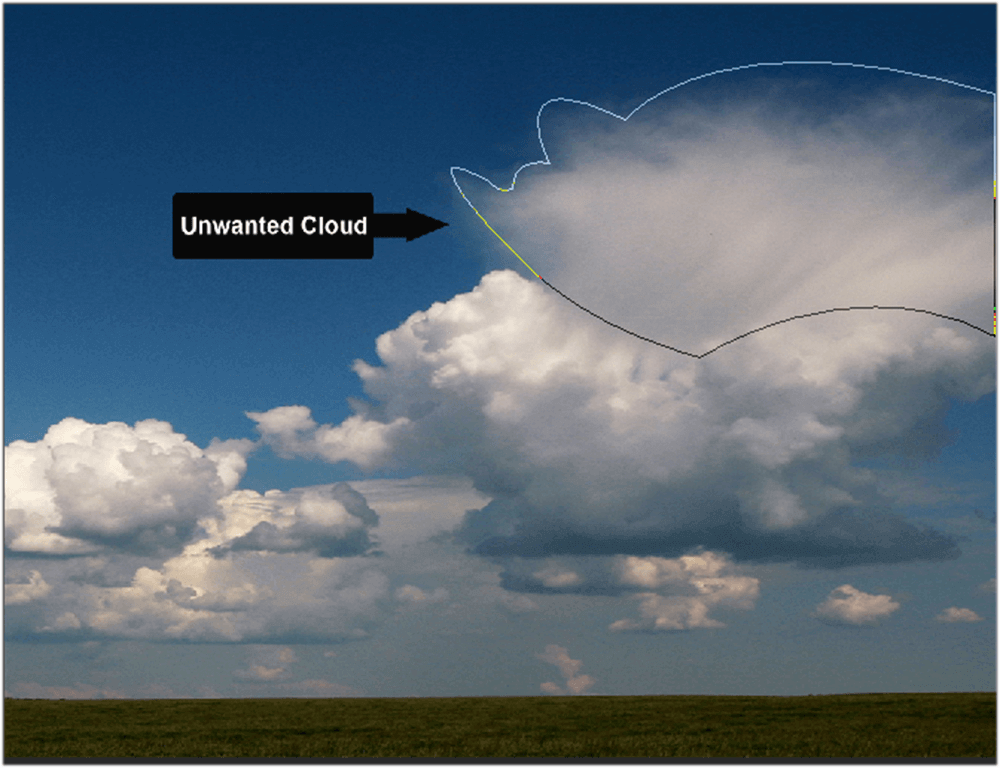
Select Clone Stamp Tool(S) from the toolbox.

Step 3 Set The Brush Values
In the tool options bar, click on the brush pop up palette and select the required brush size. For this example, I have set the brush diameter to 100 pixels and the hardness to 0%. It’s a good idea to use a soft edge brush, otherwise you will see a very hard line where the cloning takes place.
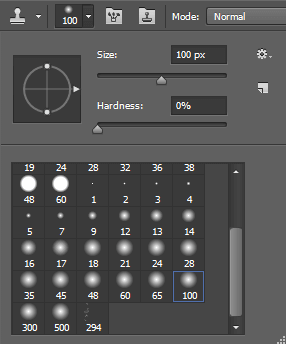
Make sure that the aligned option is selected.

Now, we need to set our sample points in the area which we want to duplicate and clone to another area. When we select aligned in the option bar, we can reuse the most current sampling point no matter how often we stop and resume painting.
Note:- When Aligned is deselected, we’ll reuse the same sampled pixels every time we paint.
Move the Clone Stamp tool pointer on the sky and take a sample of the image. Hold down Alt key and the pointer appears as target. Click once to set that point as our sampling point. Then release the Alt key.
Step 4 Set The Sample Point For Cloning Area
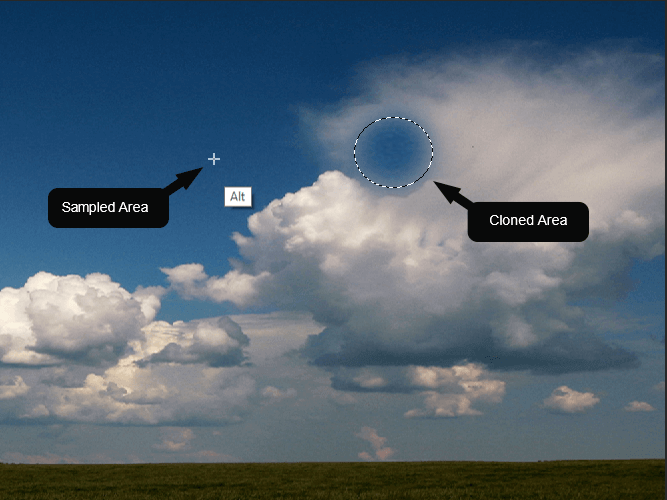
Click and drag the Clone Stamp tool over the Cloud. As we drag the cloud it will start to disappear as it is replaced with the pixels we are sampling from another part of the image.
The cross pointer that appears to the right of the Clone Stamp tool indicates the source area of the image that we are replicating as we drag.
Step 5 Apply Clone Stamp on Image
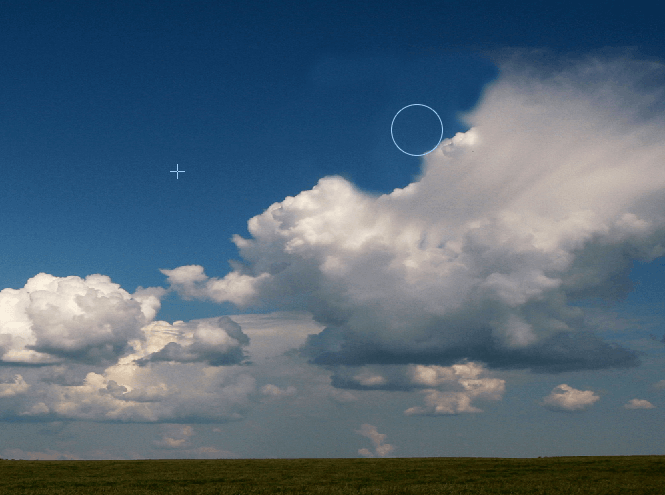
We can reset our sample area anytime by holding down the Alt key and clicking once. We need to do this several times to completely remove the cloud, and resize our brush as we go.
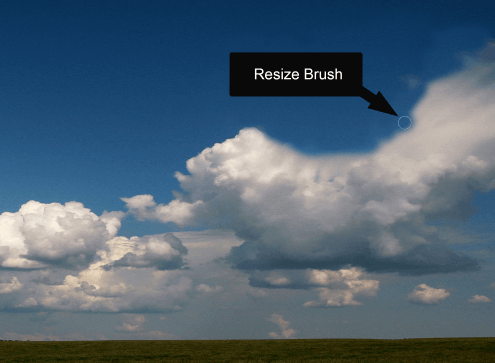
Continue cloning until you have removed all the unwanted cloud from the image.
Step 6 Final Output
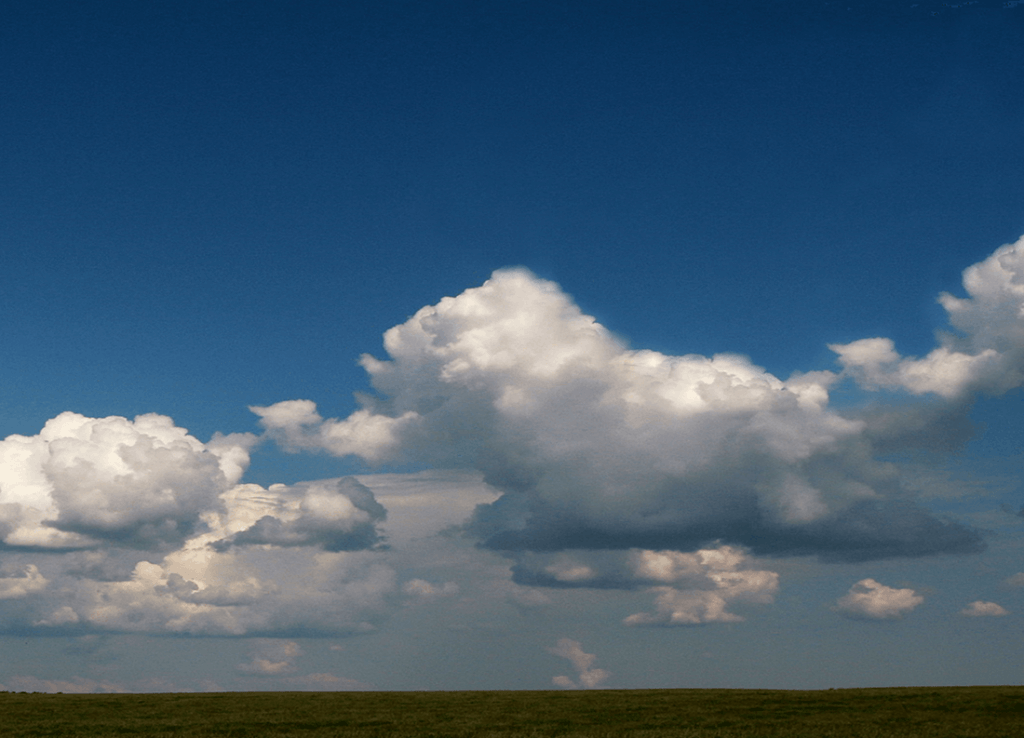
I hope you find this blog is very helpful while working with Clone Stamp Tool in Photoshop. Let me know in comment if you have any question regarding Photoshop. I will reply you ASAP.
Got an Idea of Game Development? What are you still waiting for? Contact us now and see the Idea live soon. Our company has been named as one of the best Game Development Company in India.

Hi, I am 2D game graphics designer at TheAppGuruz. I love to share 2d graphics tips and tricks for making graphics looks awesome. Here I am sharing some helpful tips with you.
Managers Using Singleton
