Objective
Main objective of this blog post is to give you an idea about how to create a Game Icon in Photoshop.
Step 1 Final Output
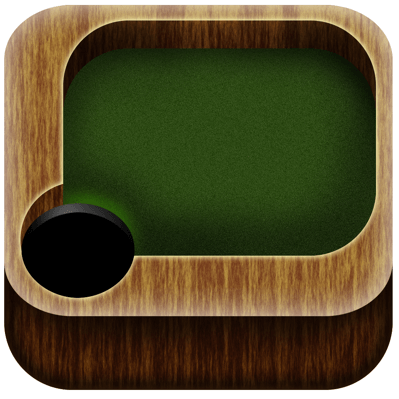
You will get final output:
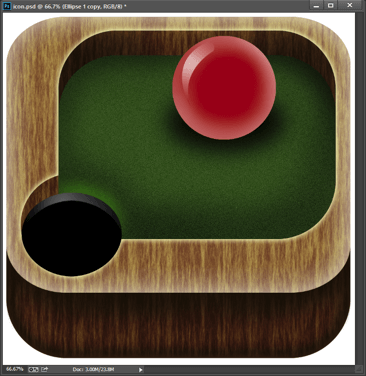
Game icon is a small graphical symbol that gives the overview of the game. In other words it represents your game play and attracts consumers. By the end of this tutorial you will be able to create a 3D looking icon for a pool game.
Step 2 Create a New Document
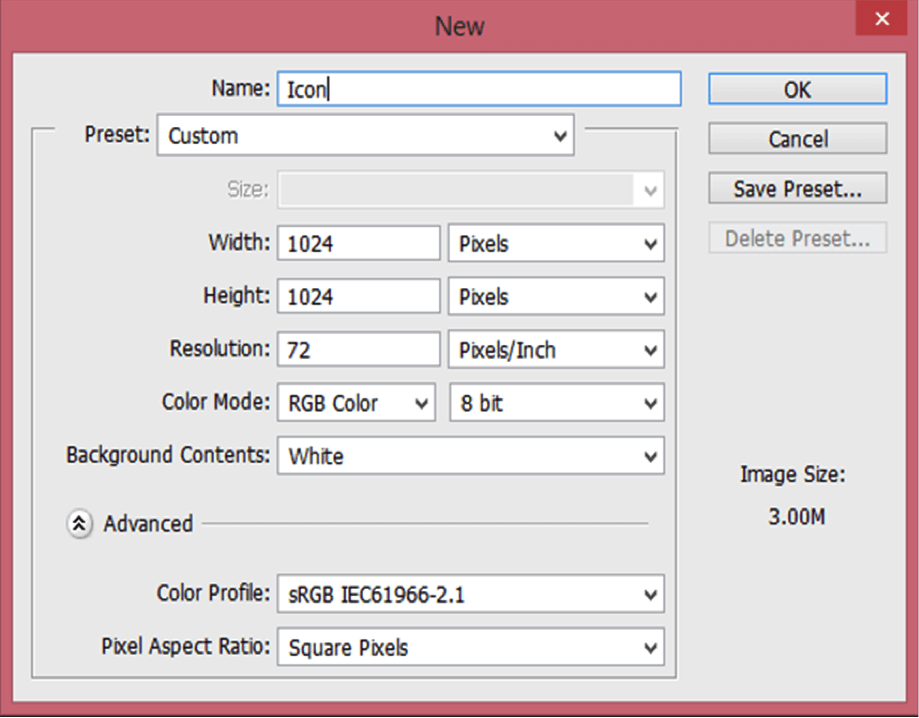
Create a new document with (1024*1024) pixels size.
This is the typical size for an icon.
Step 3 Create a Base Shape Of The Icon
From the toolbar, select the rounded rectangle tool (b) and draw a square while holding the shift key (Radius 170px) and fill it with (#b67032).
![]()
3.1 Apply Filter For Wooden Effect
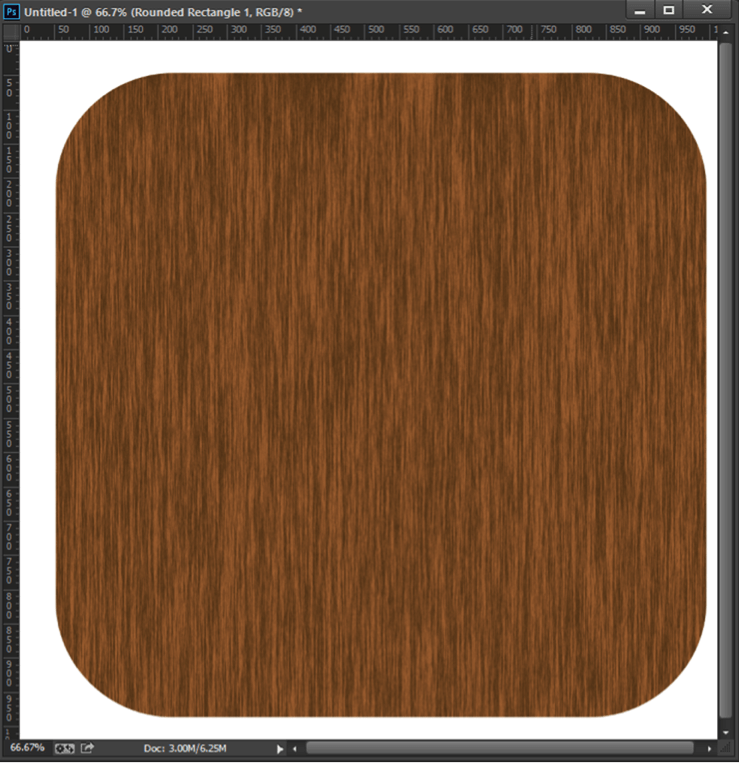
Now, to give the wooden effect in this shape you need to rasterize it first (You cannot apply filters on shapes).
Simply right click on the shape layer and select rasterize.
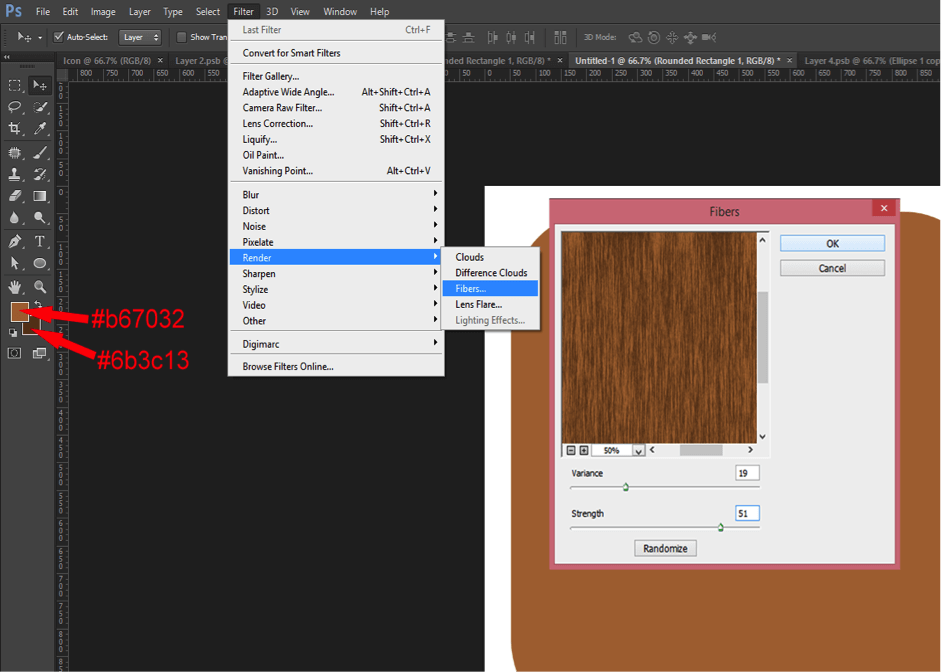
In the toolbar menu, click on (Filter>Render>Fibers), make sure you set the foreground colour with (#b67032) and the background colour with (#6b3c13). Then, set fibers properties to (Variance 19, Strength 51).
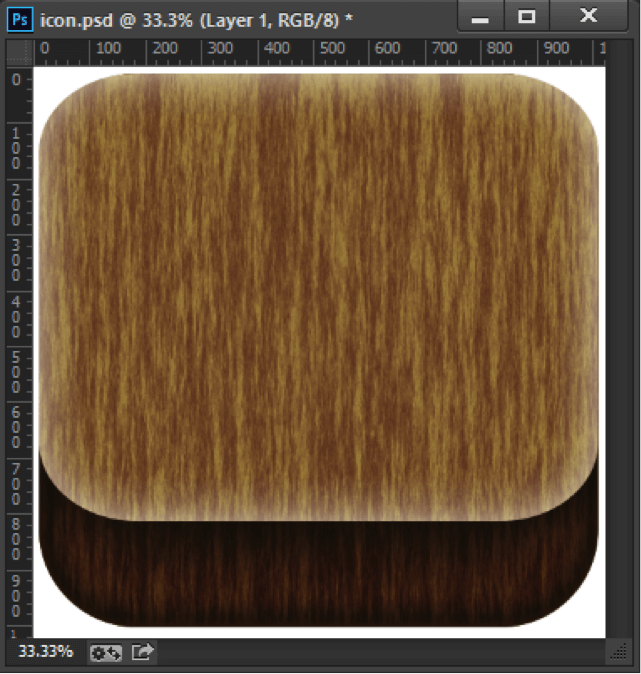
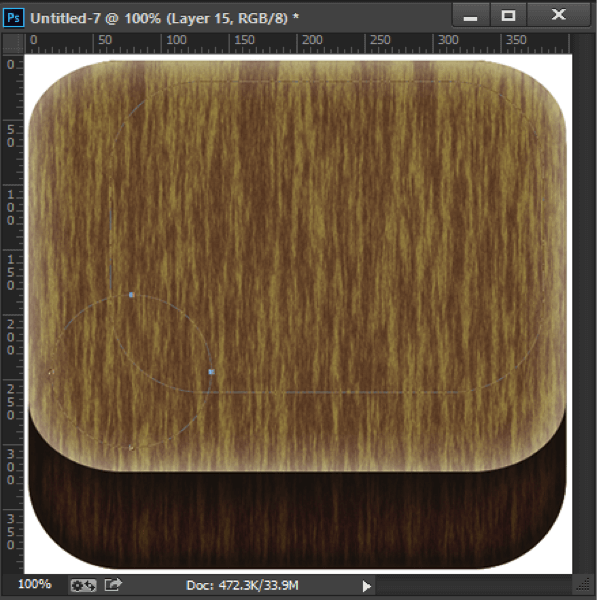
Draw another rounded rectangle using the same radius (u). Draw it shorter in height than the first one (about 6 pixels) from the bottom.
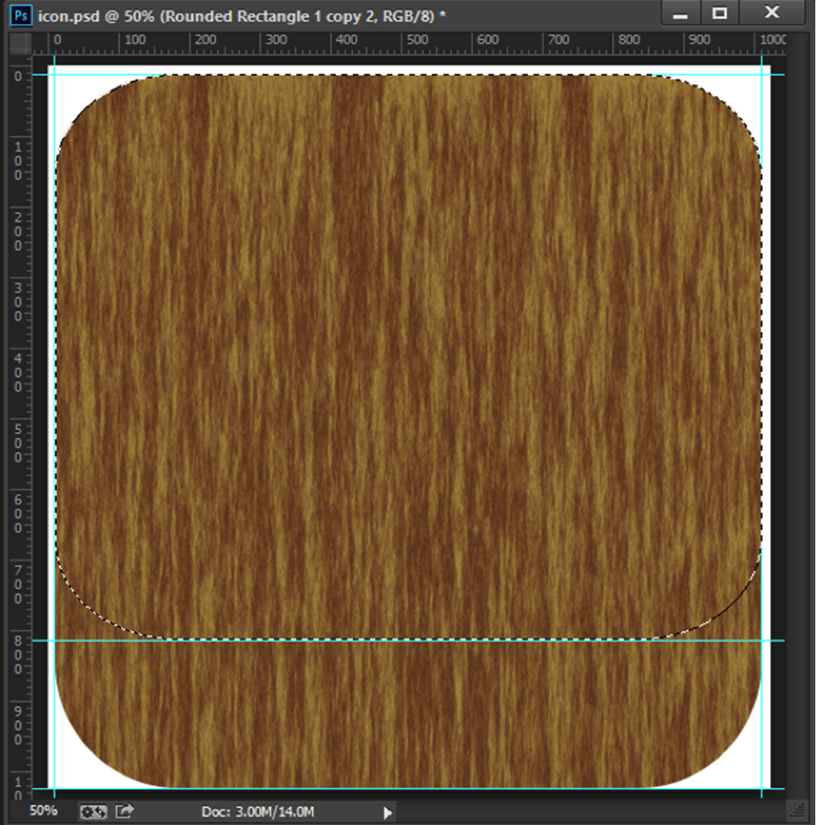
Select the shape (alt + enter) and copy the layer named ‘wooden’ to the layer named ‘wooden copy’.
Now we have two different shapes.
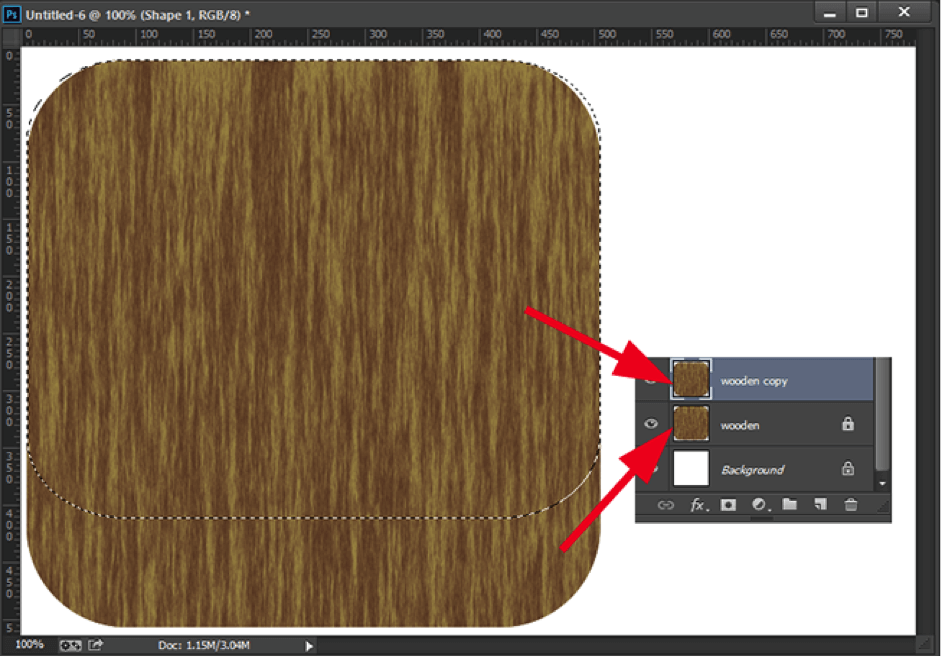
3.2 Make Image Adjustment Using Curves
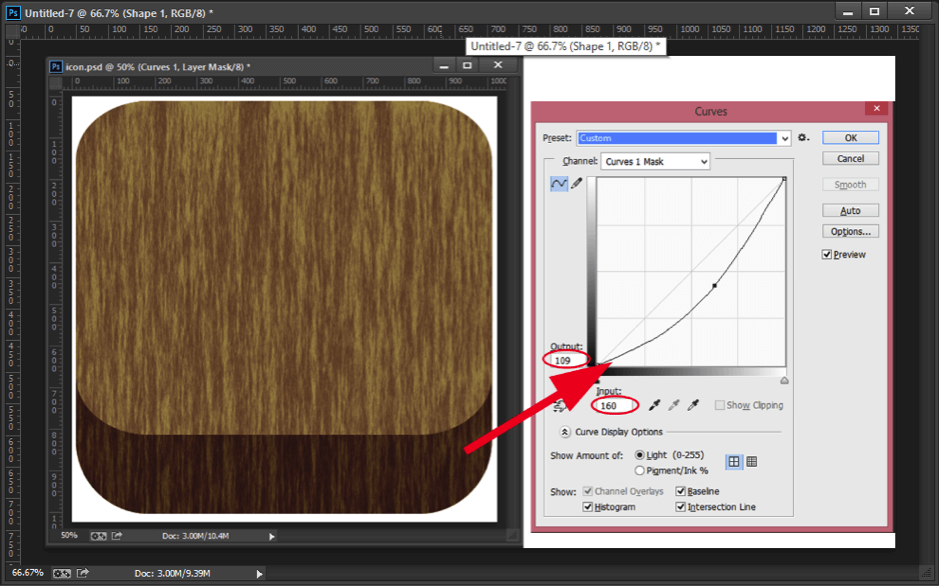
Go to the menu (Image>Adjustment>Curves), use Curves adjustment (ctrl + m) to make the wooden layer darker than the bottom layer (Curves: Input 160, Output 109).
3.3 Add Depth Using Layer Style
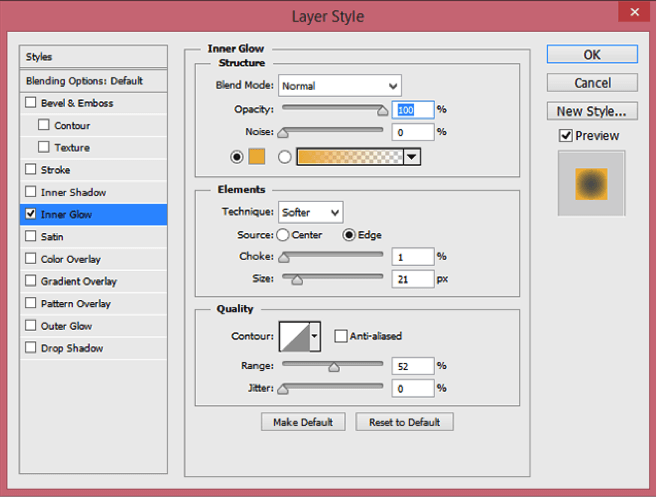
Double click on the ‘wooden copy’ named layer from the layer palette and apply inner shadow effect (#000000) and inner glow effect (#fece3c).
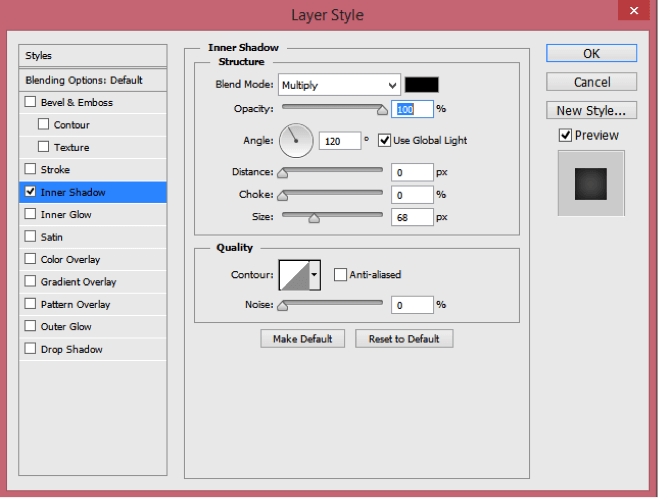
Select the ‘wooden’ named layer and add the required depth to the layer using darker colour with the Brush Tool (B).
Keep the opacity of brush around 20%.
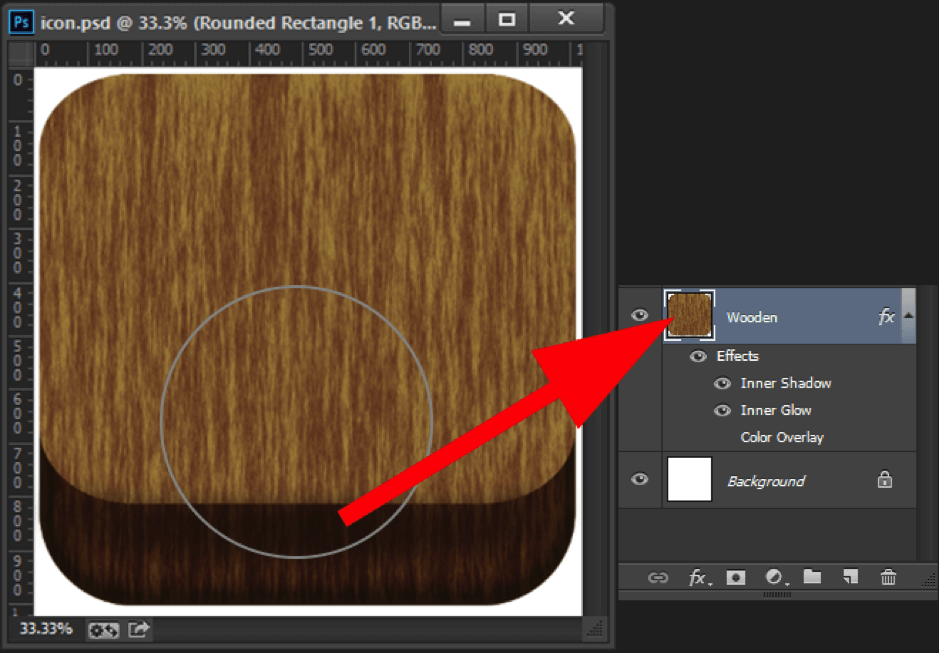
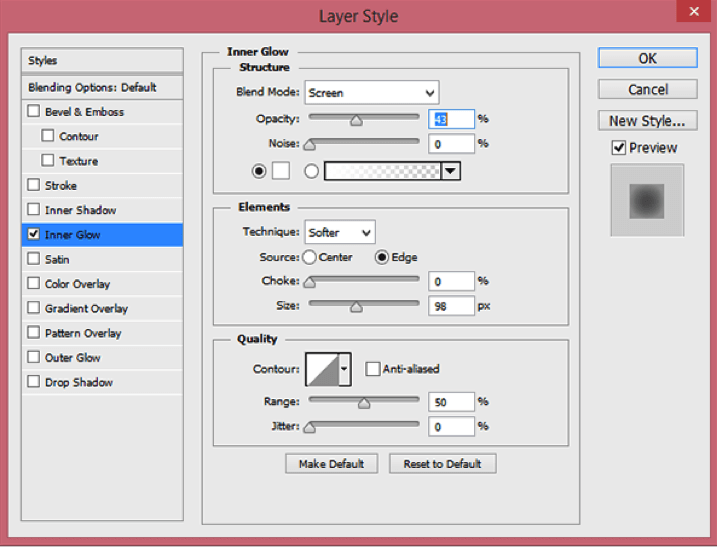
Double click on the ‘wooden copy’ named layer in the layer palettes and go to the layer style and apply inner glow style (#ffffff). You can adjust it according to your preferences.
Step 4 Create Another Shape for Top of the Icon
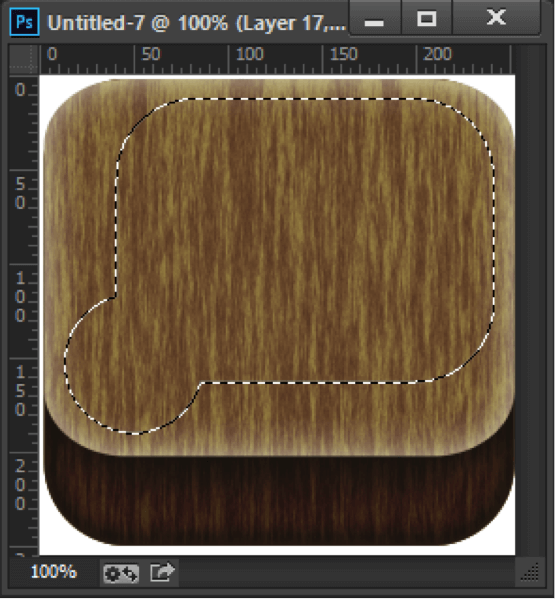
Create a new layer and select the Rounded Rectangle Tool (u) and Ellipse Tool to create two new shapes.
The round rectangle shape is the base of the table and ellipse is for the hole. After creating this shapes, merge both the shapes (ctrl + enter).
Select the shape (alt + enter), then copy the layer named ‘rounded rectangle 1 copy’ (ctrl+c then ctrl+v) into Layer 3.
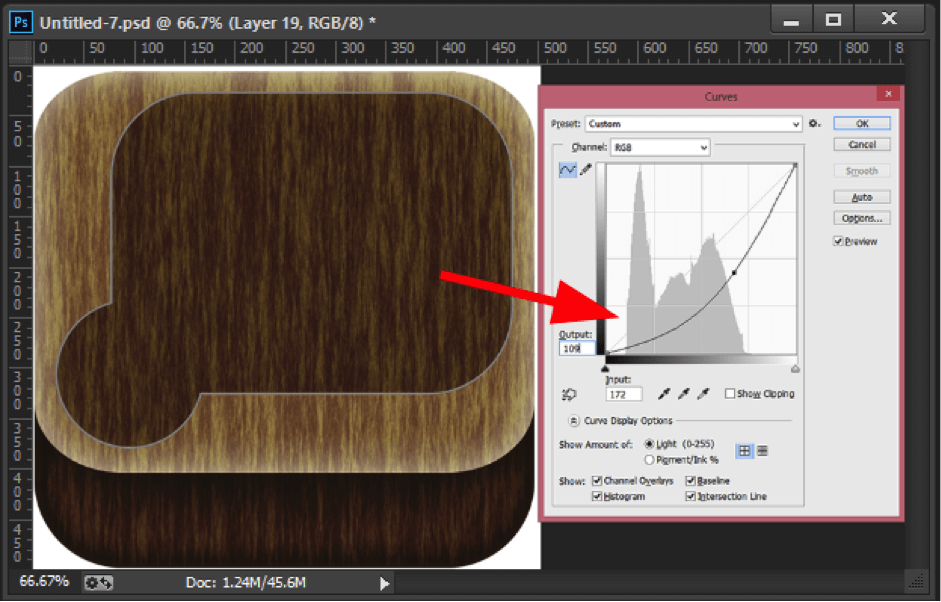
Go to the menu (image>adjustment>curves) and adjust output 109 and input 172.
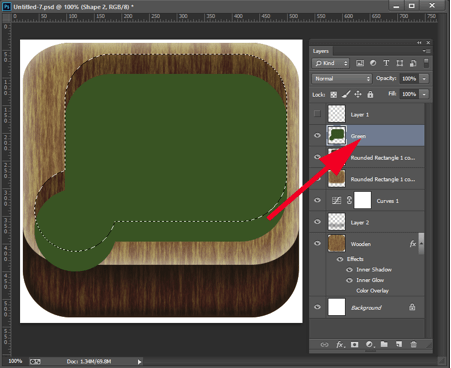
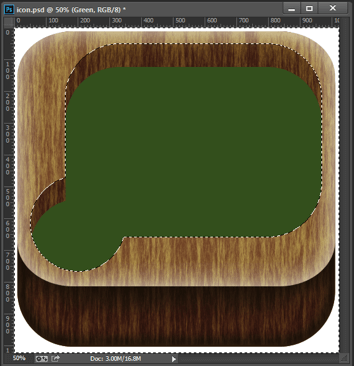
Create another duplicate layer from the ‘rounded rectangle 1 copy’ named layer (ctrl+j) and fill it (alt + delete) with green colour (#2d4914). Then move it slightly down.
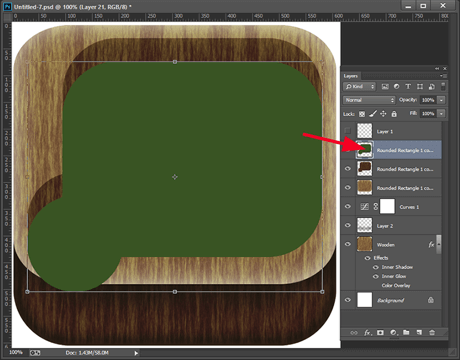
Now, I want to delete the green area that touches outside the third layer. Select ‘rounded rectangle 1 copy’ named layer by holding the ctrl button and clicking on that layer in Layers Palette.
Click on the Green Shape Layer in the Layers Palette, but make sure that the selection you have made is from the ‘rounded rectangle 1 copy’ layer. Then delete the Green Shaped Layer.
Step 5 Create A Pool Table Hole
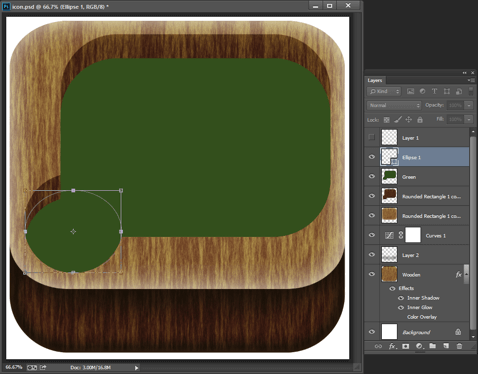
From the toolbar, select ellipse tool and create a circle for the pool table hole and fill it with black colour (#000000).
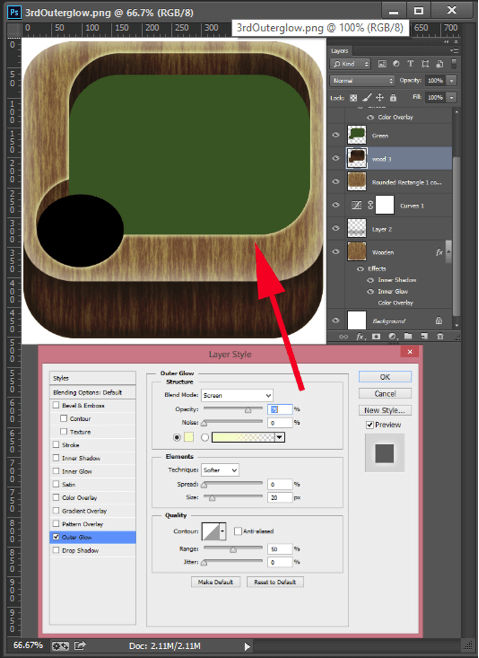
Go to the layer named ‘wood 3’ and set the outer glow effect (#ffffbe) to this layer.
Add Some More depth using the brush
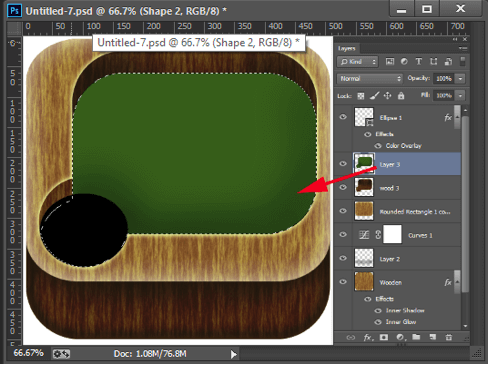
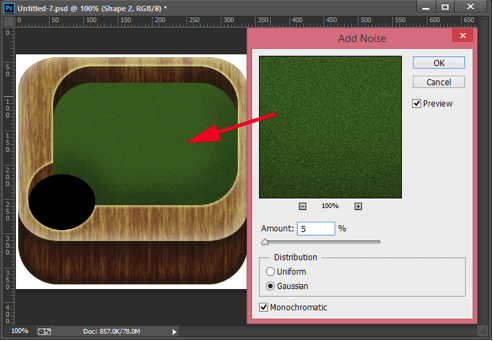
Now, add “Noise” to the Green shape (Filter > Noise > Add Noise).
I’ve set it to 5% Noise. Also select Gaussian and Monochromatic properties.
5.1 Add Highlights and Details
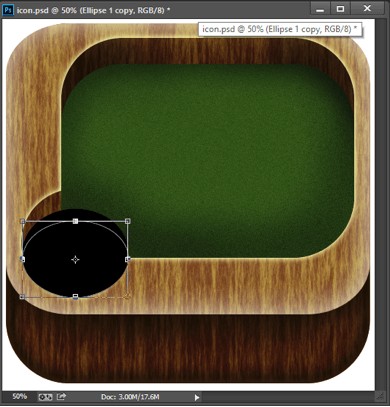
Create another black circle on top of the pool table hole and highlight the back pool table hole using the brush tool (b) and add the noise Filter.
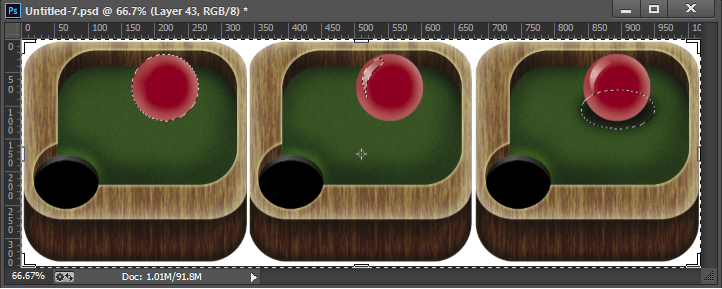
Step 6 Draw a Ball
1. Create a circle using Marquee Tool (m) and fill it with (#aa042b) colour.
Using brush tool (b) give a little lighting (#ffffff) around the ball border.
2. Create a shape that specifies the lighting source.
3. Now, from the toolbar, select marquee tool and draw a circle and fill it with (#000000) colour for the shadow effect on ball.
4. Then after, go to the menu (Filter>Blur>Gaussian Blur) and blur the black circle as required. I have blurred this circle for 30.5px so that it looks like a ball shadow.
I hope you enjoyed and learned something new about the game icon. If you have any question or query regarding this blog you can post your questions in comment. Thank you for reading this blog. Be connected for more amazing graphic blogs. Thank you!
Got an Idea of Game Development? What are you still waiting for? Contact us now and see the Idea live soon. Our company has been named as one of the best Game Development Company in India.

Hi, I am 2D game graphics designer at TheAppGuruz. I love to share 2d graphics tips and tricks for making graphics looks awesome. Here I am sharing some helpful tips with you.
Pixel Art Animation
