- Final Output
- About pixel animations
- Take a look at character
- Layers and background arrangement
- Animating stars
- Animating the character
- Add some more detail for animation
- Align all layers vertically
- Positioning the layers
- Put all layers in sequence
- Set frame time in timeline
- Hide all layers and show some of it as needed sequentially
- Save animation for web
Objective
This blog post will help you to know the things required to get animated. This blog will be helpful for animation beginners, so lets start with it.
Step 1 Final Output
![]()
Step 2 About Pixel Animation
Remember, we are not creating any animation we are just following the steps that the things require to get animated. Everything around us follows some rules for animation depending upon its weight, flexibility, speed and environment around it. So, we just need to create the required images for each necessary step. Everything in universe is given animation by God; we just need to observe it and put it in our work. For better understanding of animation, I suggest you to take a reference of Disney’s 12 Basic principles of animation.
Before going ahead with the pixel art animation, I recommend you to read my previous blogs on creating pixel art and adding details in pixel art. Here I will use my pre created character of witch to give an idea for pixel art animation.
If you are working with pixels it means that you’re dealing with perfection. As every detail in your art should be given manually, every animation step will be created as a new frame and every frame will have its own detailing.
Pixel art animation works on classic frame by frame animation. Every step is a new manually created frame. I will animate my character very simply without the time consuming frame by frame animations.
Take a look at my character which I am going to animate. I have created this character in Adobe Photoshop.
Step 3 Take Look At Character
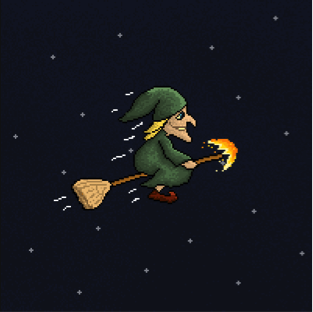
Step 4 Layers and Background Arrangement
I have three Layers in my photoshop document's which are,
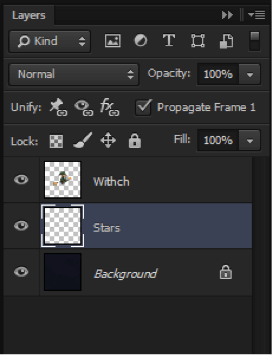
Create character that you want to animate. Merge all layers of character in a single layer.
Put appropriate background and drop character on it.
Step 5 Animating Stars
Create stars for background. Keep it in a new layer.
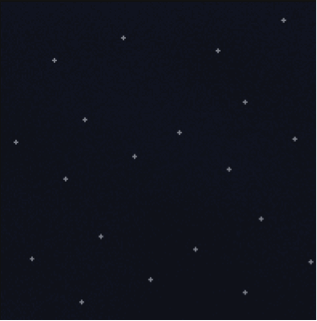
Create another Layer for star to animate. That would look like:
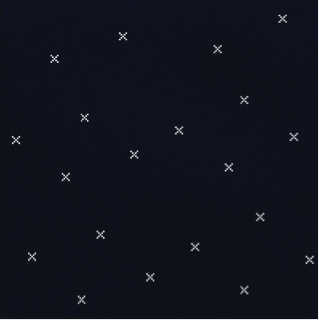
Draw the star shapes exactly on the first layer stars so that it looks shiny while animating.
Step 6 Animating The Character
Put your character in the background and get the results as shown below:
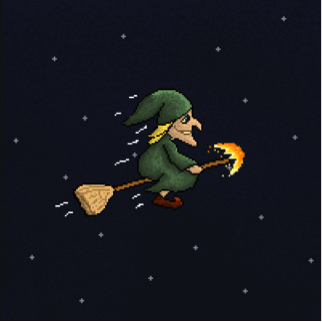
Now, I suggest you to turn off the star layers for clear vision of character. Generate a copy of this character layer.
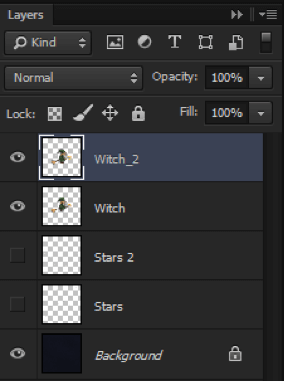
(NOTE: Images put in step 7 are for your reference, you don’t need to move copied layer up or down. Let it be on the same align of previous frame so that you can draw a new frame depending on the previous one. Use opacity option to differentiate both the layers.)
Step 7 Add Some More Detail For Animation
Make a change with marquee, eraser and pencil tool in layer 2 where you want to see the animation in your character.
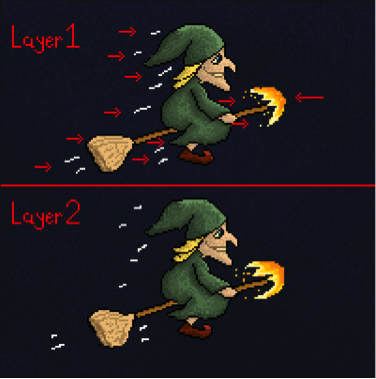
Here, check out the RED ARROW where I’ve made changes to my character. Give a little motion to hat, gown, hair and broom. Check out both the images for reference.
The white lines behind the character show air. Put the air white lines a little bit behind in second layer so that it looks as if it’s going back side.
Do the same for the fire flames. And also make a change into the main flame. Remember; do not make too many changes in next frame rather change it near the first one.
Let’s take a copy of second layer to animate more.
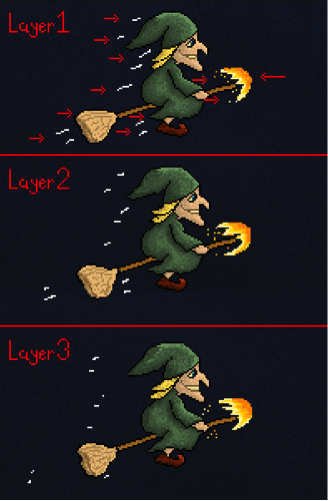
Follow step 7 for layer 3 and try to get layer 3 as mine.
Now, we are almost done with animation. To create loop able animation you always need to draw the last frame near the first one. Here we have layer 2 which is too close to layer 1, so we will take a copy of layer 2 and use it as our layer 4.
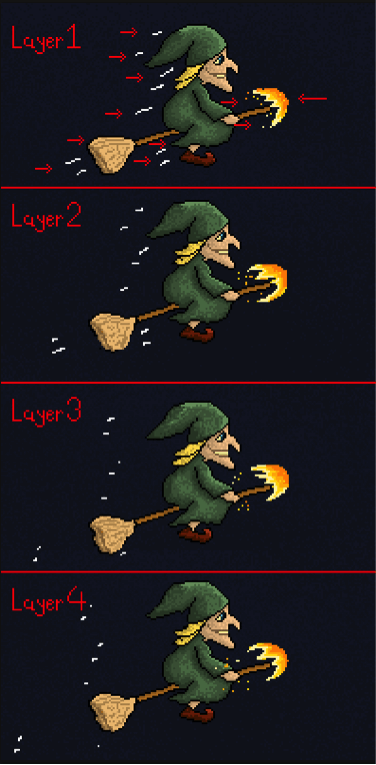
We will use layer 2 as layer 4 to come back to layer 1, but remember air and fire flames will not be the same as in layer 2. You must keep giving it a way to the back side.
See the full animation; here air and flames are reduced in size as it descends. Follow the same for appropriate result. It’s a way in which air and flame are animated.
Turn on all the layers and your Photoshop doc should look like this.
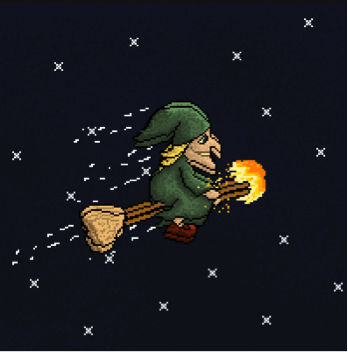
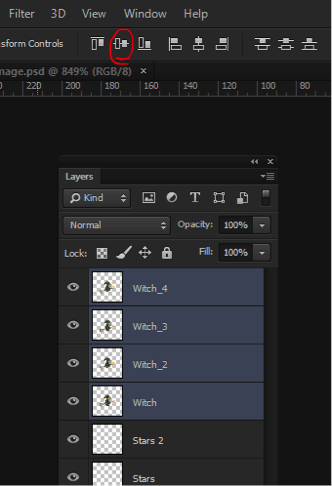
Step 8 Align All Layers Vertically
For this, set Vertical Align Center by selecting all the four layers of the character.
Step 9 Position The Layers
Now take animation layer 2 and 4 two pixels down then layer 1 and layer 3.
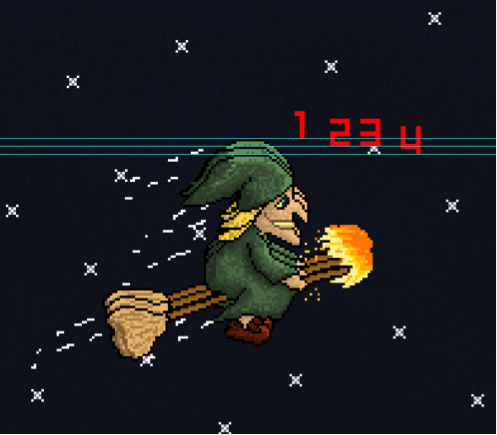
You can also change a little in detailing of your every frame as I do, I have changed clothes, hat and face shadow in every layer, but remember to reach back to the first frame from where you started. See this
Step 10 Put all layers in Sequence
We are done. Let’s just put all the layers in sequence to make the animation live. For that go to Windows menu and select Timeline.
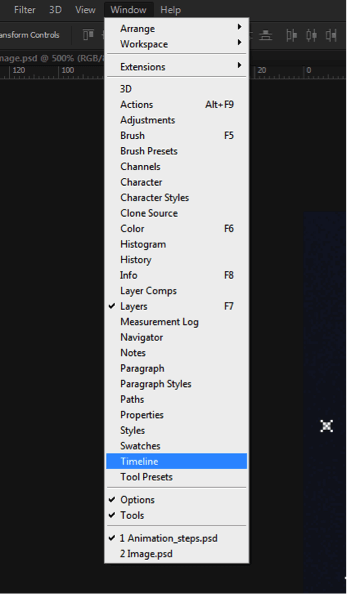
Photoshop will popup time line in your document.
Step 11 Set Frame Time In Timeline
Set frame time to 0.1 in timeline by clicking the down side of the frame in timeline.
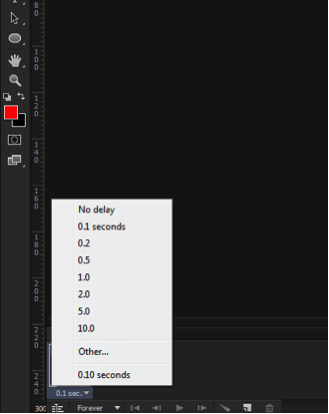
Step 12 Hide all Layers and Show Of It as needed Sequentially
Now turn of all the layers except the background.
Next, turn on stars layer 1 and witch_1 layer for frame 1.
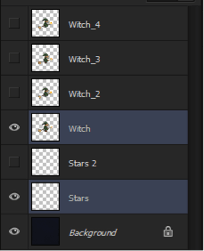
Create new frame by clicking on create option in the time line. And turn on stars 1 and witch_2 layer for it.
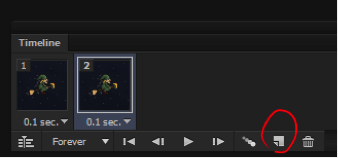
Again create new frame by clicking create option in time line. And turn on stars 2 and witch_3 layer for it.
Again create new frame, and turn on stars_2 and witch_4 layer for it. After it your time line will look like3
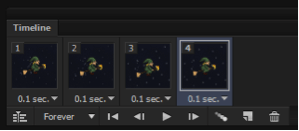
It’s done!! Click on the play icon in the timeline and you can see your animation.
Step 13 Save Animation For Web
Go to file menu -> save for web and select red marked option from dropdown list and press save button to save.
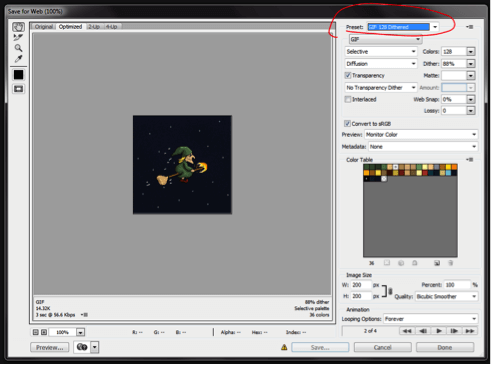
You can create more pixel animations using the same method that we have used here.You can save either GIF of PNG’s sequence or any other format.
I hope you enjoyed and learned something new about the pixel art. If you have any question or query post your questions in comment. Thank you for reading this blog. Be connected for more amazing pixel and 2D graphics blogs. Thank you!
Got an Idea of Game Development? What are you still waiting for? Contact us now and see the Idea live soon. Our company has been named as one of the best Game Development Company in India.

I am 2D game graphics designer at TheAppGuruz, I designed graphics for many 2D games. Here I am writing blog about one of my favorite concept of 2D graphics; love to share this with you.
How To Create a Game Icon