To download the code, login with one of the following social providers.
Login
Be patient..... we are fetching your source code.
Objective
Activity indicator is used to show the progress of a task to the user. In this tutorial, I will simulate the progress of a specific task by adding custom progress bar in application.
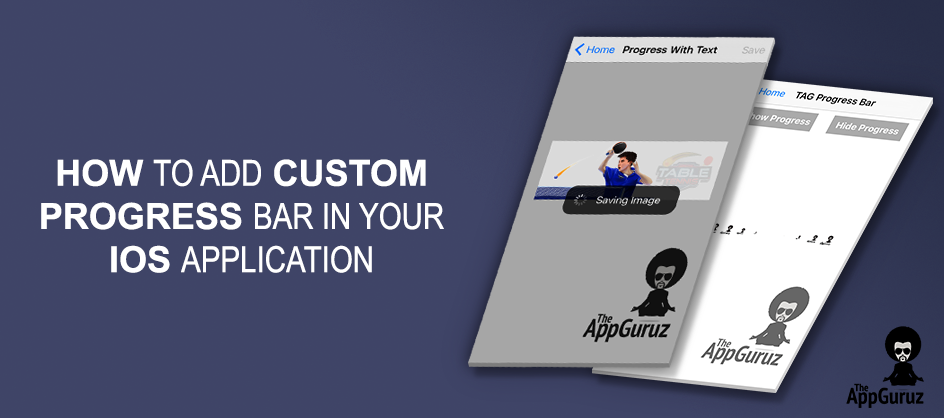
You will get Final Output:
Introduction:
I would be creating two types of progress bar in this tutorial. You can use either of them depending upon your requirements.
- Activity indicator with text
- TAG progress bar (progress bar with custom image)
Examples of when you can set progress bar to show progress can be like following:
- Saving image
- Downloading image
- Downloading content etc.
Now let’s create our first example where I’ll show how you can display activity indicator with custom text.
Part 1 Activity Indicator with text
To display activity indicator with custom text, I have created following method.
func showProgress(msg: String, withIndicator: Bool)
This method takes two parameters:
| msg | A string variable for message to display in activity indicator. |
| withIndicator | A boolean variable for displaying indicator or not. |
func showProgress(msg: String, withIndicator: Bool)
{
   lblMessage = UILabel(frame: CGRect(x: 50, y: 0, width: 200, height: 50))
   lblMessage.text = msg
   lblMessage.textColor = UIColor.whiteColor()
   vwProgressPopup = UIView(frame: CGRect(x: view.frame.midX - 90, y: view.frame.midY - 25 , width: 180, height: 50))
   vwProgressPopup.layer.cornerRadius = 15
   vwProgressPopup.backgroundColor = UIColor(white: 0, alpha: 0.7)
   if (withIndicator)
   {
      progressActivityIndicator = UIActivityIndicatorView(activityIndicatorStyle: UIActivityIndicatorViewStyle.White)
      progressActivityIndicator.frame = CGRect(x: 0, y: 0, width: 50, height: 50)
      progressActivityIndicator.startAnimating()
      vwProgressPopup.addSubview(progressActivityIndicator)
   }
   vwProgressPopup.addSubview(lblMessage)
   view.addSubview(vwProgressPopup)
}
This method will:
- Creates a UILabel for text message named lblMessage.
- Creates a UIView for popup named vwProgressPopup.
- If withIndicator is set to true, then it creates a UIActivityIndicatorView named progressActivityIndicator.
- Add lblMessage to vwProgressPopup.
- Add vwProgressPopup to the subview of the current view.

I would be removing activity indicator view when image is saved successfully. You can remove it as per your requirement.
self.vwProgressPopup.removeFromSuperview()
Now let’s check the 2nd part of this tutorial - display TAG progress bar in your application.
Part 2 Progress bar with animating Images
This progress bar allows you to display progress bar with custom number of images and adding effect in it by animation. In this example, I have displayed progress bar with TAG logo image.
You can create it with your own image.
Step 1 Create circles to add progress image
For my custom progress bar, I would be showing images in circles. So first and foremost, I have to create circles.
private func createCircles ()
{
   var circleWidth = 2 * circleRadius * CGFloat(intNumberOfCircles) + CGFloat(intNumberOfCircles - 1) * spaceBetweenCircles
   if (circleWidth > CGRectGetWidth(self.vwCircleParent.frame))
   {
      circleWidth = CGRectGetWidth(self.vwCircleParent.frame)
   }
   let xOffset = (CGRectGetWidth(self.vwCircleParent.frame) - circleWidth) / 2
   let yPos = (CGRectGetHeight(self.vwCircleParent.frame) - 2 * circleRadius) / 2

   for i in 0..<intNumberOfCircles
   {
      let posX = xOffset + CGFloat(i) * ((2 * circleRadius) + spaceBetweenCircles)
      let circle = addImageToTheCircle(circleRadius, xPos: posX, yPos: yPos)
      circle.transform = CGAffineTransformMakeScale(0, 0)
      self.vwCircleParent.addSubview(circle)
   }
}
This method will:
- Calculates circleWidth according to circleRadius, intNumberOfCircles, and spaceBetweenCircles.
- Calculate xOffset and yPos.
- Add image to the circle by addImageToTheCircle().
- Add circle to the vwCircleParent.
Step 2 Call addImageToTheCircle() method
Now, I’ll create another method called addImageToTheCircle().
private func addImageToTheCircle(radius: CGFloat, xPos: CGFloat, yPos: CGFloat) -> UIView
{
   let imgCircle = UIImage(named: "TAG_Icon.png")
   let imageView = UIImageView(image: imgCircle)
   imageView.frame = CGRect(x: xPos, y: yPos, width: radius * 2, height: radius * 2)
   imageView.contentMode = UIViewContentMode.Center
   imageView.contentMode = UIViewContentMode.ScaleAspectFit
   return imageView
}
Parameters:
| radius | A CGFloat variable for radius of the circle. |
| xPos | A CGFloat variable for x position of the circle. |
| yPos | A CGFloat variable for y position of the circle. |
This method will:
- Create an image and add that image to the UIImageView named imageView.
- Set attributes of the imageView.
Step 3 Add Animation to all circles
Now, I would be adding animation to circles.addAnimationToTheCircles() method will take care of that.
private func addAnimationToTheCircles ()
{
   for i in 0..<self.vwCircleParent.subviews.count
   {
      let subview = self.vwCircleParent.subviews[i]
      subview.layer.removeAnimationForKey("scale")
      subview.layer.addAnimation(self.addAnimation(duration, delay: Double(i) * delay), forKey: "scale")
   }
}
This method will:
- Get subviews of vwCircleParent and store it to subview.
- Add animation to the subview.
Step 4 How to animate circles?
To add animation, I have created a separate method called addAnimation().
private func addAnimation(duration: Double, delay: Double) -> CABasicAnimation
{
   let animation = CABasicAnimation(keyPath:"transform.scale")
   animation.delegate = self
   animation.fromValue = 0
   animation.toValue = 1
   animation.autoreverses = true
   animation.duration = duration
   animation.removedOnCompletion = false
   animation.beginTime = CACurrentMediaTime() + delay
   animation.repeatCount = MAXFLOAT
   animation.timingFunction = CAMediaTimingFunction(name: kCAMediaTimingFunctionEaseInEaseOut)
   return animation
}
This method will take two Parameters:
| duration | A Double variable for the duration of the animation. |
| delay | A Double variable for the delay of the animation (to start animation after specific interval of time) |
Step 5 Show/Hide Progress Bar
I have created two buttons called, Show Progress & Hide Progress.
5.1 Show Progress
When you click on this button, It will add UIView (named vwCircleParent) to the current view. So when you want to show progress bar, just add the view to the current view.
self.view.addSubview(self.vwCircleParent)

5.2 Hide Progress
When you click on this button, It will remove UIView(named vwCircleParent) from the current view. So when you want to remove progress bar, just remove the view from superview.
self.vwCircleParent.removeFromSuperview()
I hope you will find this blog post helpful while working with Add Custom Progress bar in iOS Application. Let me know in comment if you have any questions regarding Add Custom Progress bar in iOS Application. Please put a comment here and we will get back to you ASAP.
Got an Idea of iPhone App Development? What are you still waiting for? Contact us now and see the Idea live soon. Our company has been named as one of the best iPhone App Development Company in India.

I am 2D Game developer and iOS Developer with an aspiration of learning new technology and creating a bright future in Information Technology.
Google Maps Mobile SDK Using Swift
Integrate LinkedIn SDK In iOS