Be patient..... we are fetching your source code.
Objective
The objective of this blog post is to introduce the readers to the NSTimer class in NSObject which is included in the Foundation Framework by a simple example.
The NSTimer class can be used to create timer objects in iOS applications. In other words – a timer. Here we create a simple single view application which will describe the use of the NSTimer class in xCode. So lets get started
Step 1 Create XCode Project
Now, lets create Xcode project for this demo. If you are beginner and have no idea about how to create Xcode project then refer our previous blog or Create Xcode Project.
Step 2 Design UI
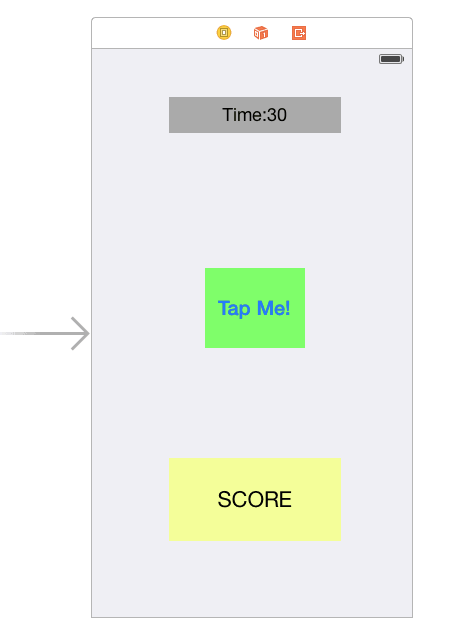
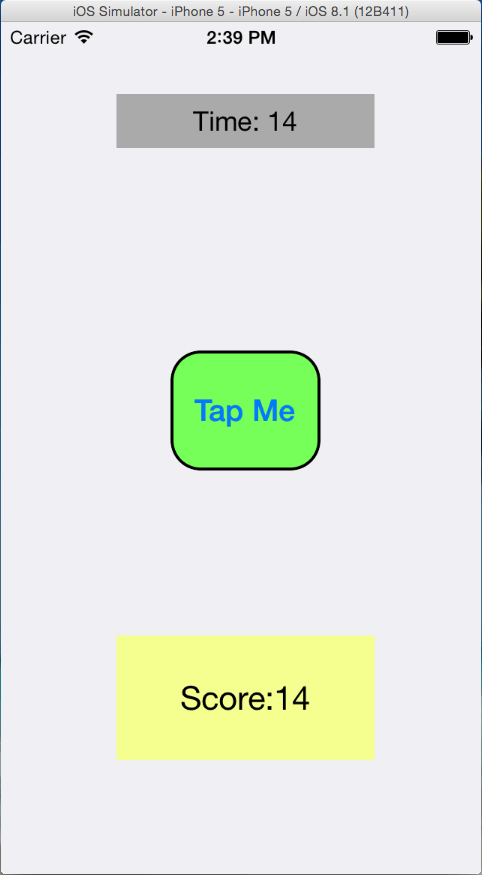
Set the background color of the view to Group Table View Background Color. Add a label in the view of the view controller which will keep the record of the seconds that are left in game, give it a title Time:30, font size = 18 and bold change its background color to gray color.
Add a button in the center of the view and set its background color to gray color and change its text to Tap Me!, font size = 20 and bold. Add another label which keeps the track of the score i.e. how many times the button is pressed, change its background color to light yellow and text to Score, font size = 22 and bold.
Now the view will appear as below:
Step 3 Set Runtime Attributes
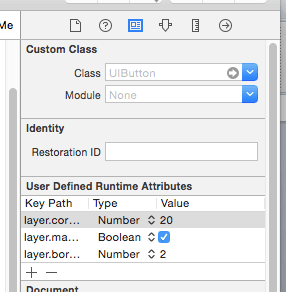
In the 3rd inspector of Tap Me! button at the key attributes
| Key Path | Type | Value |
| layer.cornerRadius | Number | 20 |
| layer.masksToBounds | Boolean |  |
| layer.borderWidth | Number | 2 |
Step 4 Split Screen in XCode
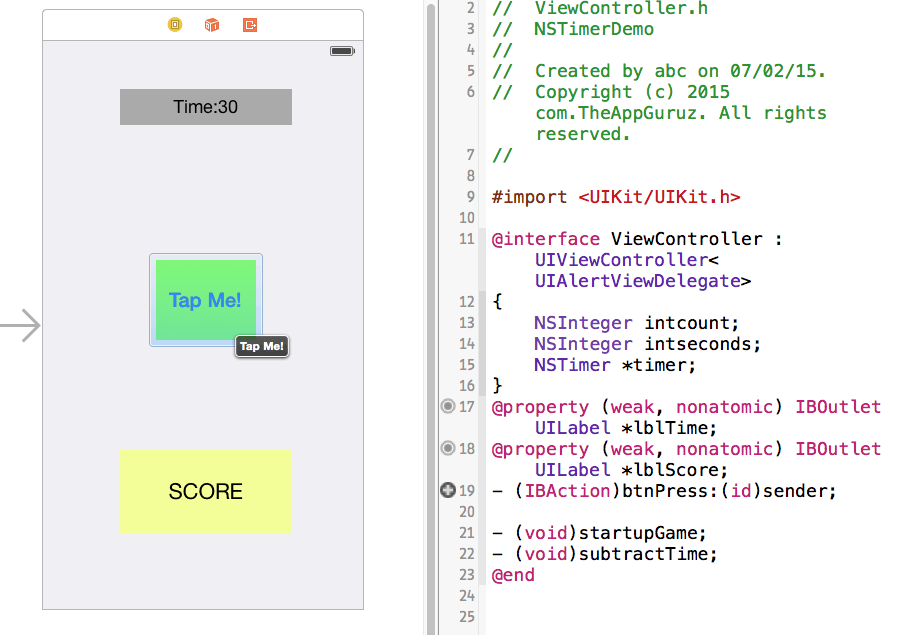
Now drag an outlet from two labels and an action from the button to the viewcontroller.h file as show below and name them as lblTime, lblScore and btnPress respectively.
Step 5 Generate Events
Now add the following code in the viewcontroller.h file
@interface ViewController : UIViewController
{
    NSInteger intcount;
    NSInteger intseconds;
    NSTimer *timer;
}
@property (weak, nonatomic) IBOutlet UILabel *lblTime;
@property (weak, nonatomic) IBOutlet UILabel *lblScore;
- (IBAction)btnPress:(id)sender;

- (void)startupGame;
- (void)subtractTime;

@end
Here we create two NSIntegers intcount, intsceconds and one object of NSTimer and name it timer and two user defined methods which are used to start Game and Subtract time as show above;
Step 6 Intialisation the Timer
We need to call the startupGame method int the viewDidLoad method so that when the view loads the game is initialize:
(void)viewDidLoad
{
    [super viewDidLoad];

    [self startupGame];
}
Next include the following line of code in the viewcontroller.m file for the startupGame method. Here mark that we are making use of the timer object which we have declared in viewcontroller.h file, for that we are making the use of scheduled with time interval method which is already defined under NSTimer Class, we are scheduling the timer with time interval of 1 second so the timer is increment with time interval of 1 second.
- (void)startupGame
{
    intcount = 0;
    intseconds = 30;

    lblTime.text = [NSString stringWithFormat:@"Time: %li", (long)intseconds];
    lblScore.text = [NSString stringWithFormat:@"Score:%li", (long)intcount];

    timer = [NSTimer scheduledTimerWithTimeInterval:1.0f
                                             target:self
                                           selector:@selector(subtractTime)
                                           userInfo:nil
                                            repeats:YES];
}

And for the subtractTime

- (void)subtractTime
{
    intseconds--;
    lblTime.text = [NSString stringWithFormat:@"Time: %li",(long)intseconds];

    if (intseconds == 0)
    {
        [timer invalidate];

        UIAlertView *alert = [[UIAlertView alloc] initWithTitle:@"Time is up!"
                                                    message:[NSString stringWithFormat:@"You scored %li points", (long)intcount]
                                                   delegate:self
                                          cancelButtonTitle:@"Play Again"
                                          otherButtonTitles:nil];

        [alert show];
    }
}
Step 7 Update Score
We need to update the score when the user press the button hence we write the following code in the btnPress action:
- (IBAction)btnPress:(id)sender
{
    intcount = intcount+1;
    lblScore.text = [NSString stringWithFormat:@"Score:%li", (long)intcount];
}
Step 8 UIAlertViewDelegate Method
Next we need to add delegate method for UIAlertView so when the user presses the play again button in Alert Message the game is restarted and for it we add following header in viewcontroller.h file:
@interface ViewController : UIViewController<UIAlertViewDelegate>
And add the following line of code in viewcontroller.m file to call the delegate method:
- (void)alertView:(UIAlertView *)alertView clickedButtonAtIndex:(NSInteger)buttonIndex
{
    [self startupGame];
}
Step 9 Final Output
So we are done with the code. We have successfully made a small game with the use of NSTimer Class which is included in NSObject. Calulate your score now and make sure you increment it next game.
I hope you find this blog is very helpful while working NSTimer Class in iOS. Let me know in comment if you have any question regarding NSTimer Class. I will reply you ASAP.
Got an Idea of iPhone App Development? What are you still waiting for? Contact us now and see the Idea live soon. Our company has been named as one of the best iPhone App Development Company in India.

I am a Techno Freak who likes to explore new technologies and as an iOS developer and enthusiast I try to learn new things which polish my development skills, so that applications are made more users friendly.
Managers Using Singleton
